Keep Documentation - How to
This documentation is still being updated, so you might not find everything you're looking for just yet.
We apologize for any inconvenience this may cause.
If you have any questions or need further assistance, please don't hesitate to contact us or submit a ticket through our service desk.
We're here to help! 😇
Parts
You will find everything regarding the Parts menu in this chapter.
Create a part definition
- If you want to define a part that has not been run before, you might want to start from scratch.
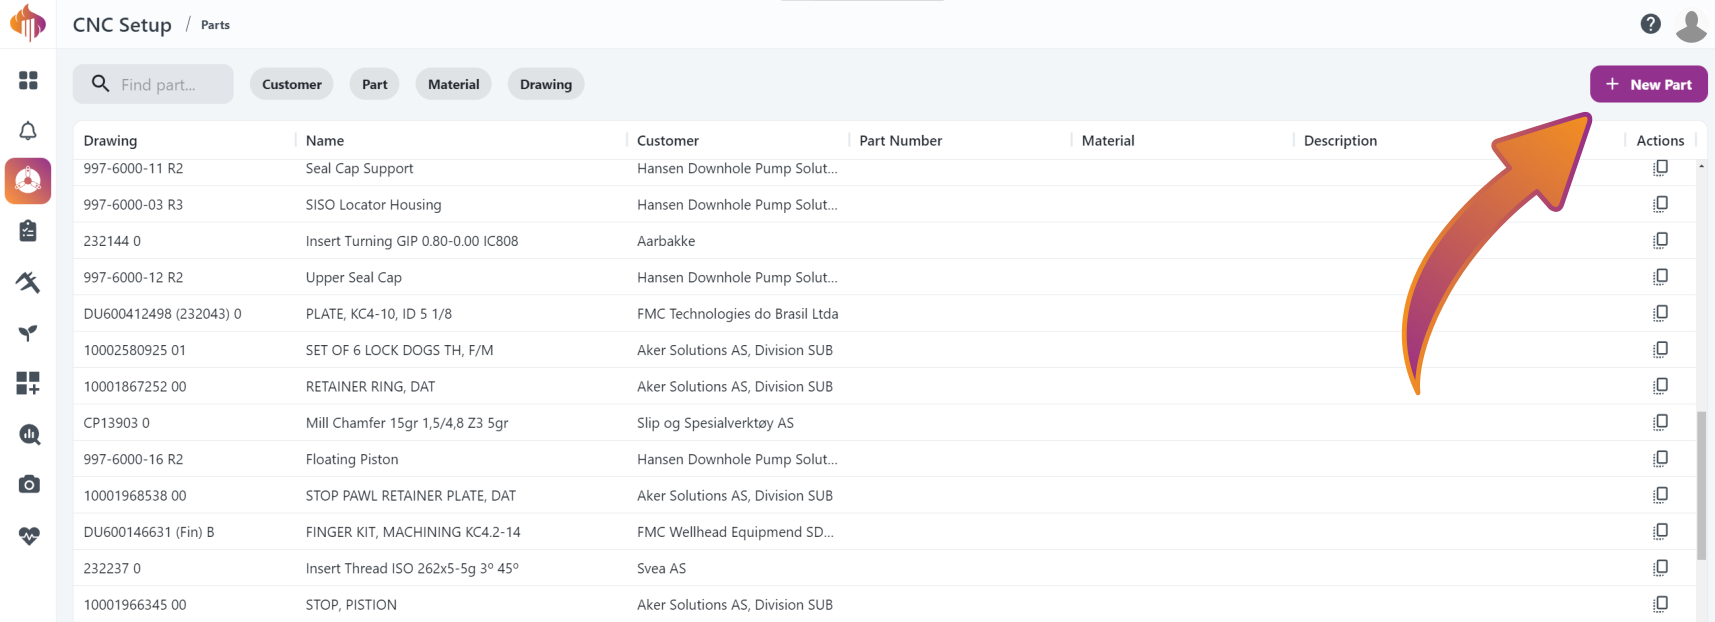
- Create a part definition:
Press the New Part button in the top right corner, this will open the part-details window.
- Define the part details for the part you want to document:
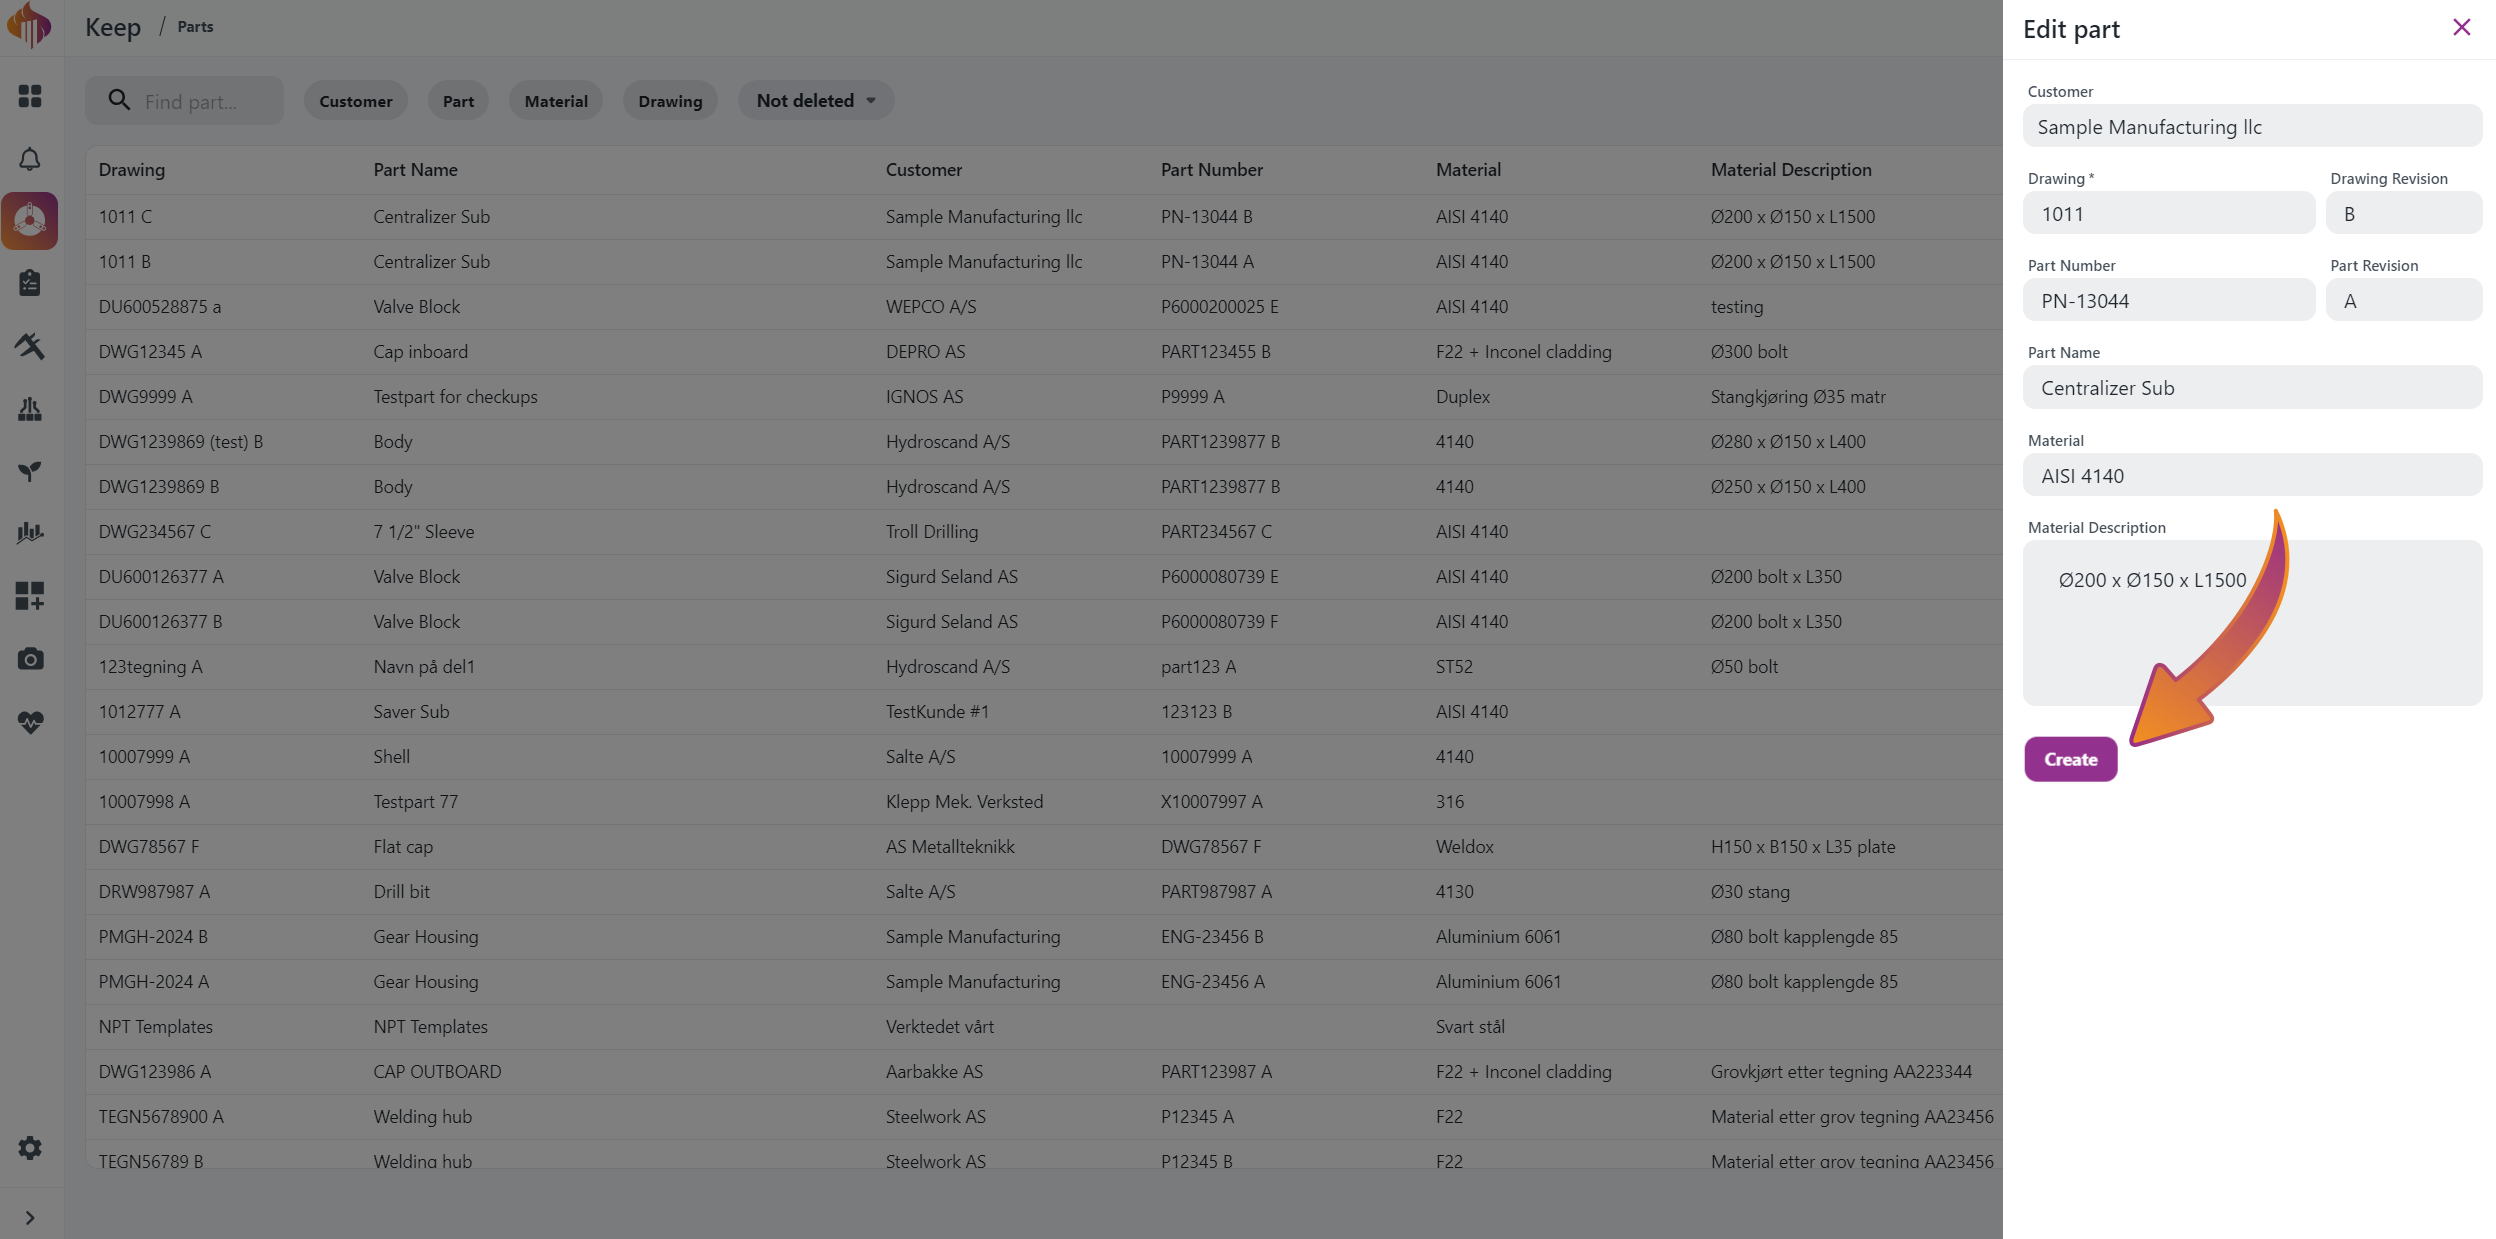
Field Definitions:
Customer: The customer name, or if the part you are making is designed in-house it could also be your own company name. This field will suggest previously defined customer names.
Drawing: The parts drawing number, this is the only required field when defining new part.
Drawing Revision: The parts drawing revision, typically a letter or a number on the drawing.
Part Number: The part number, typically defined in work order.
Part Revision: Typically bundled with part number.
Part Name: The descriptive name of the part.
Material: The standard reference name you would use for the stock material, could typically be “AISI 4140”, “DUPLEX”, “BRASS” etc.
"Try to use just one name for materials. For instance, don't use both 'SAF 2507' and 'SAF2507'. This makes it easier for people to find what they need later on."
Material Description: Describe material dimensions. E.g.: "OD250 x ID125 x L400" or "W250 x L250 x H40"
- Press the Create button when done and you will be redirected to the parts operation-view.
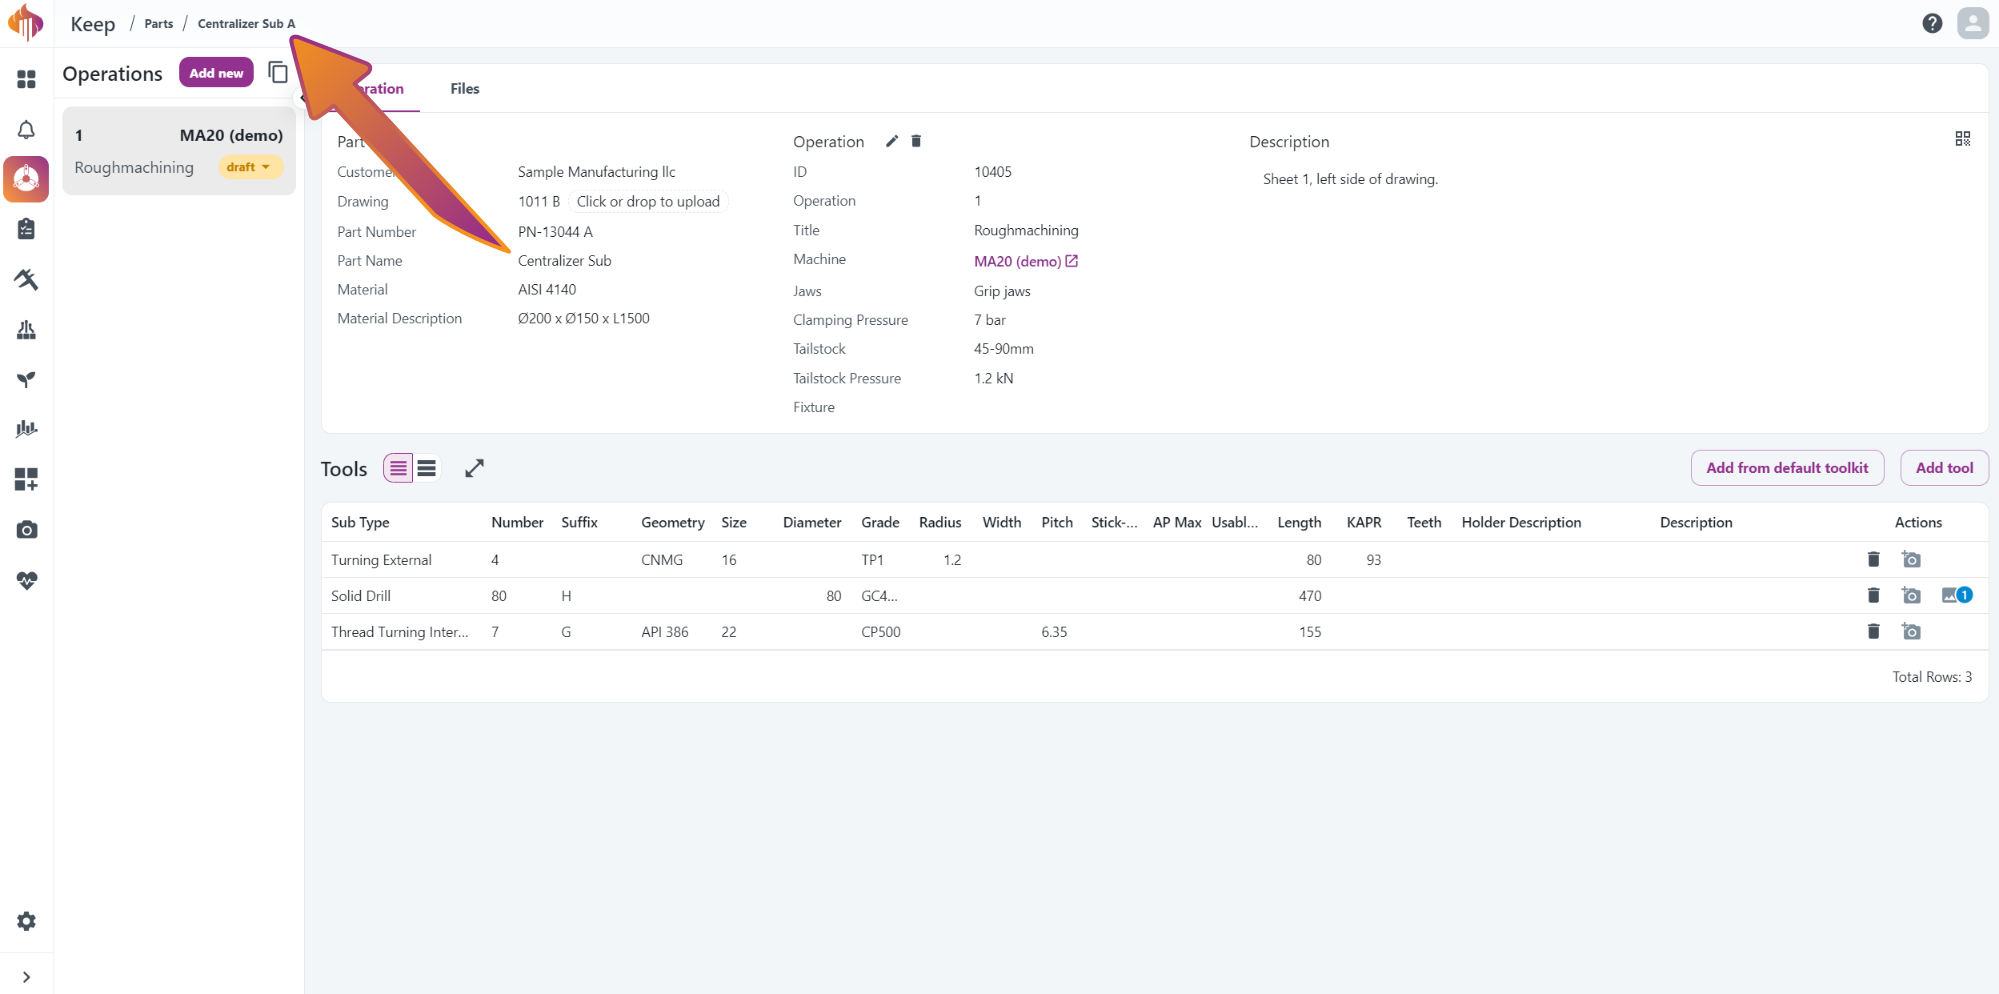
Notice the Part Name is shown in the top left along with Part Revision.
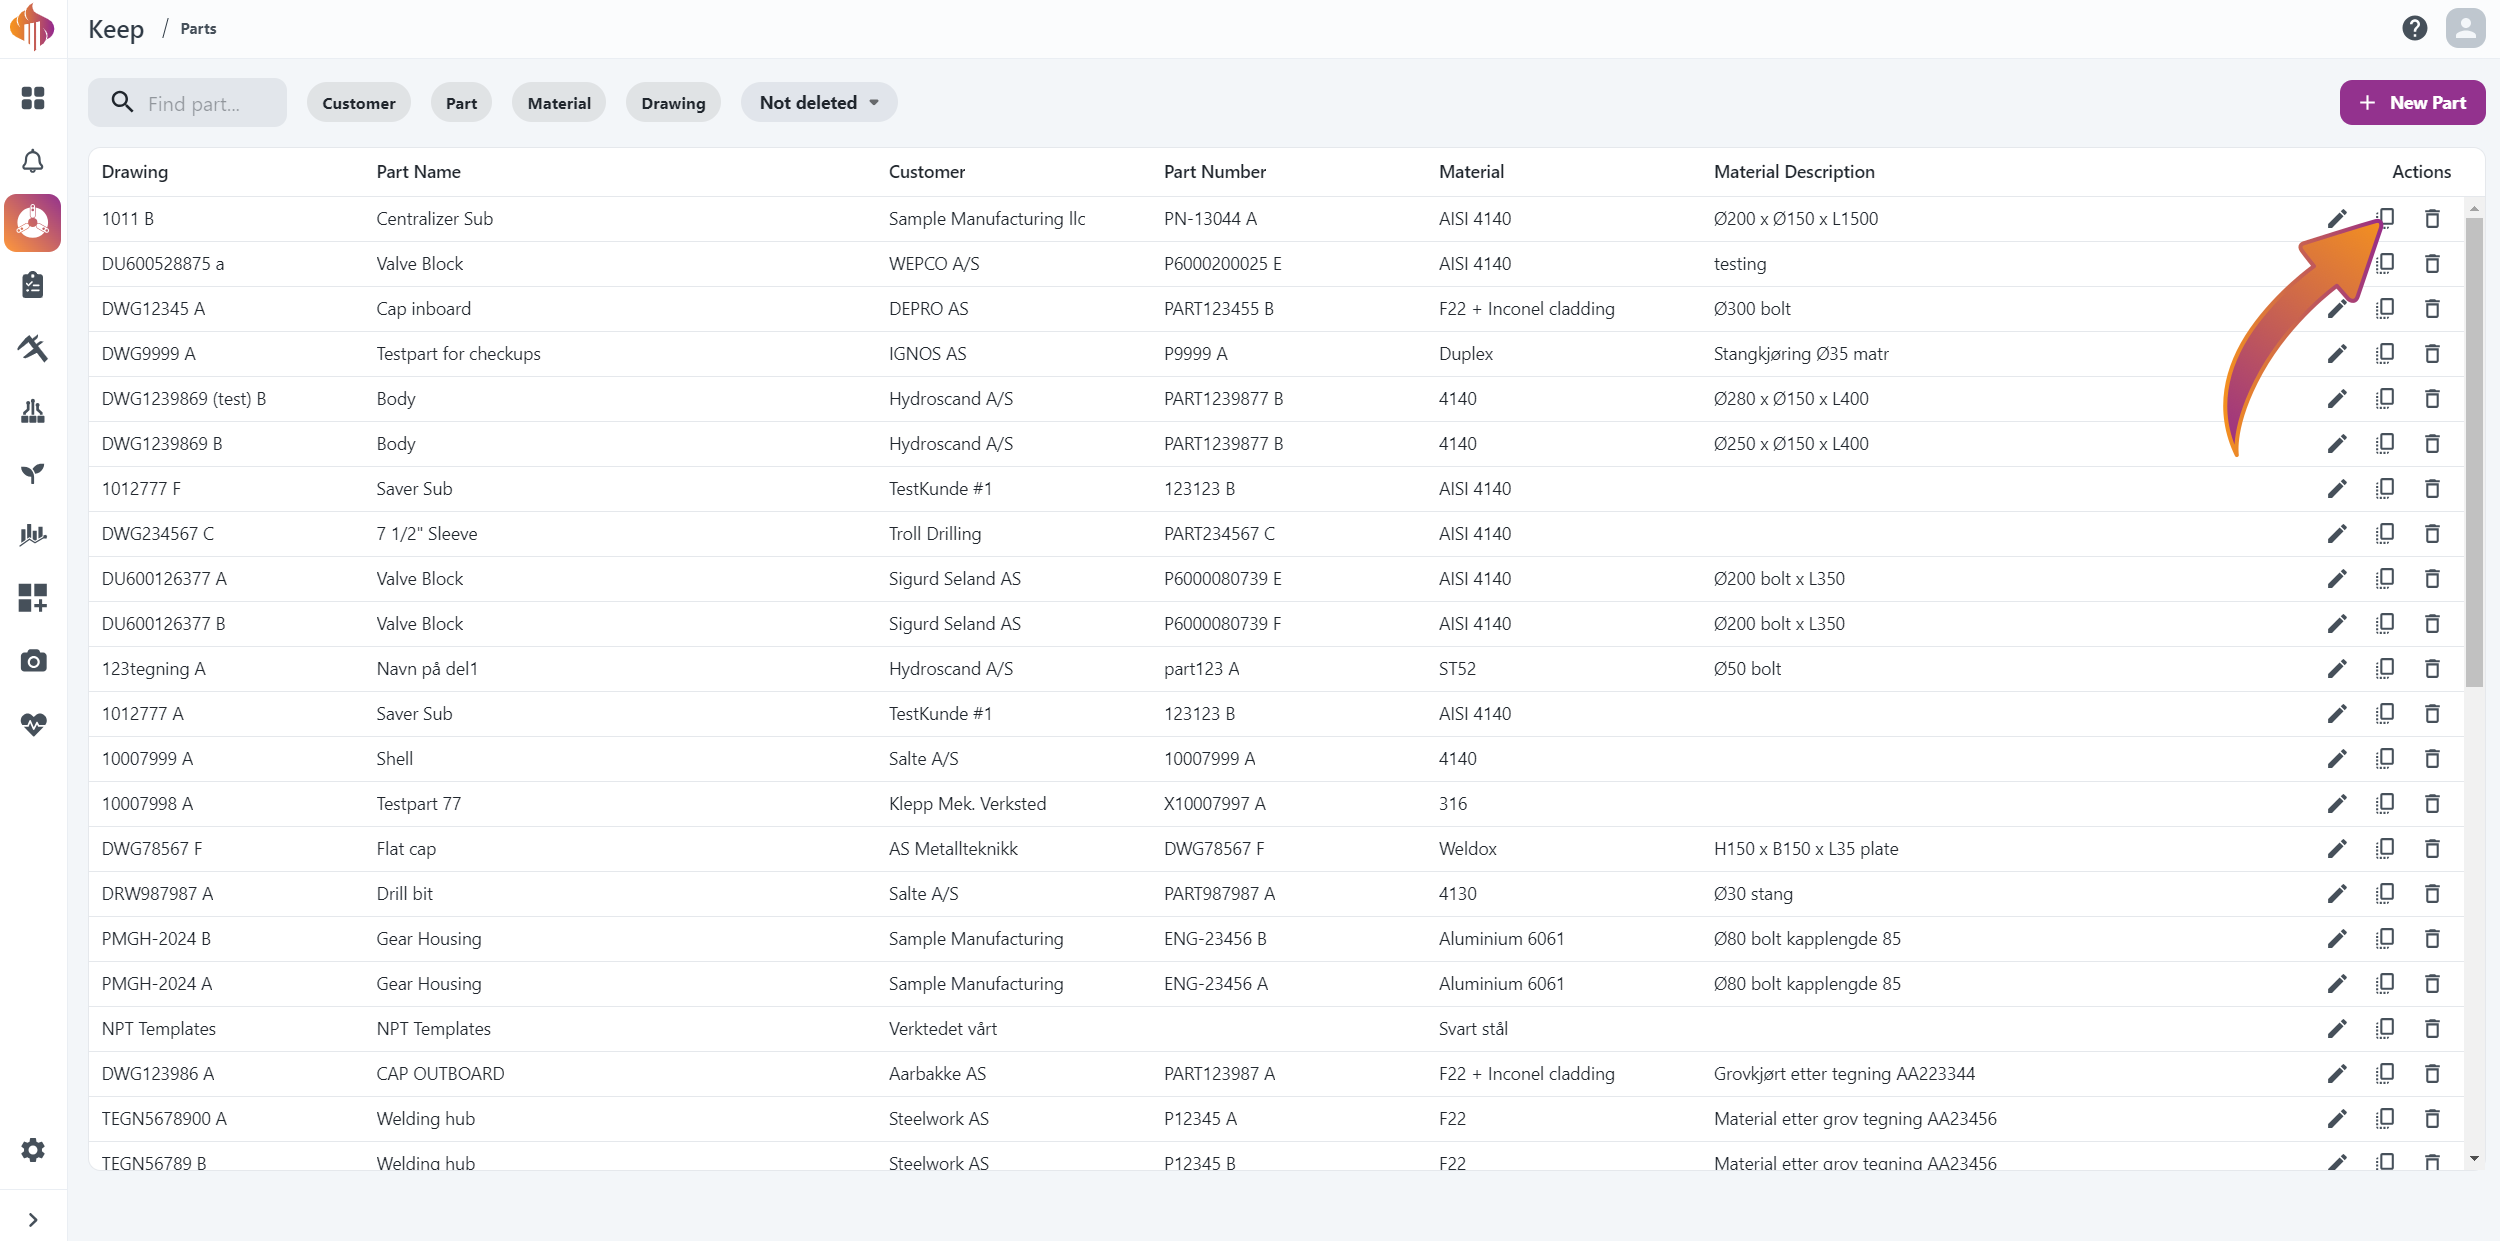
Revision change of a previously run part
To create a new revision of an already existing part, do the following steps:
-
Press the Create copy button on the Parts list:
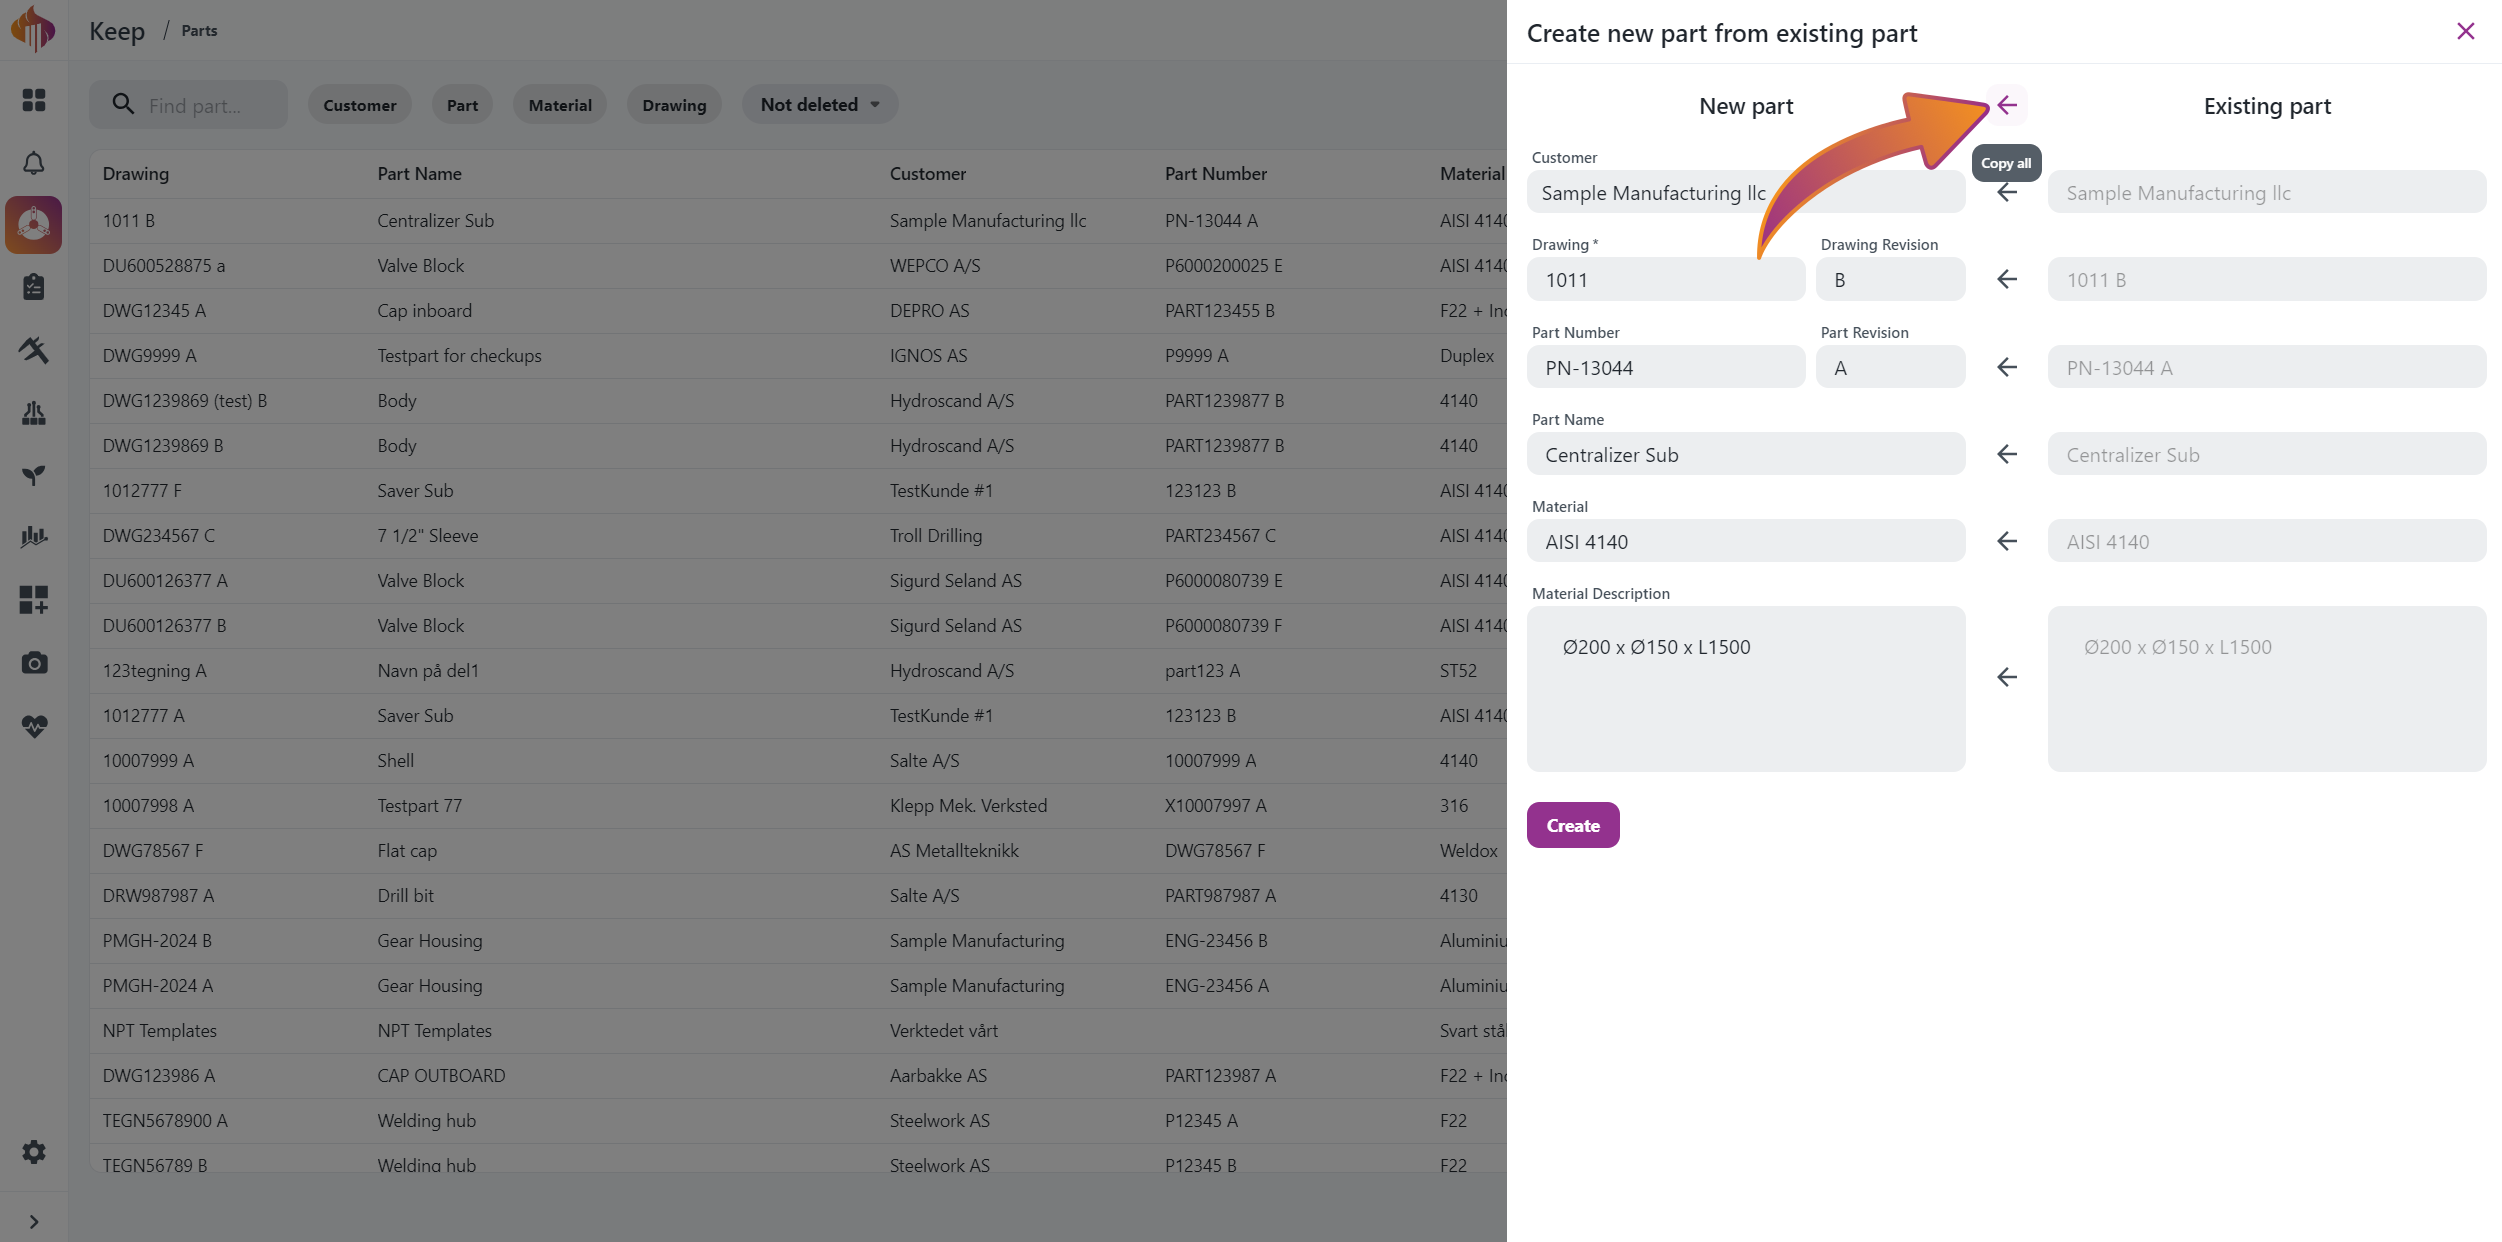
-
Press Copy all or just Copy on the lines you want to copy, and change the revision afterwards before you press Create:
-
You have now created a new revision of an already existing part:
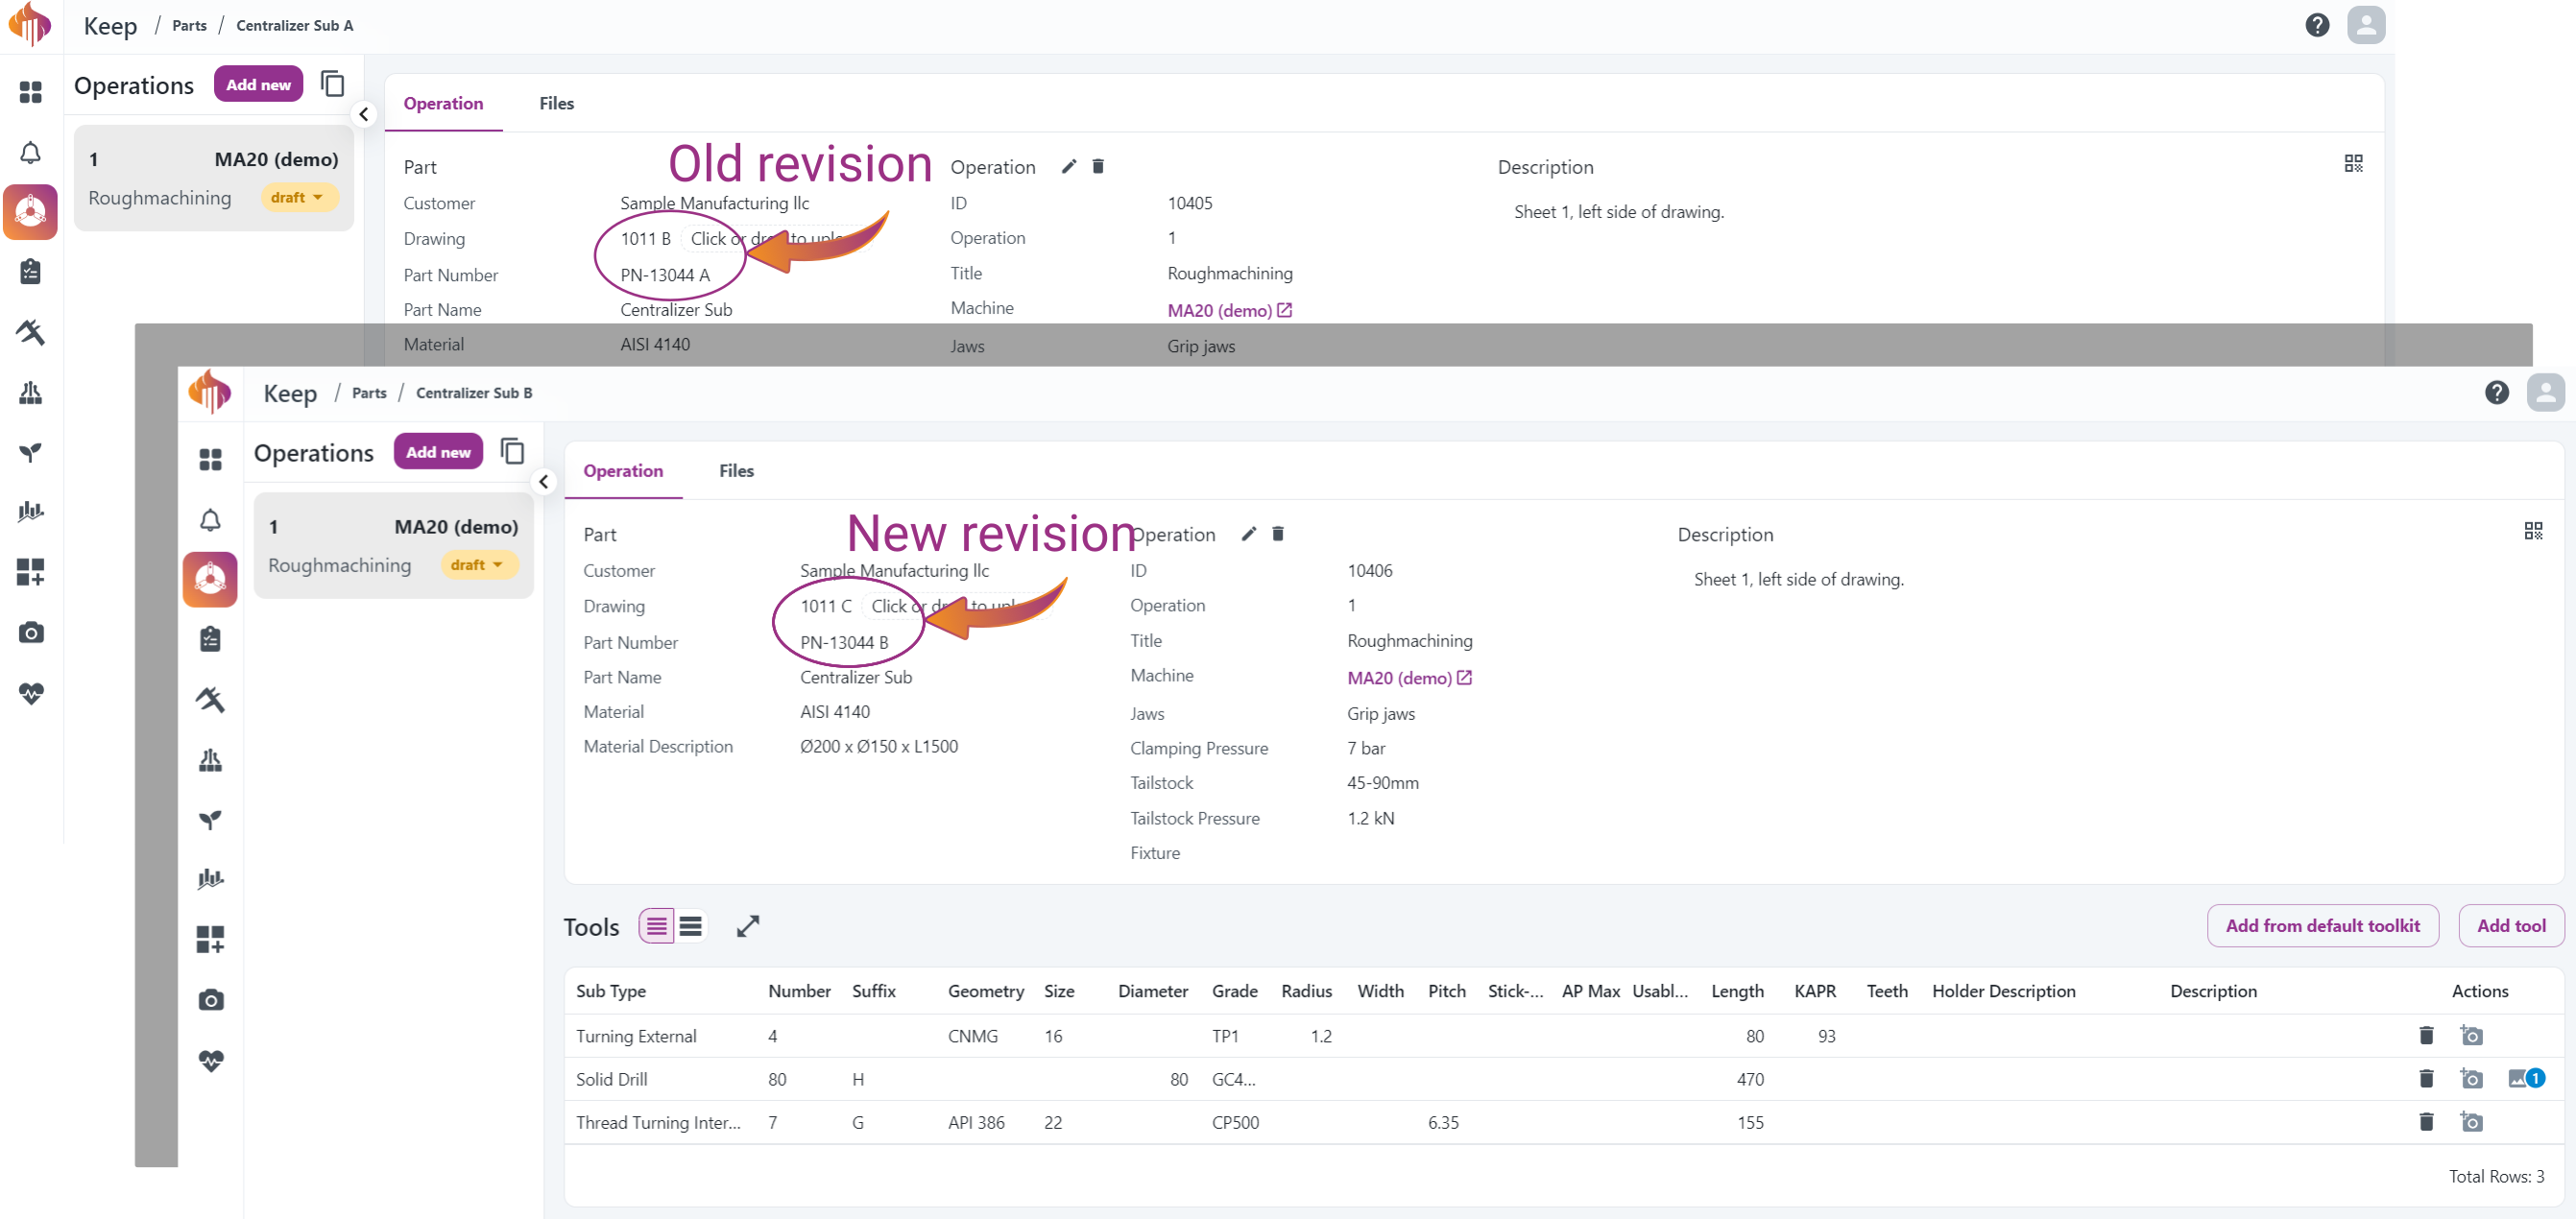
-
Here's also a view from the Parts list:

Operations
You will find everything regarding Operations in this chapter.
Adding an operation
An operation is the equivalent of a single machine setup.
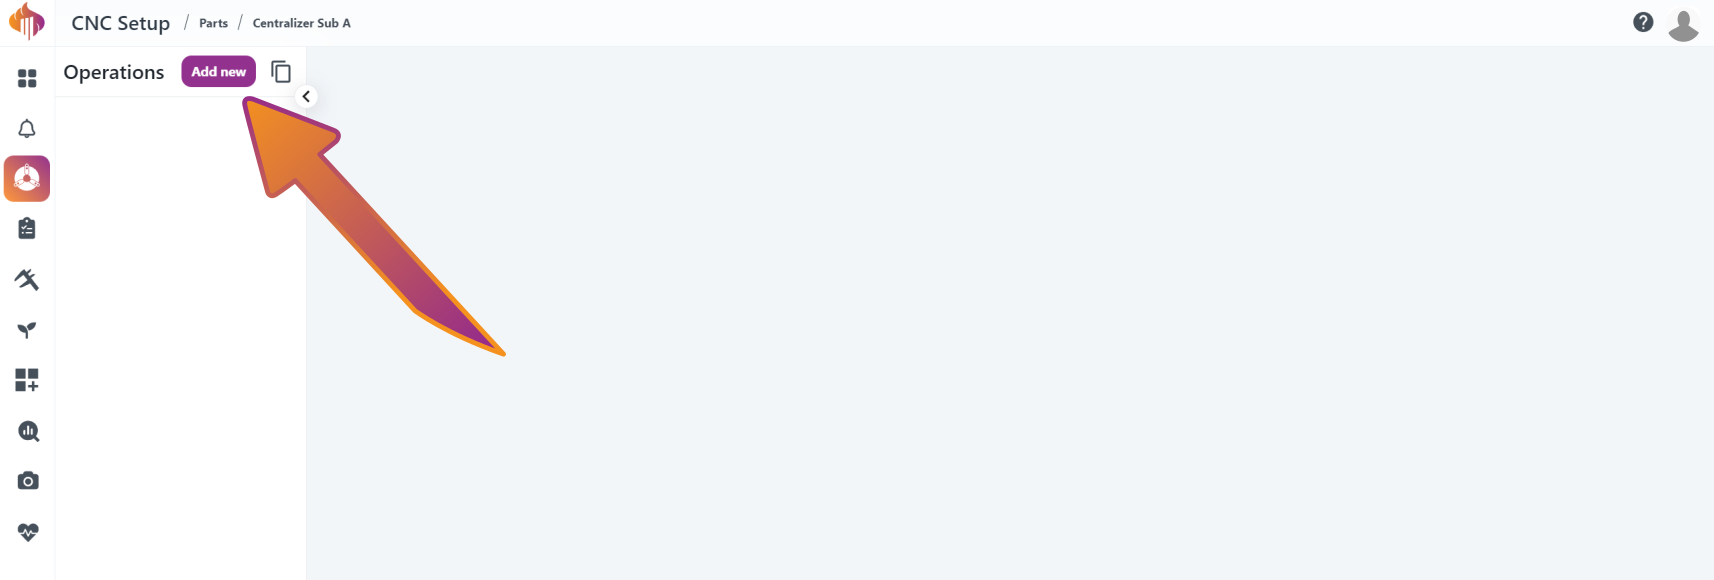
- Press "Add new"
- Fill out the operation details:
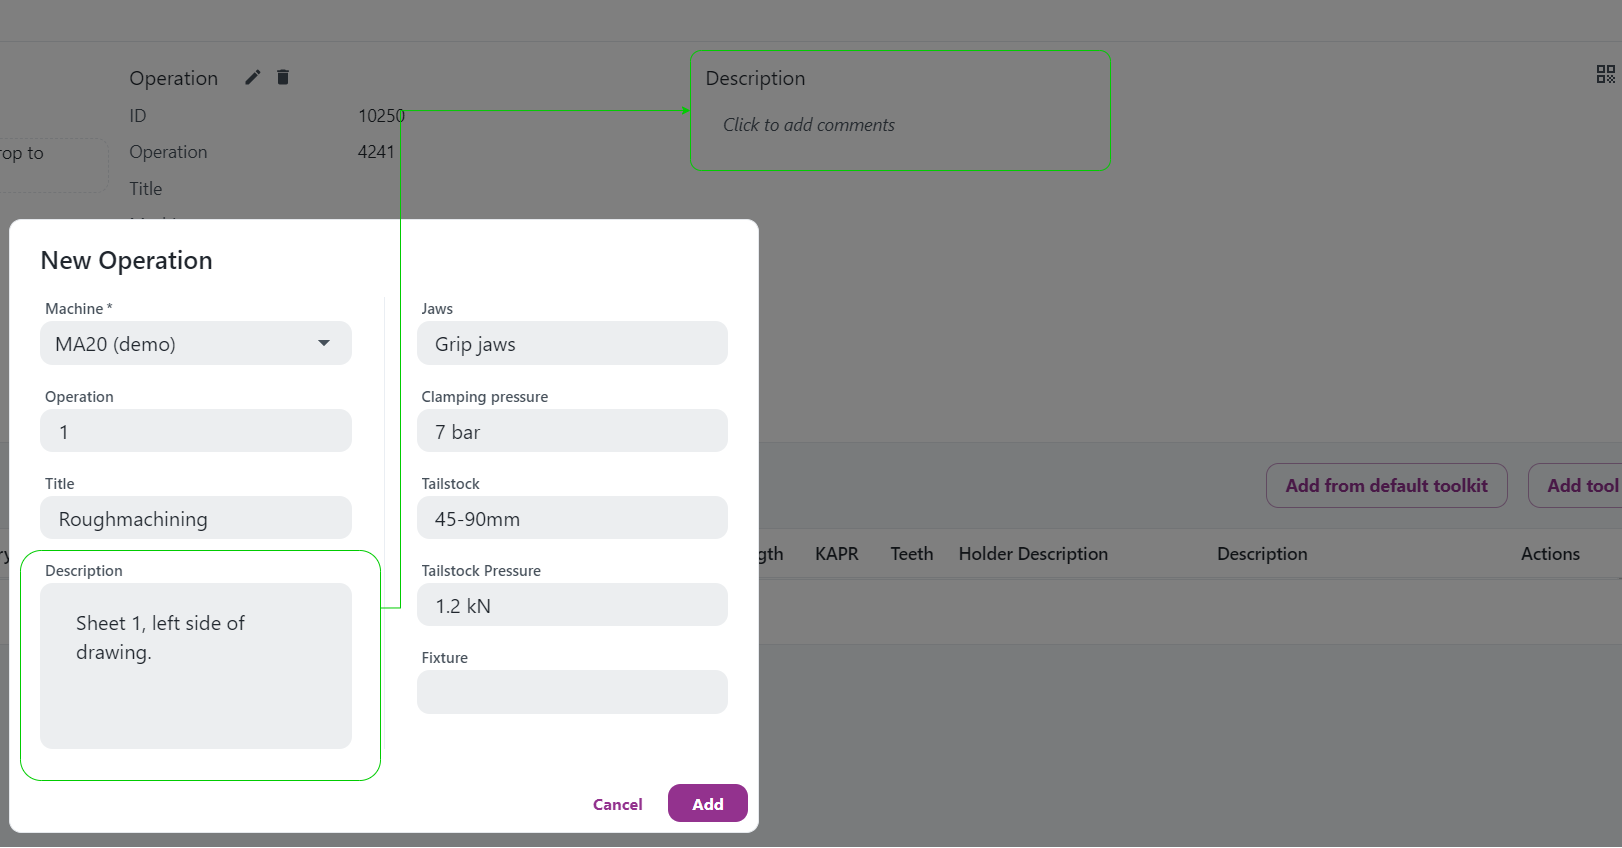
Field Definitions:
Machine: The machine you are running the operation in.
Operation: The operation step number, customer can decide if this should reflect the operation number within each machine or overall for all machines involved in making the specific part.
Title: Could for example be “Rough-machining” or “Finishing”
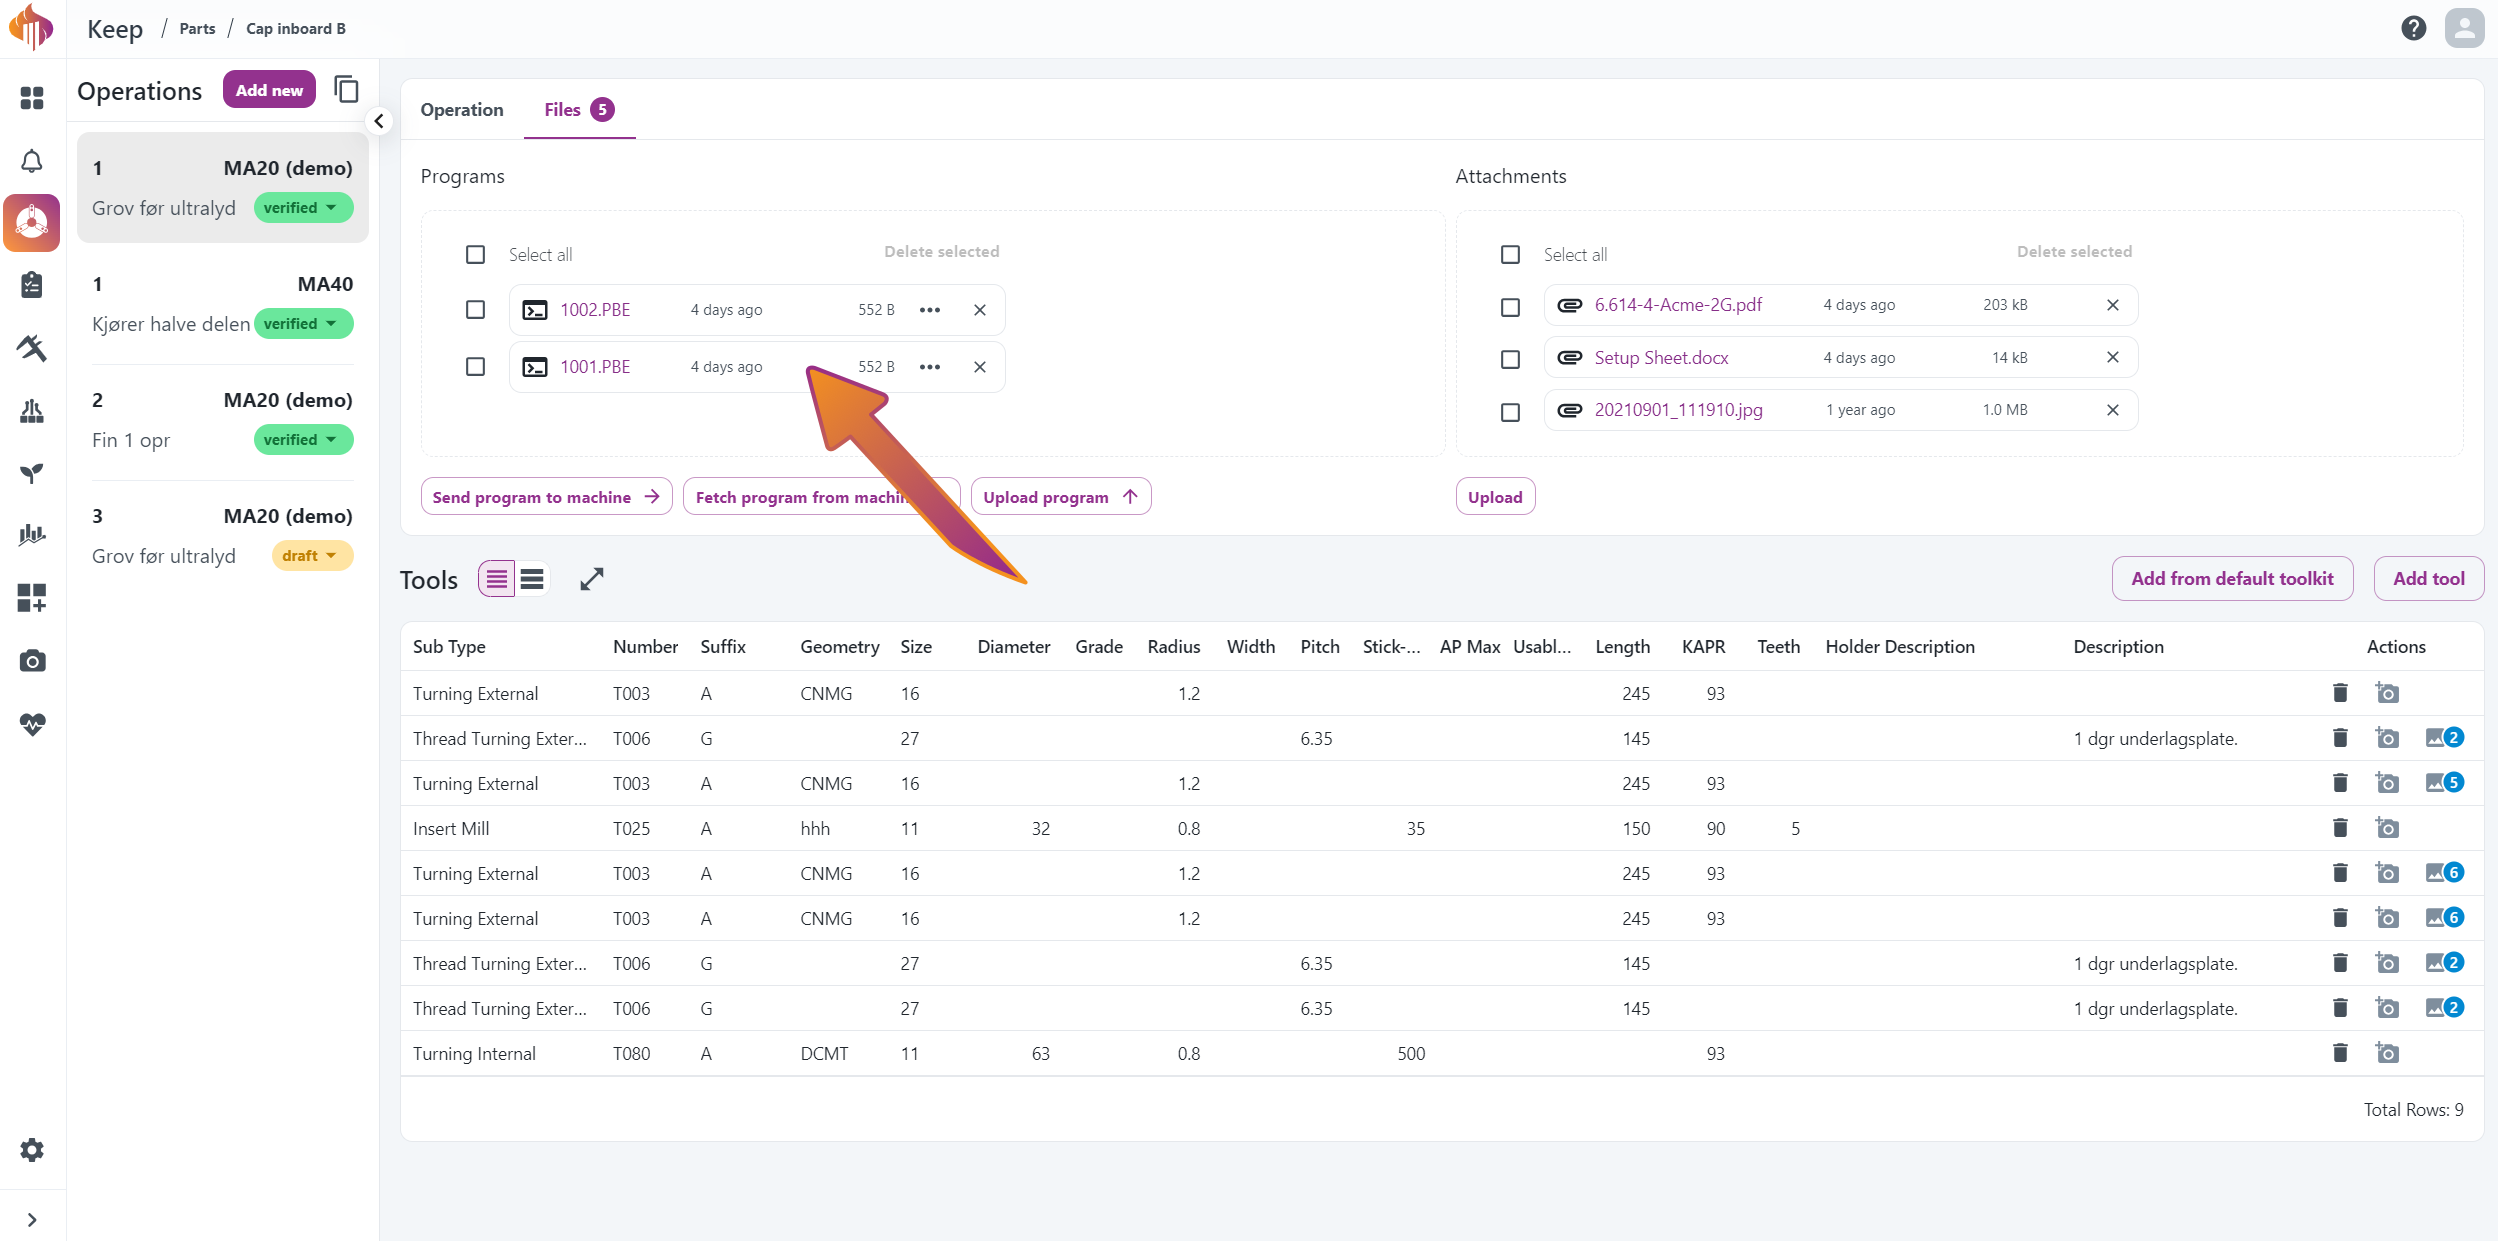
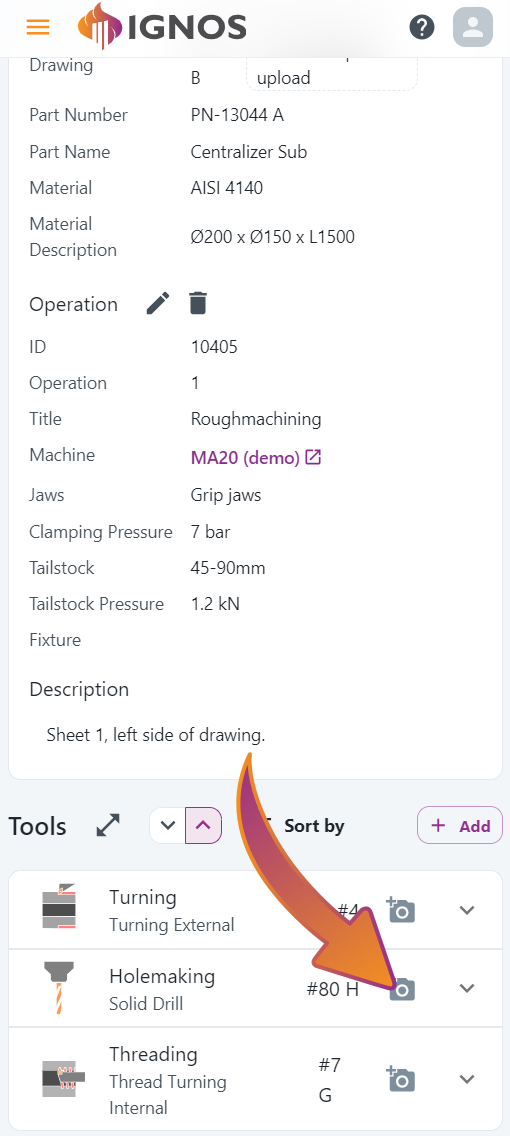
Description: This is a field you can use for any additional information you would like to add that is relevant for yourself or anyone else in the future. This window will also be available (in a larger version) after the operation has been added (see green arrow)
Jaws: Could be “Grip-jaws” or “Soft-jaws OD xx”. Or, if you keep an updated list of jaws available you can use any ID already in place.
Clamping pressure: The amount of pressure for clamping the part on this setup, due to varying measuring units on different machines it is not tied to a specific unit. You can specify the unit within the field if you wish to do so, i.e. “x bar” or “x psi”.
Tailstock: If tailstock is used or not, or it could also be which dead-center insert you used.
Tailstock Pressure: The amount of pressure used on the tailstock for the operation. Not tied to a specific unit, so you can specify it if you wish to do so.
Fixture: If a fixture was used it can be described here.
- You have now created an operation:
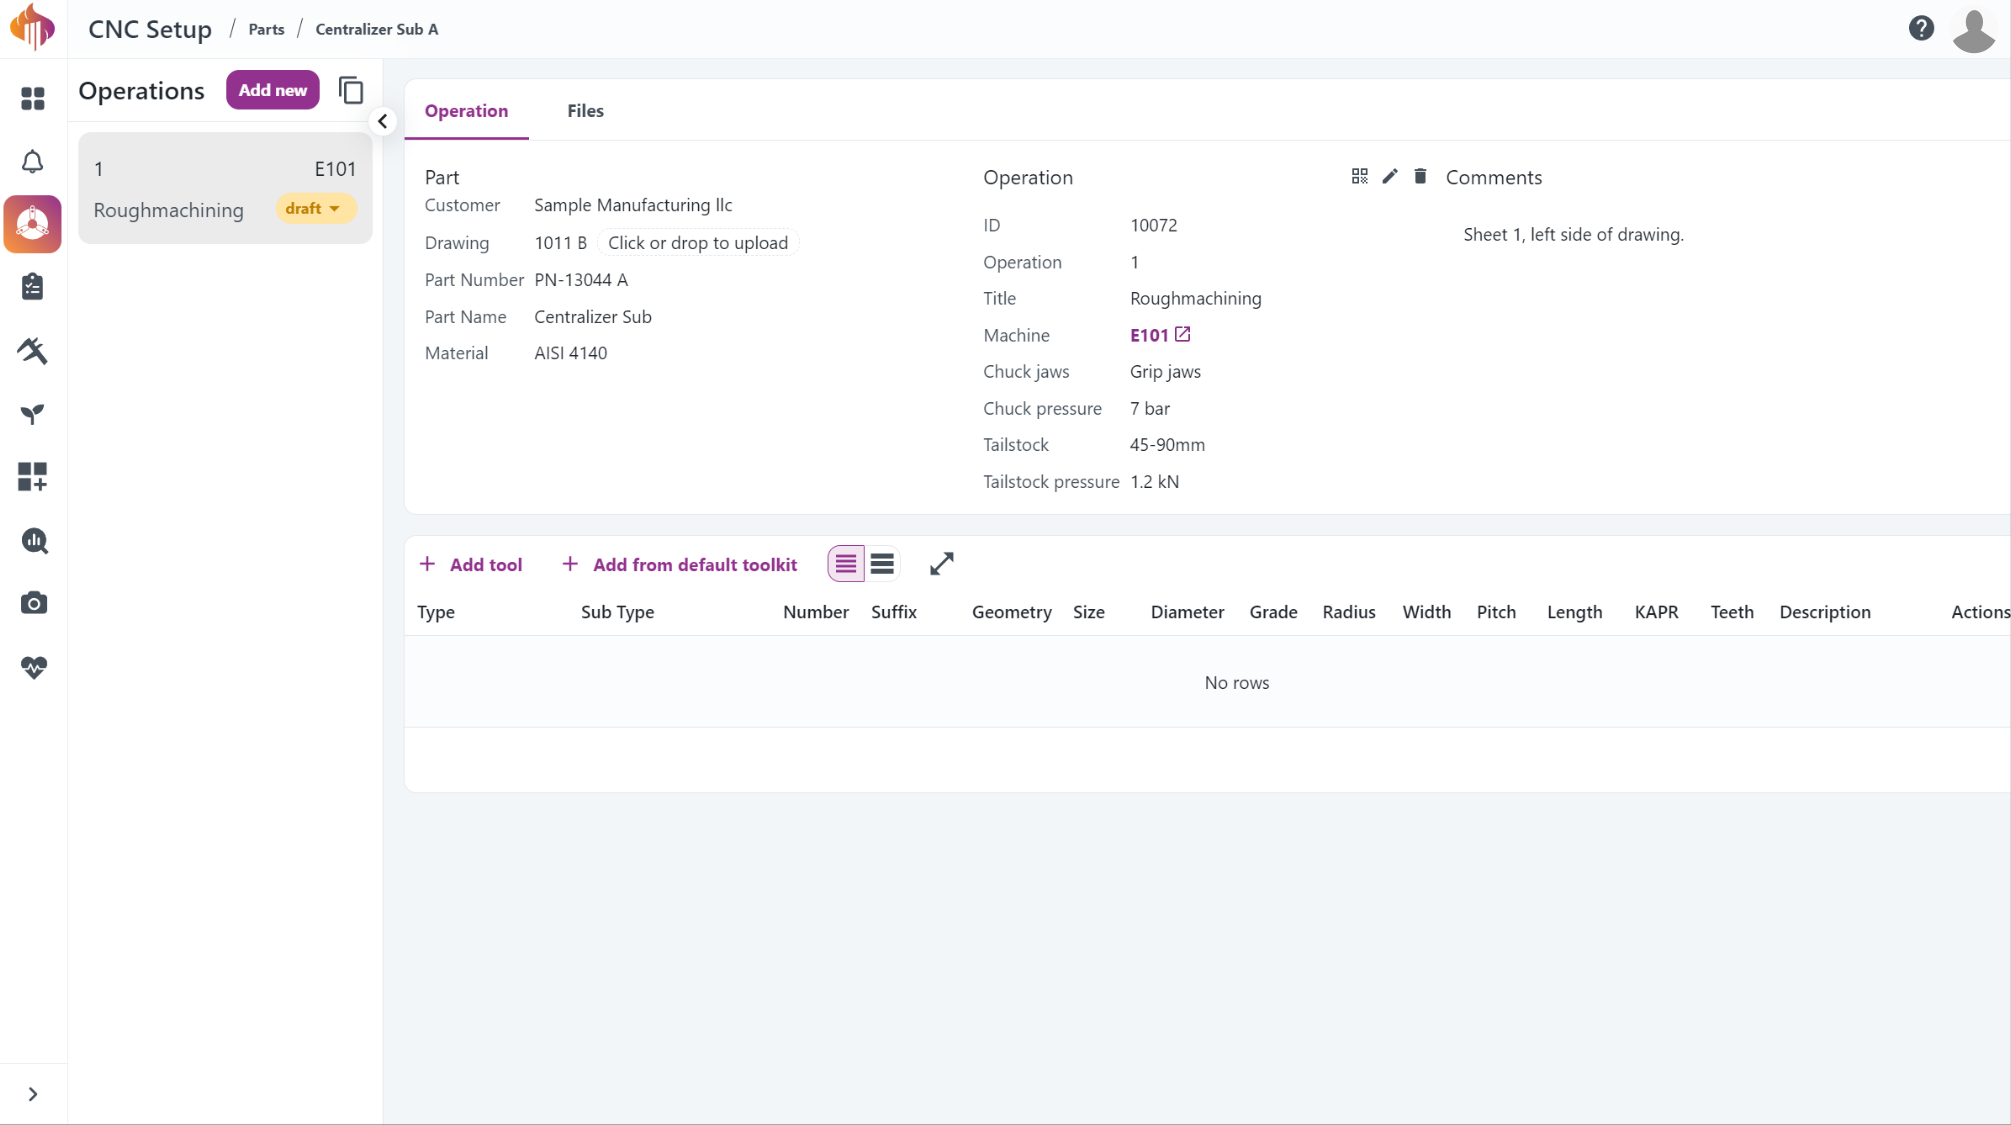
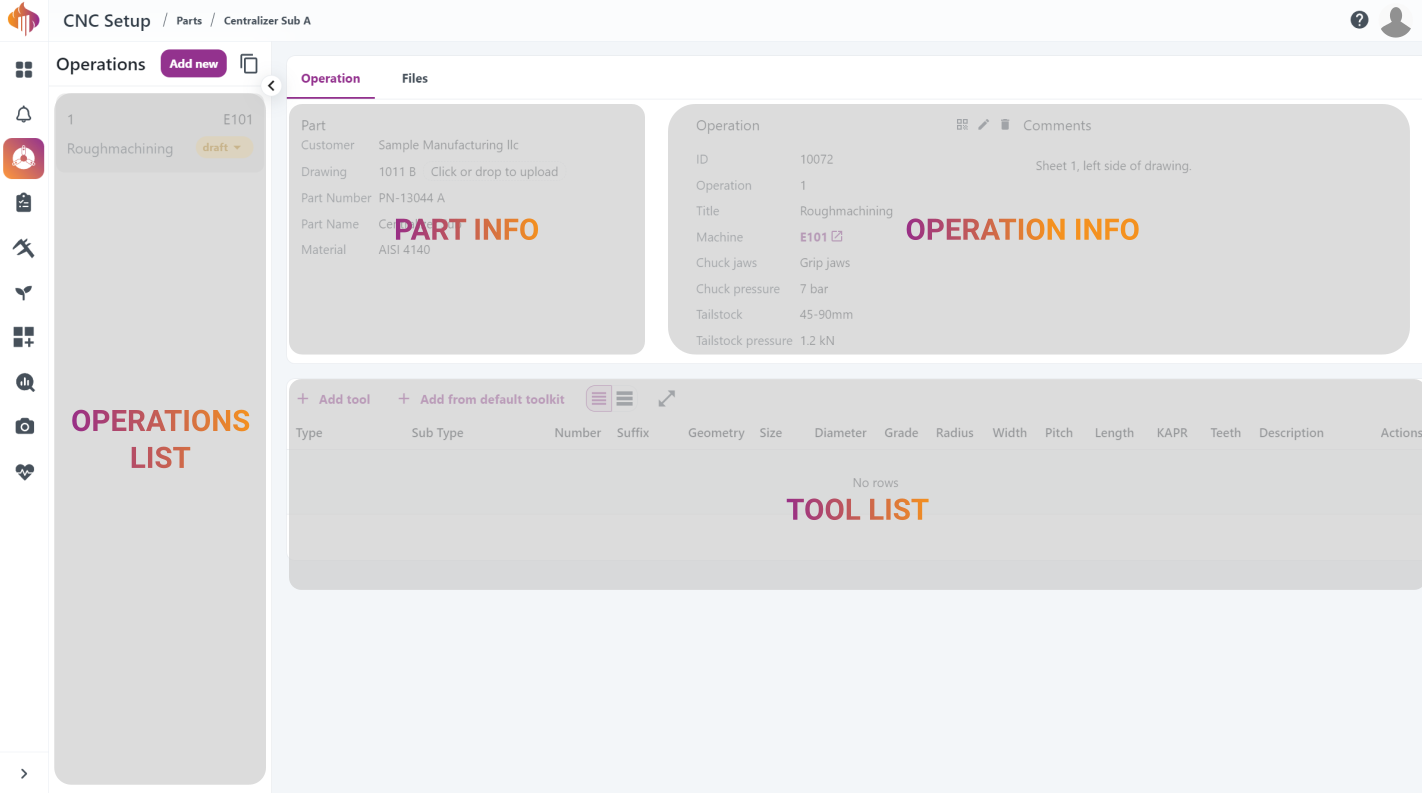
- The operation view consists of the following information:
Program transferring
Here you can access user manuals on how to transfer programs in Keep once everything has been set up.
Download Mazak program transfer manuals
mazak_transfer_manual_NO.pdf
mazak_transfer_manual_EN.pdf
Programs will be stored in the left box under the Files tab on an operation:
Tool lists
You will find everything regarding Tool lists in this chapter.
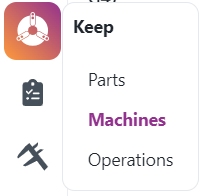
Adding tools to operation
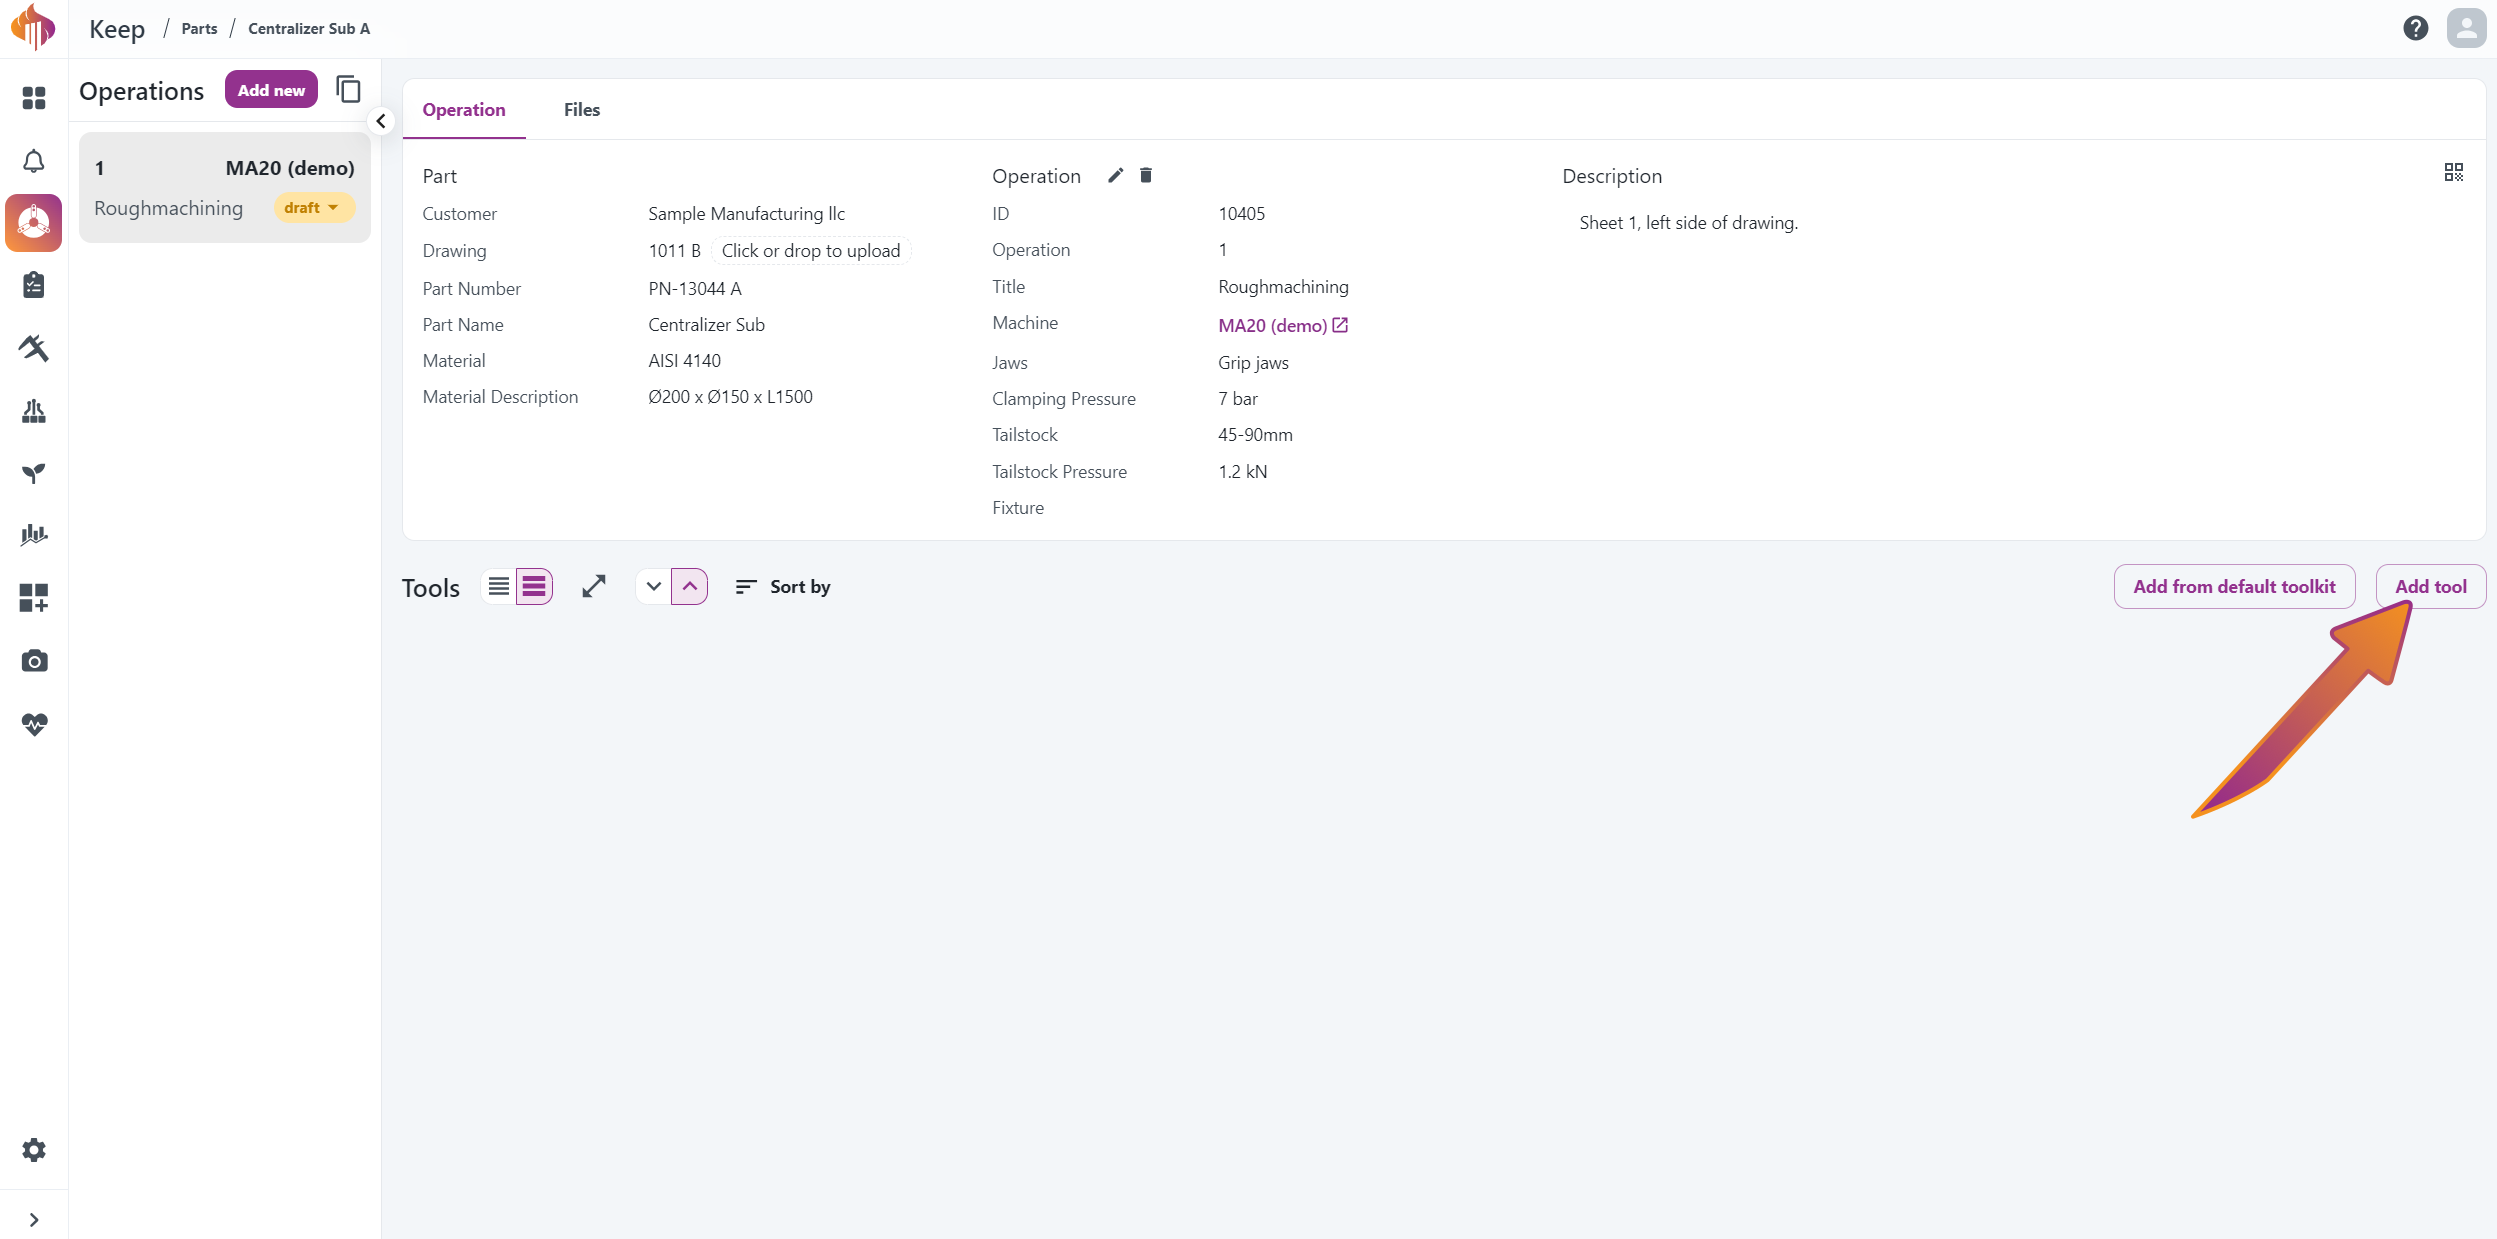
- Click the “Add Tool” button in the tool list header:
- The tool category window will pop up as an overlay, pressing the different categories will reveal the underlying
sub-category for each tool type:
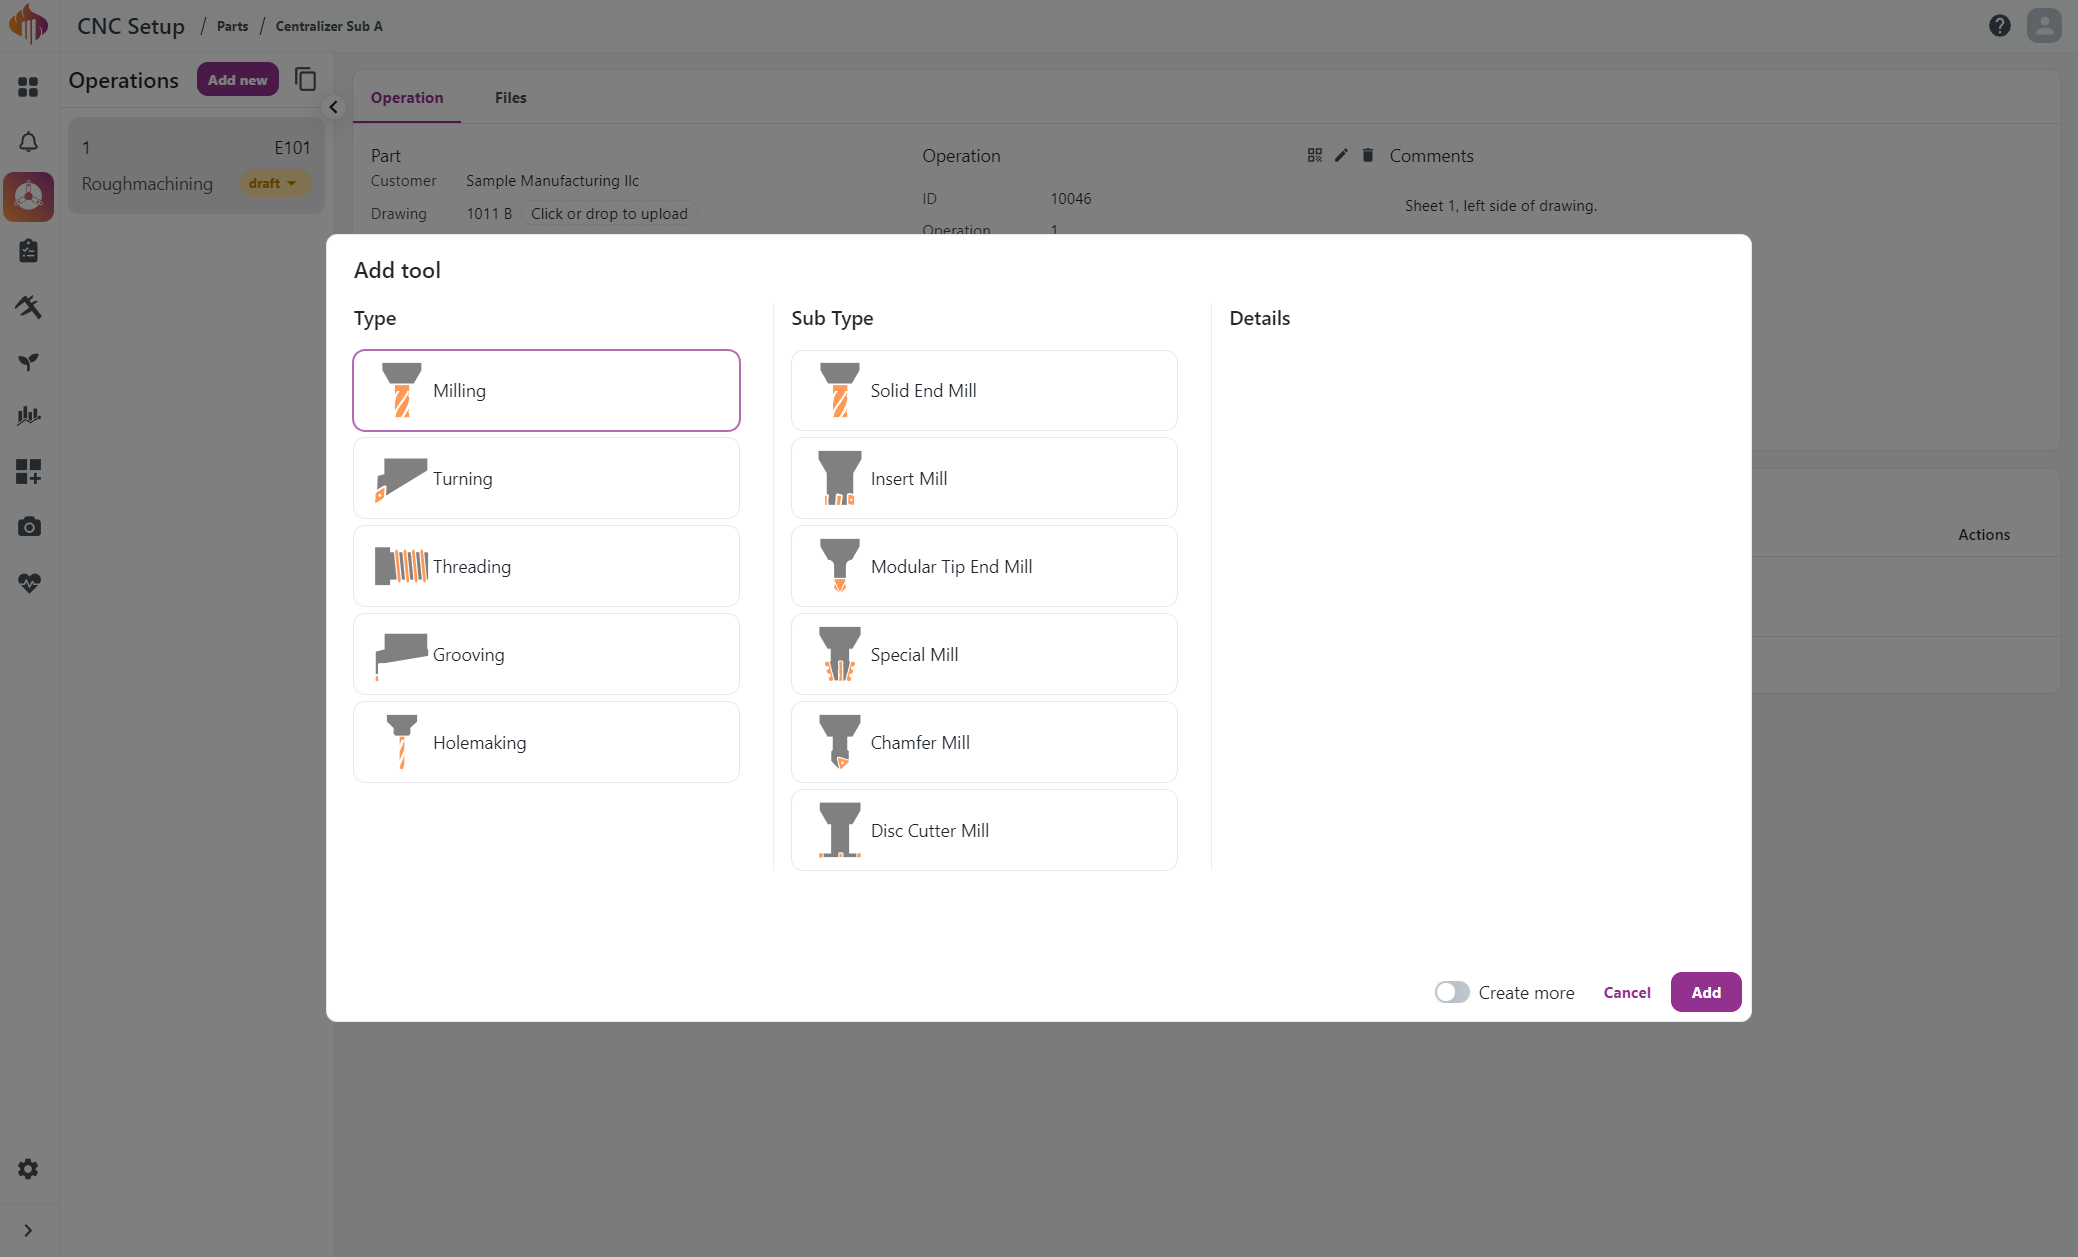
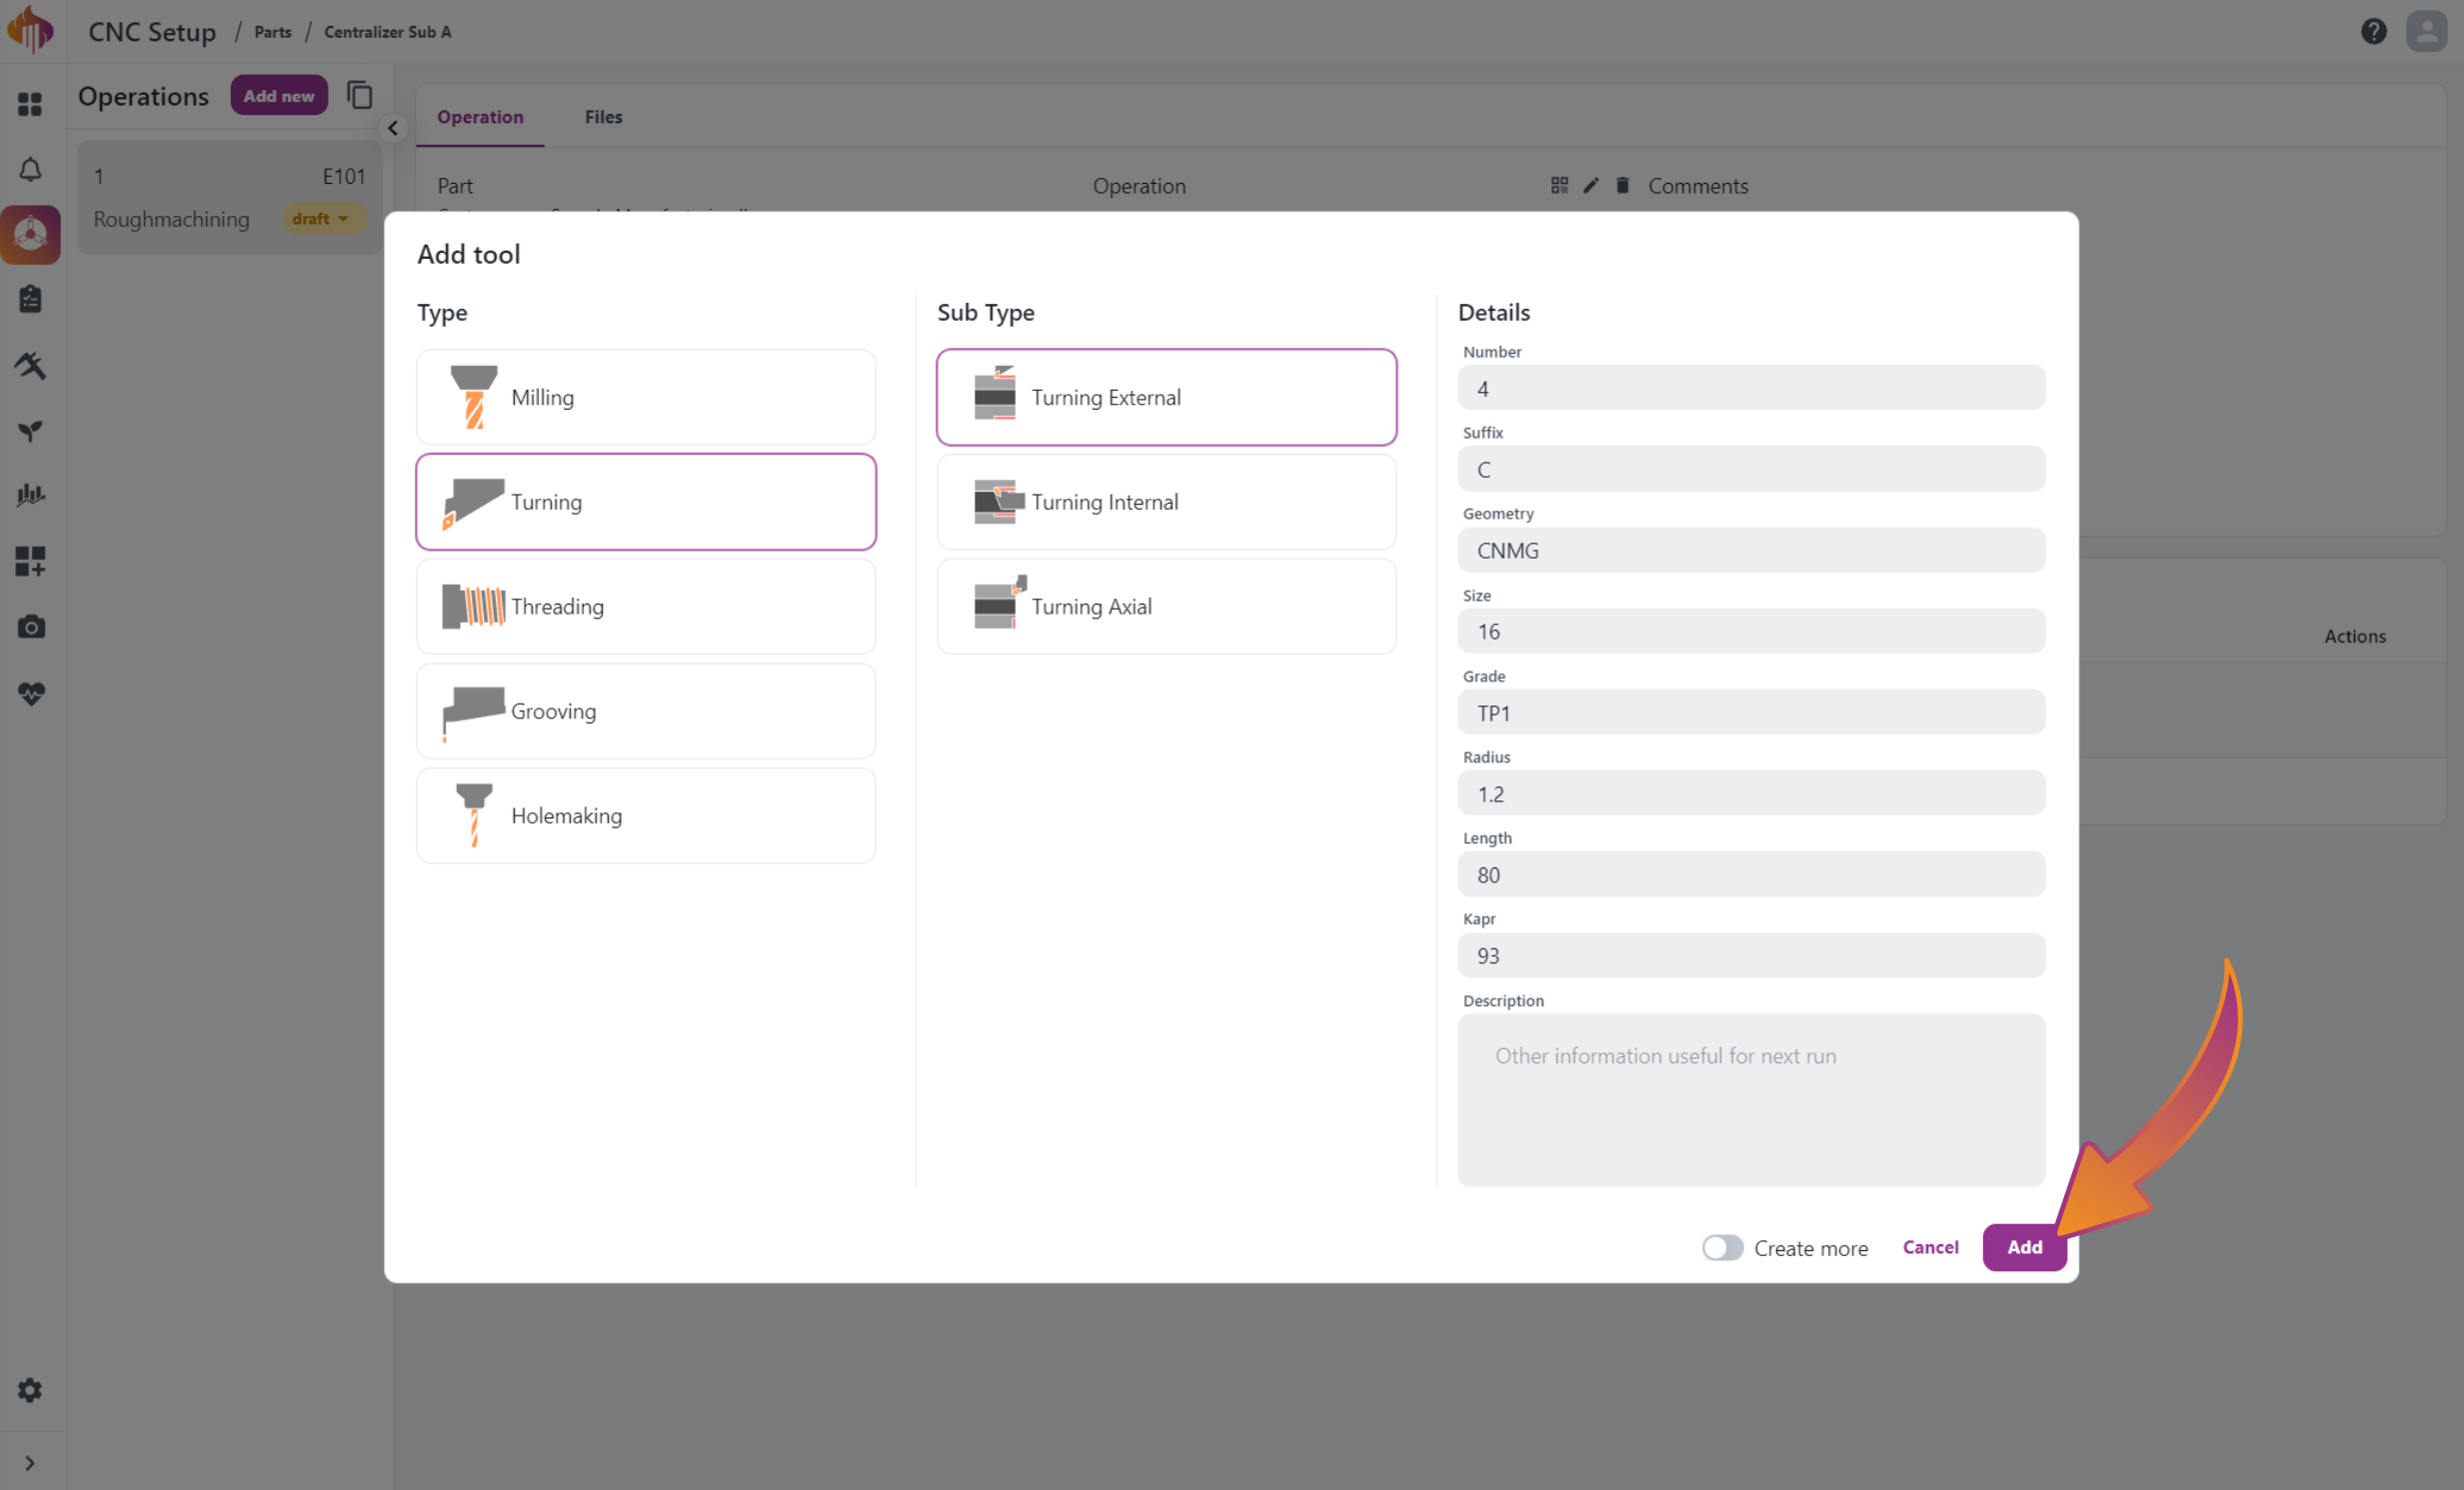
- Pick the type and sub type you wish to add, and fill out the relevant fields:
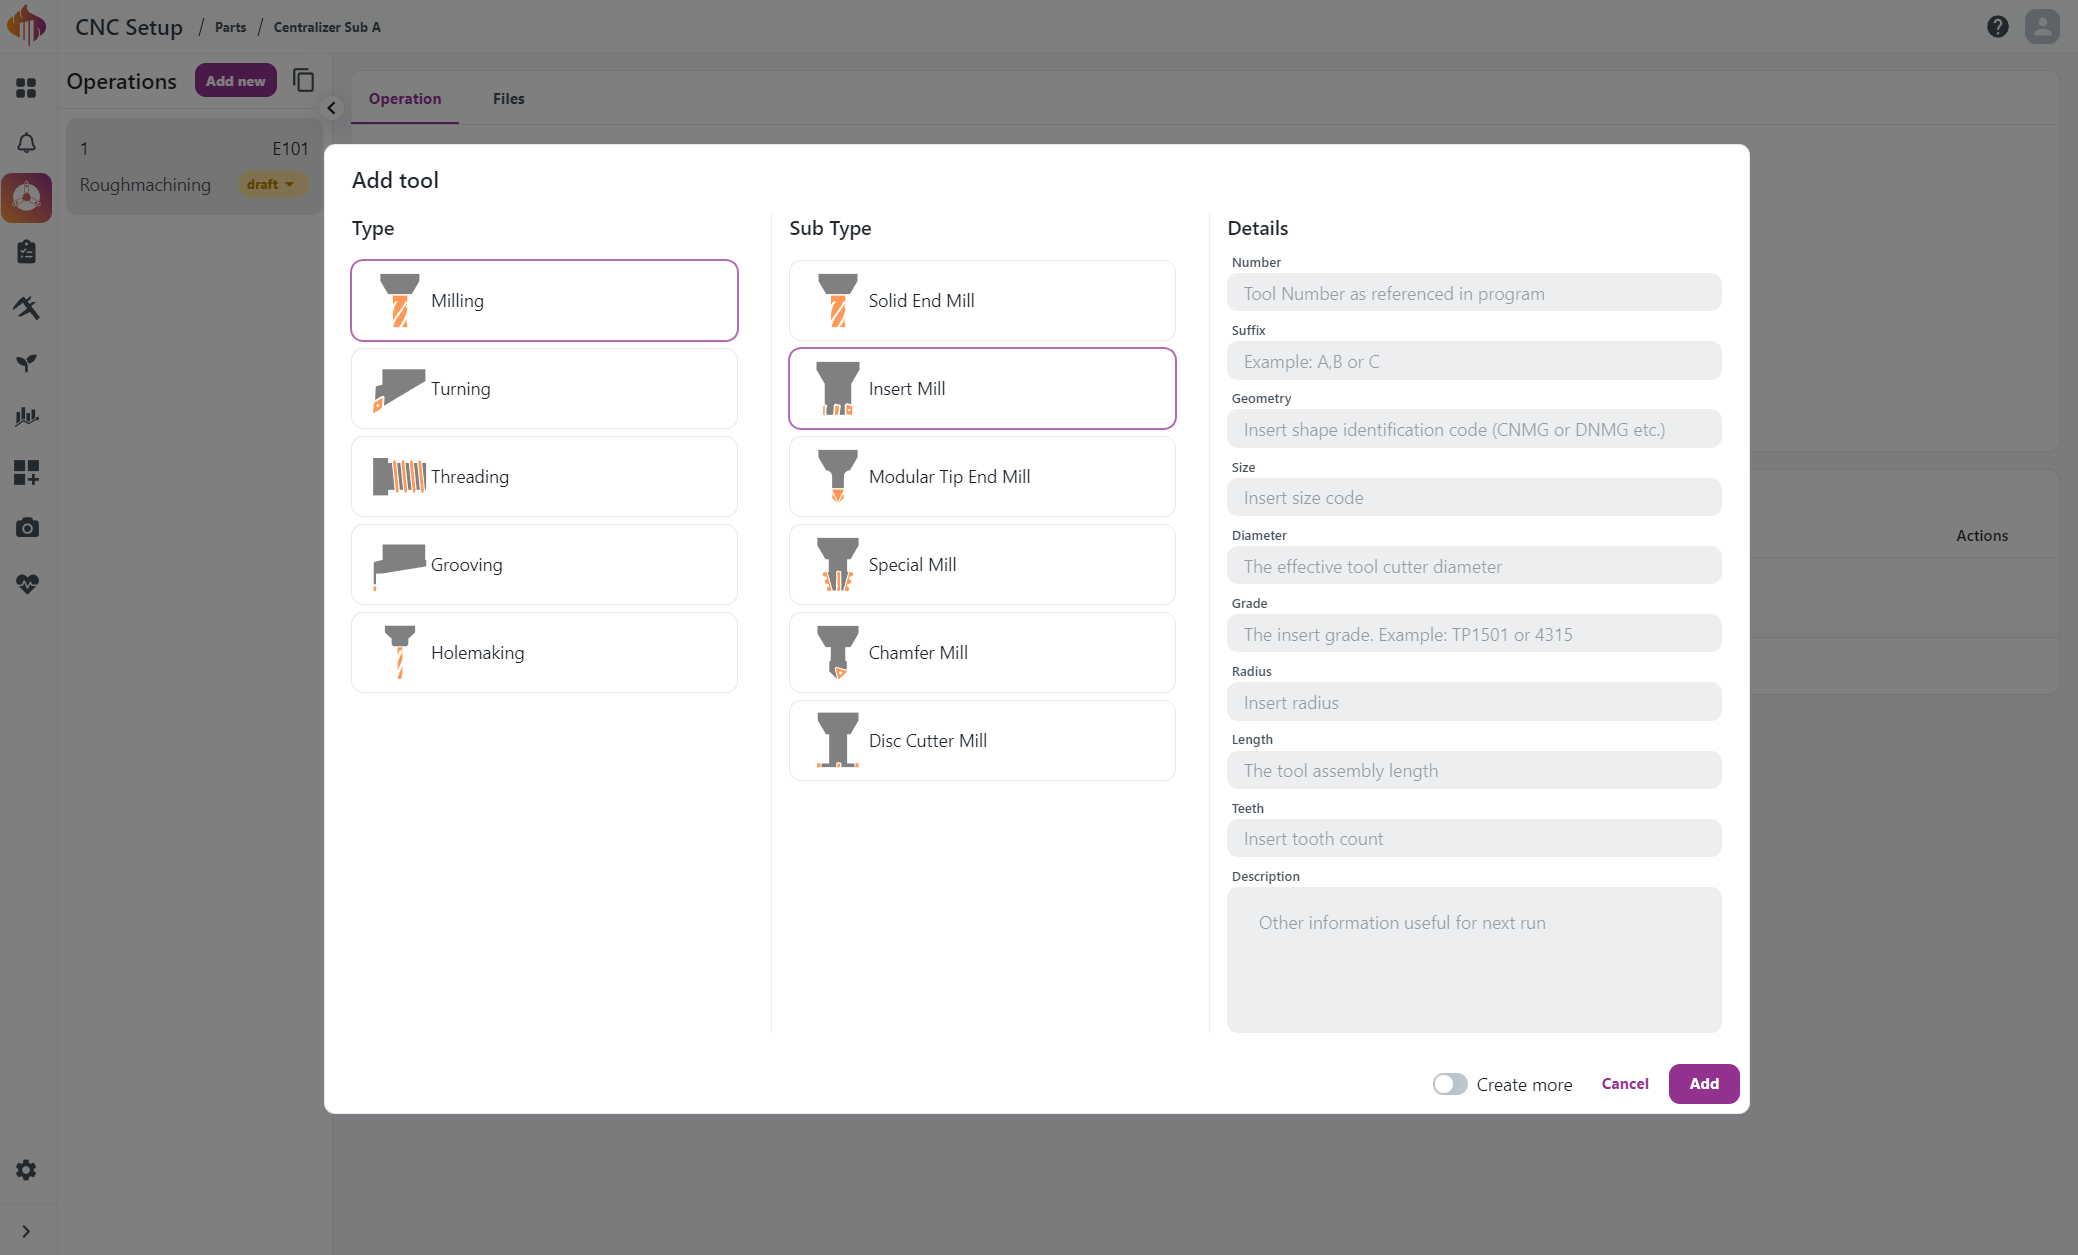
All fields are optional, but the rule of thumb is to fill out enough that you can replicate the same tool the
next time you will need to run the same or similar operation.
- When done defining the tool, press "Add":
- The tool you defined will be added to the operation:
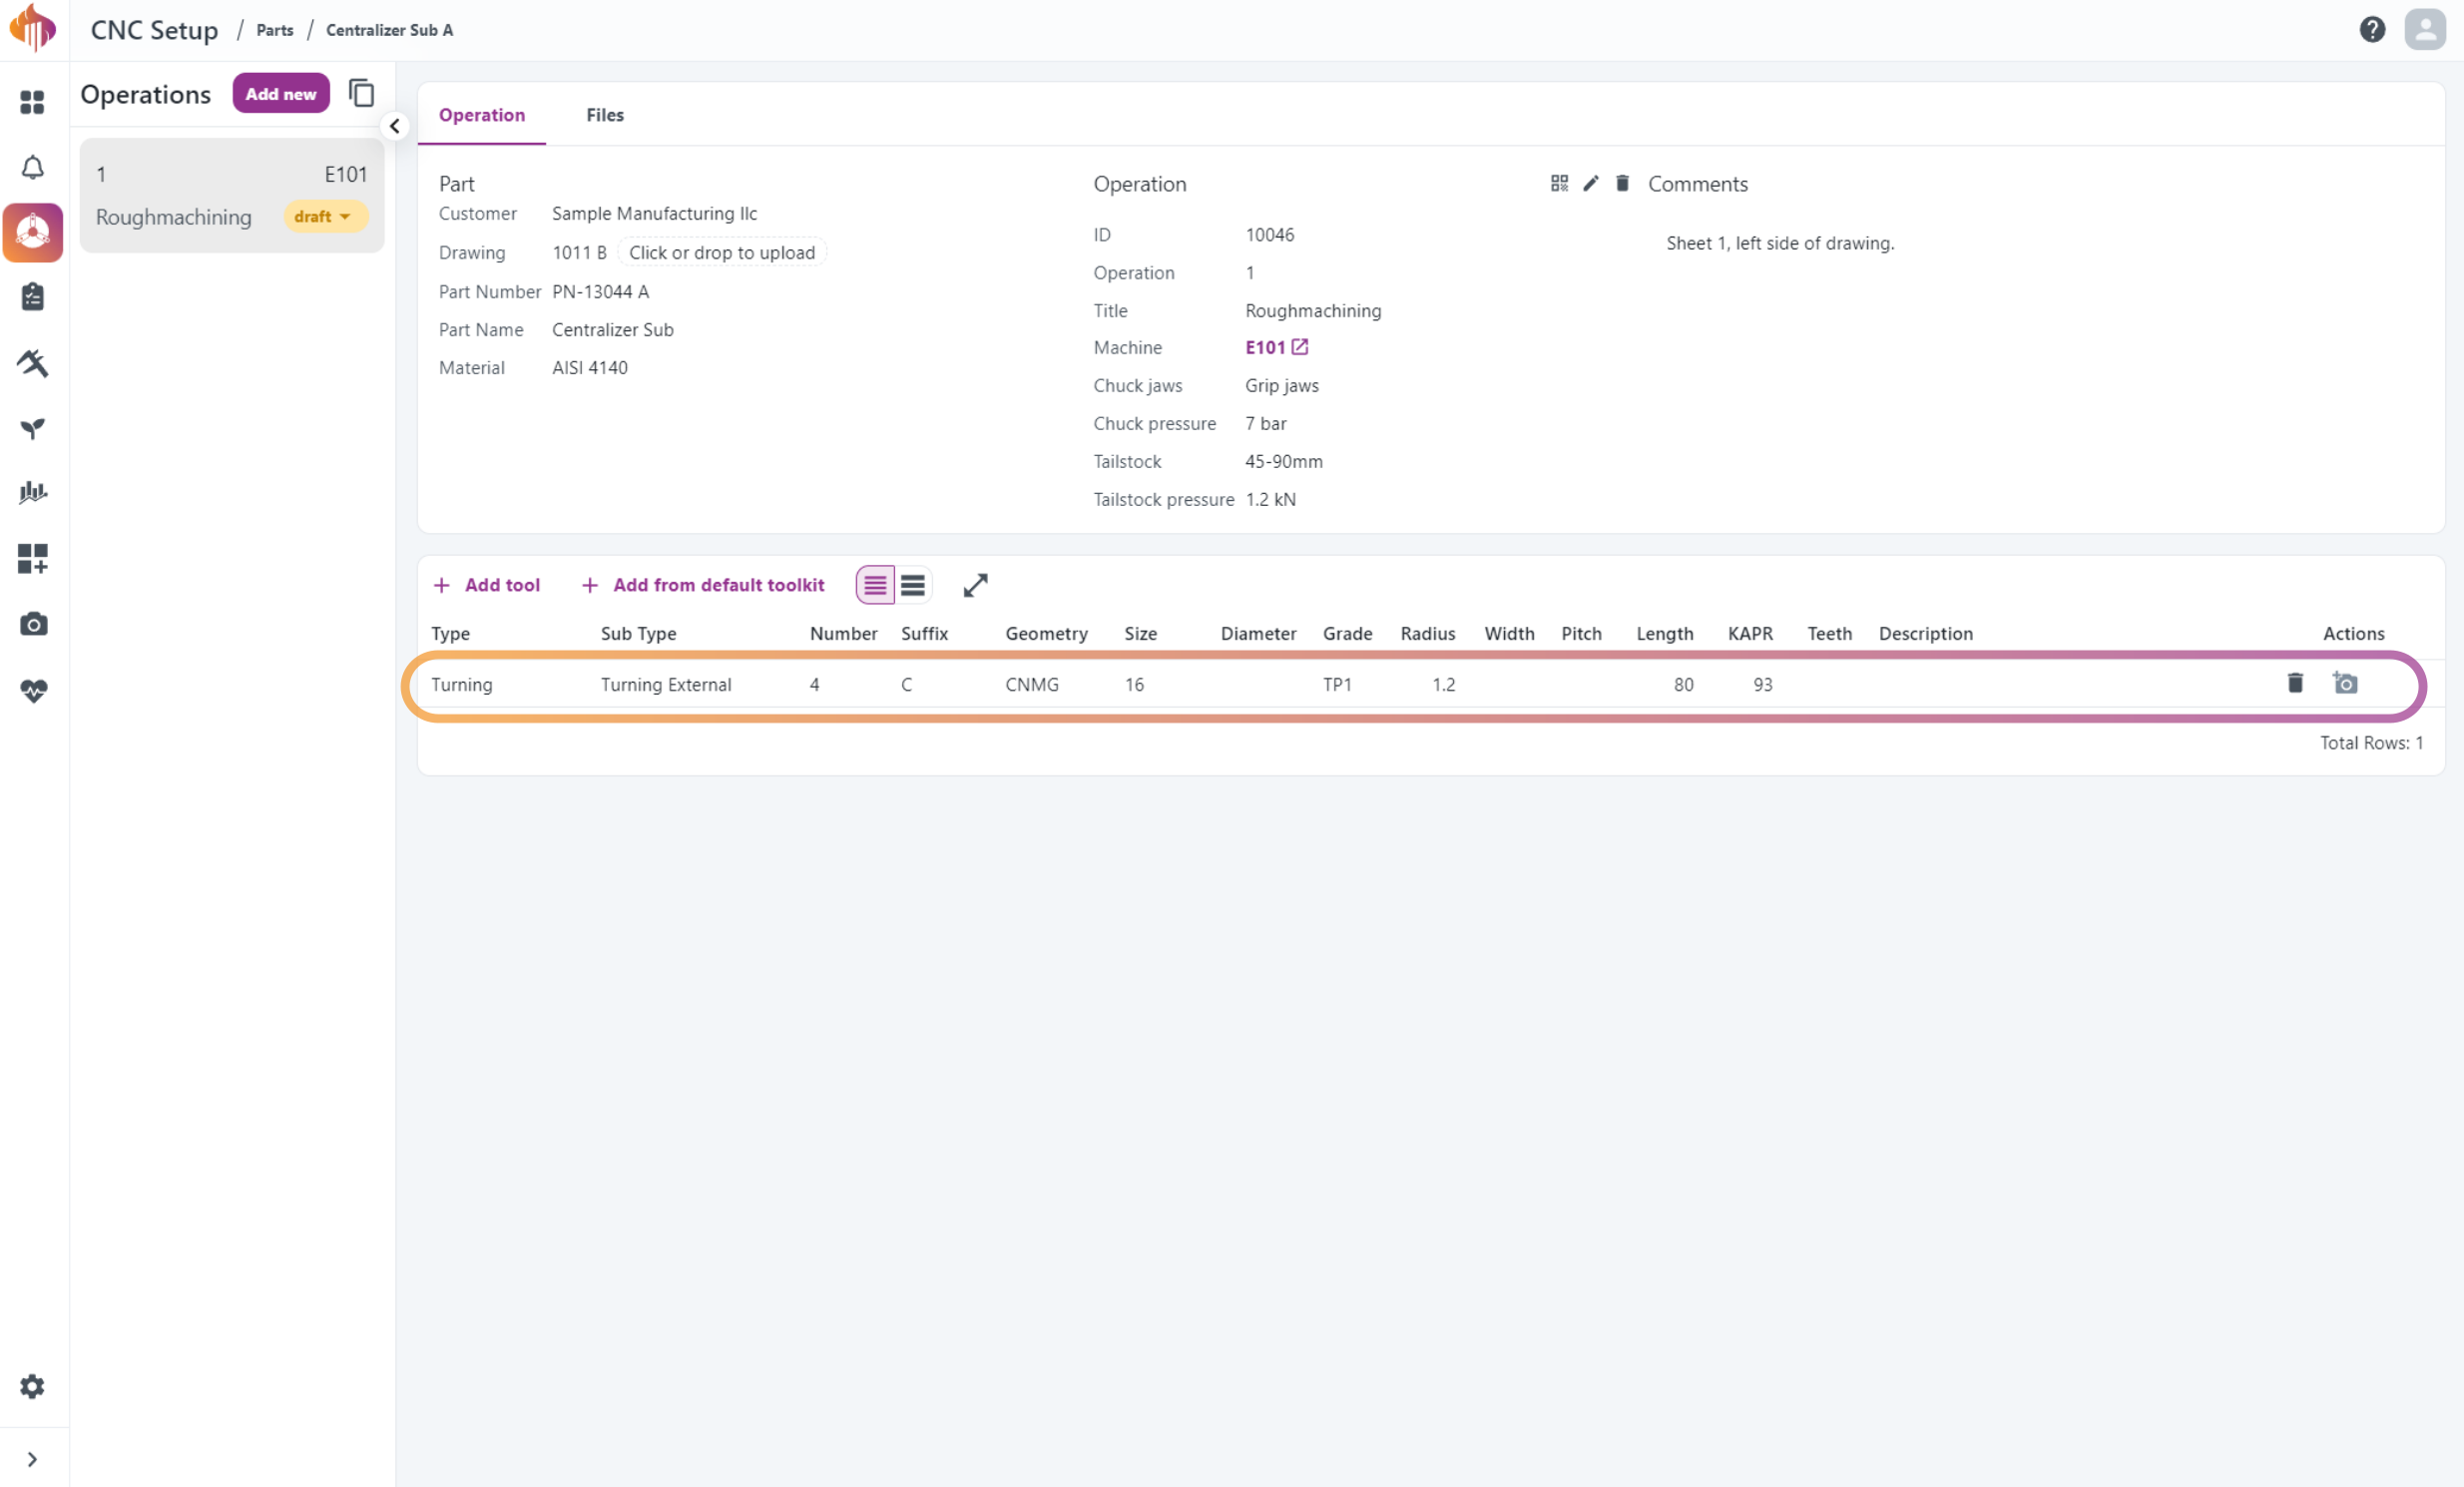 Here you can see an instance of a turning tool added to the tool list window.
Notice that you can still edit the tool by clicking any defined field and typing in the desired value.
There's also an alternative view of the tool lists, called "accordion view":
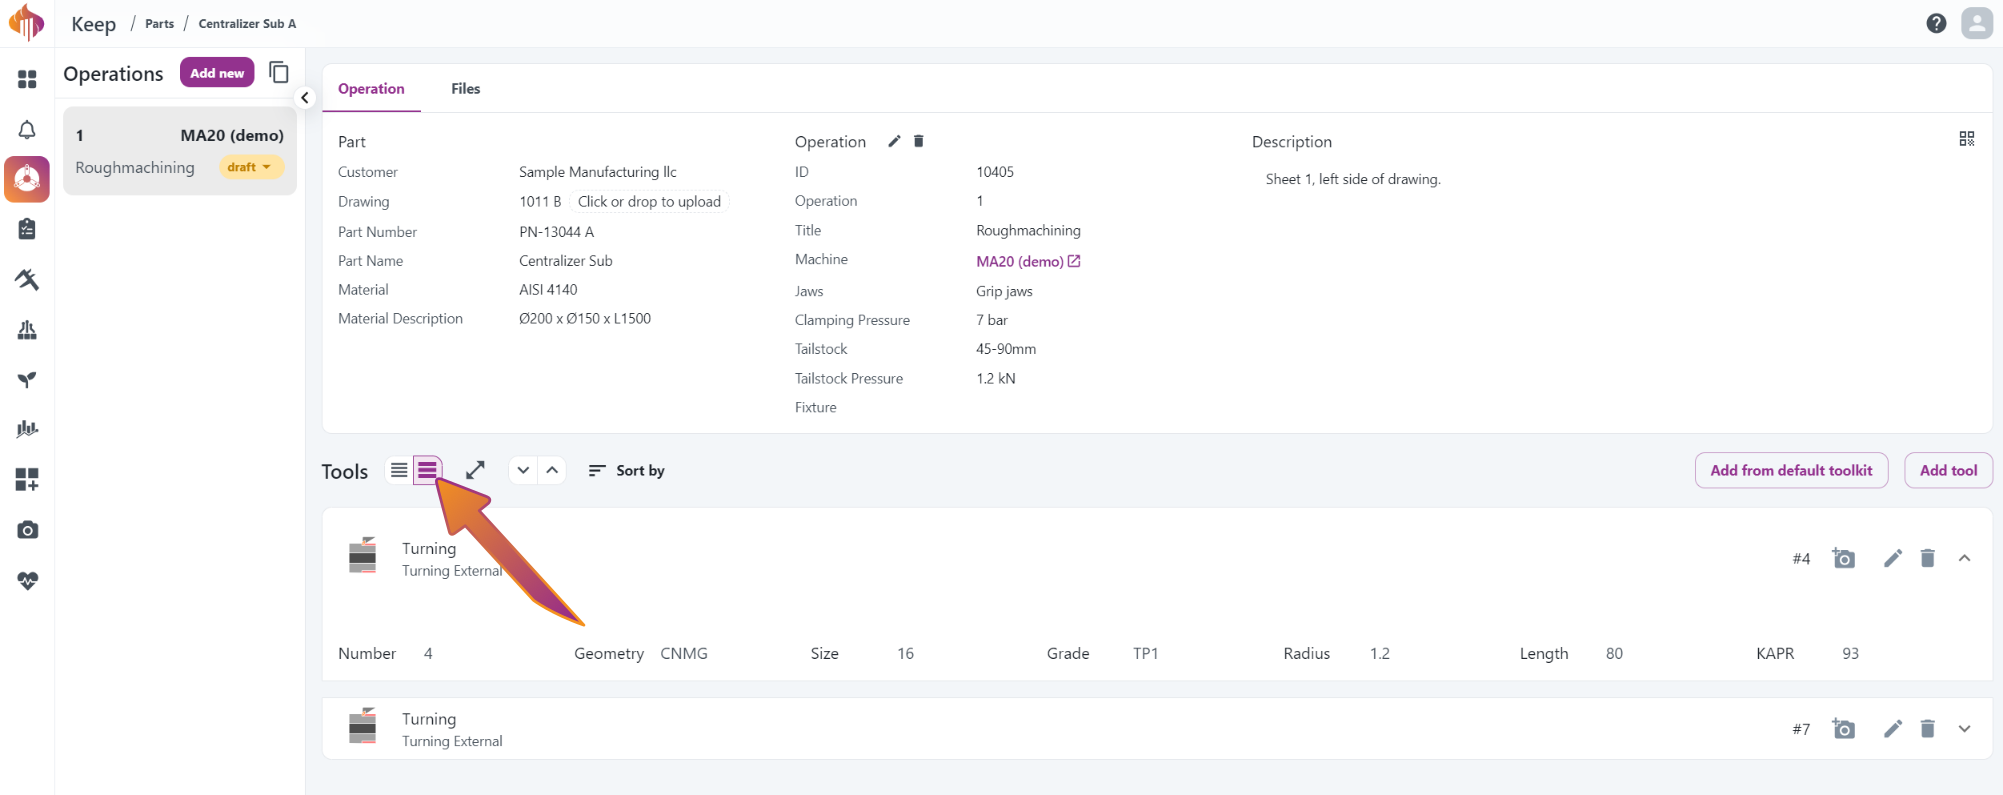 Accordion view tool list. Notice the dropdown on each tool. This view only shows the fields you have filled out.
You will need to press the pencil icon to edit or add more information.
Uploading Pictures to tools
Specifying how the tool was set up only by text can be troublesome.
That's why Keep lets you upload images that can easily be viewed within the application!
You can do this in two ways:
- Upload from your computer.
- Use your mobile device's camera to upload directly.
Uploading from computer:
- To upload from your computer, click the camera icon next to the tool, then choose an image and confirm.

Uploading from Mobile Device:
To upload through you phone, you will first have to open the operation on your phone’s browser.
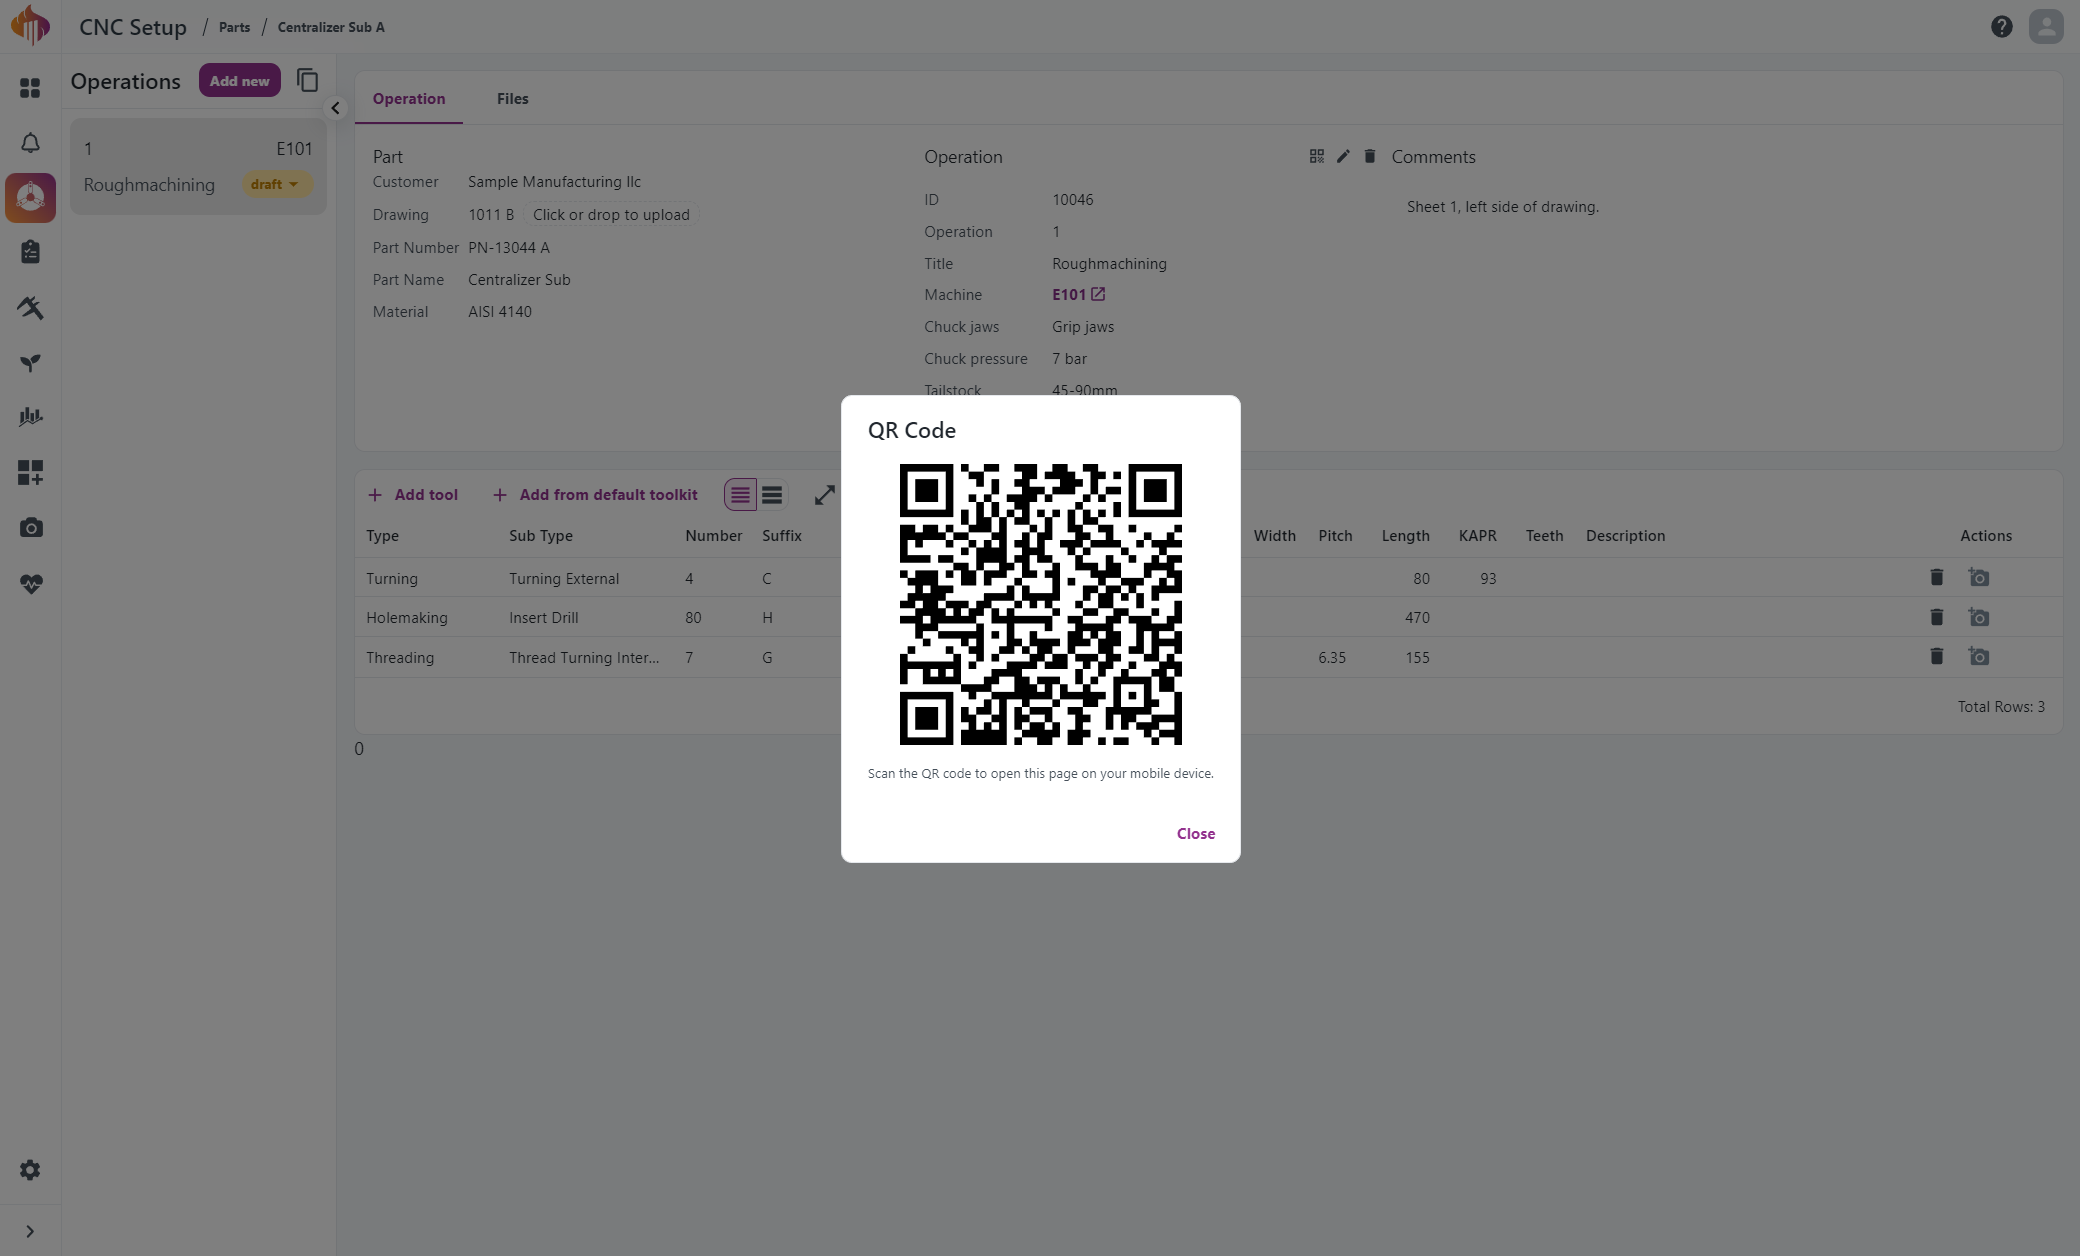
- Press the small QR-code icon within the operation information.
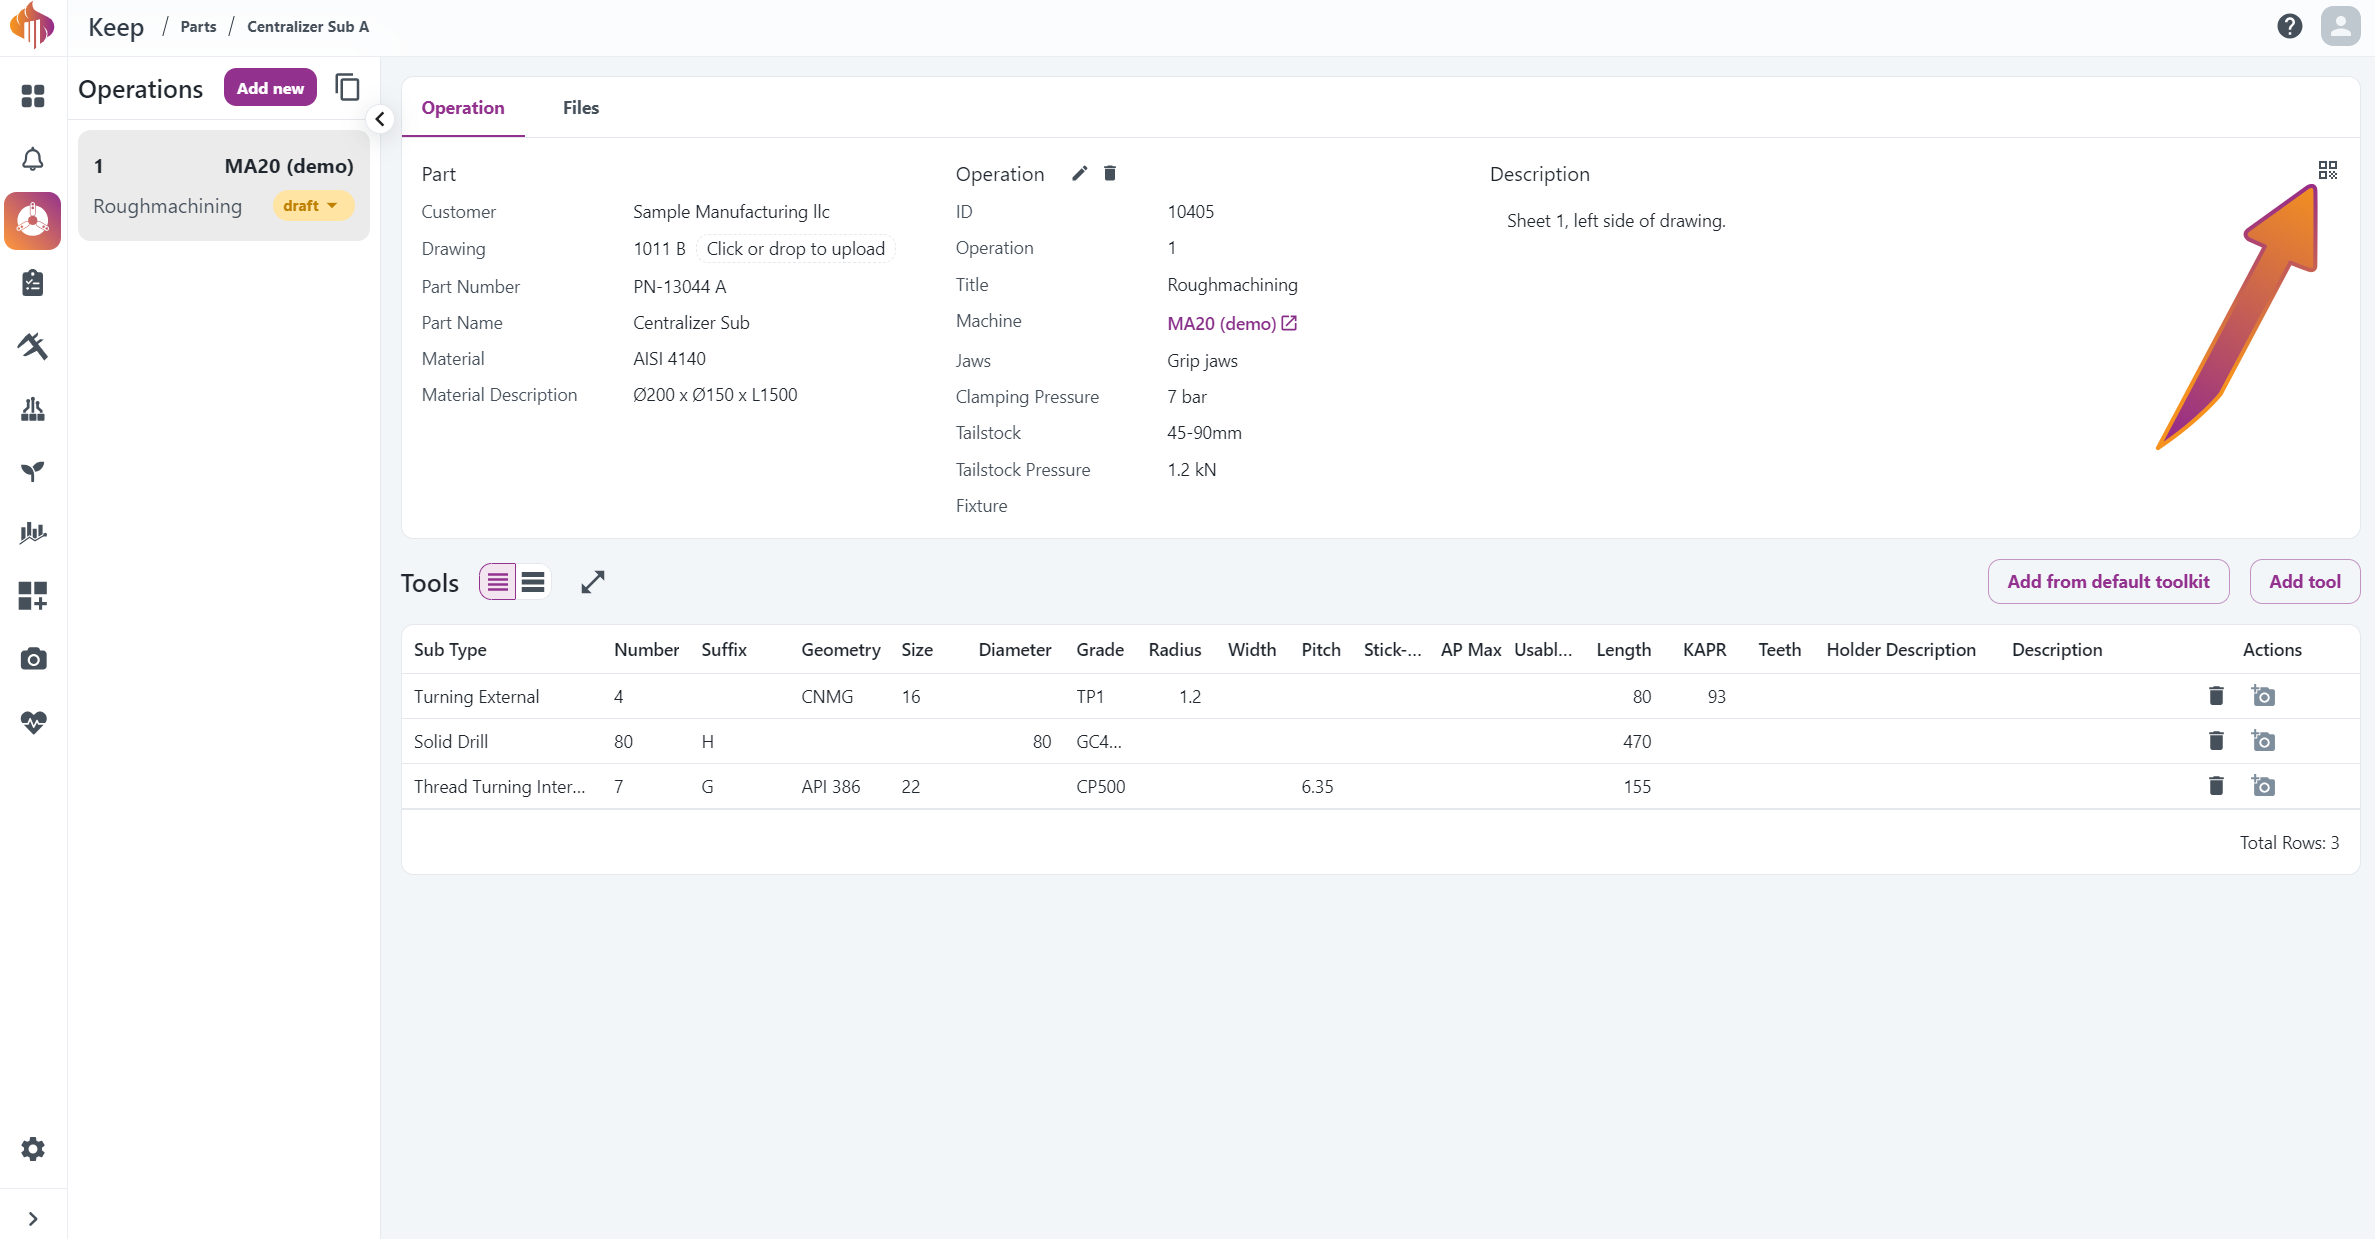
- A QR code will appear, scan this with your phone camera.
If you are not already logged in on your phone, you will be queried to do so.
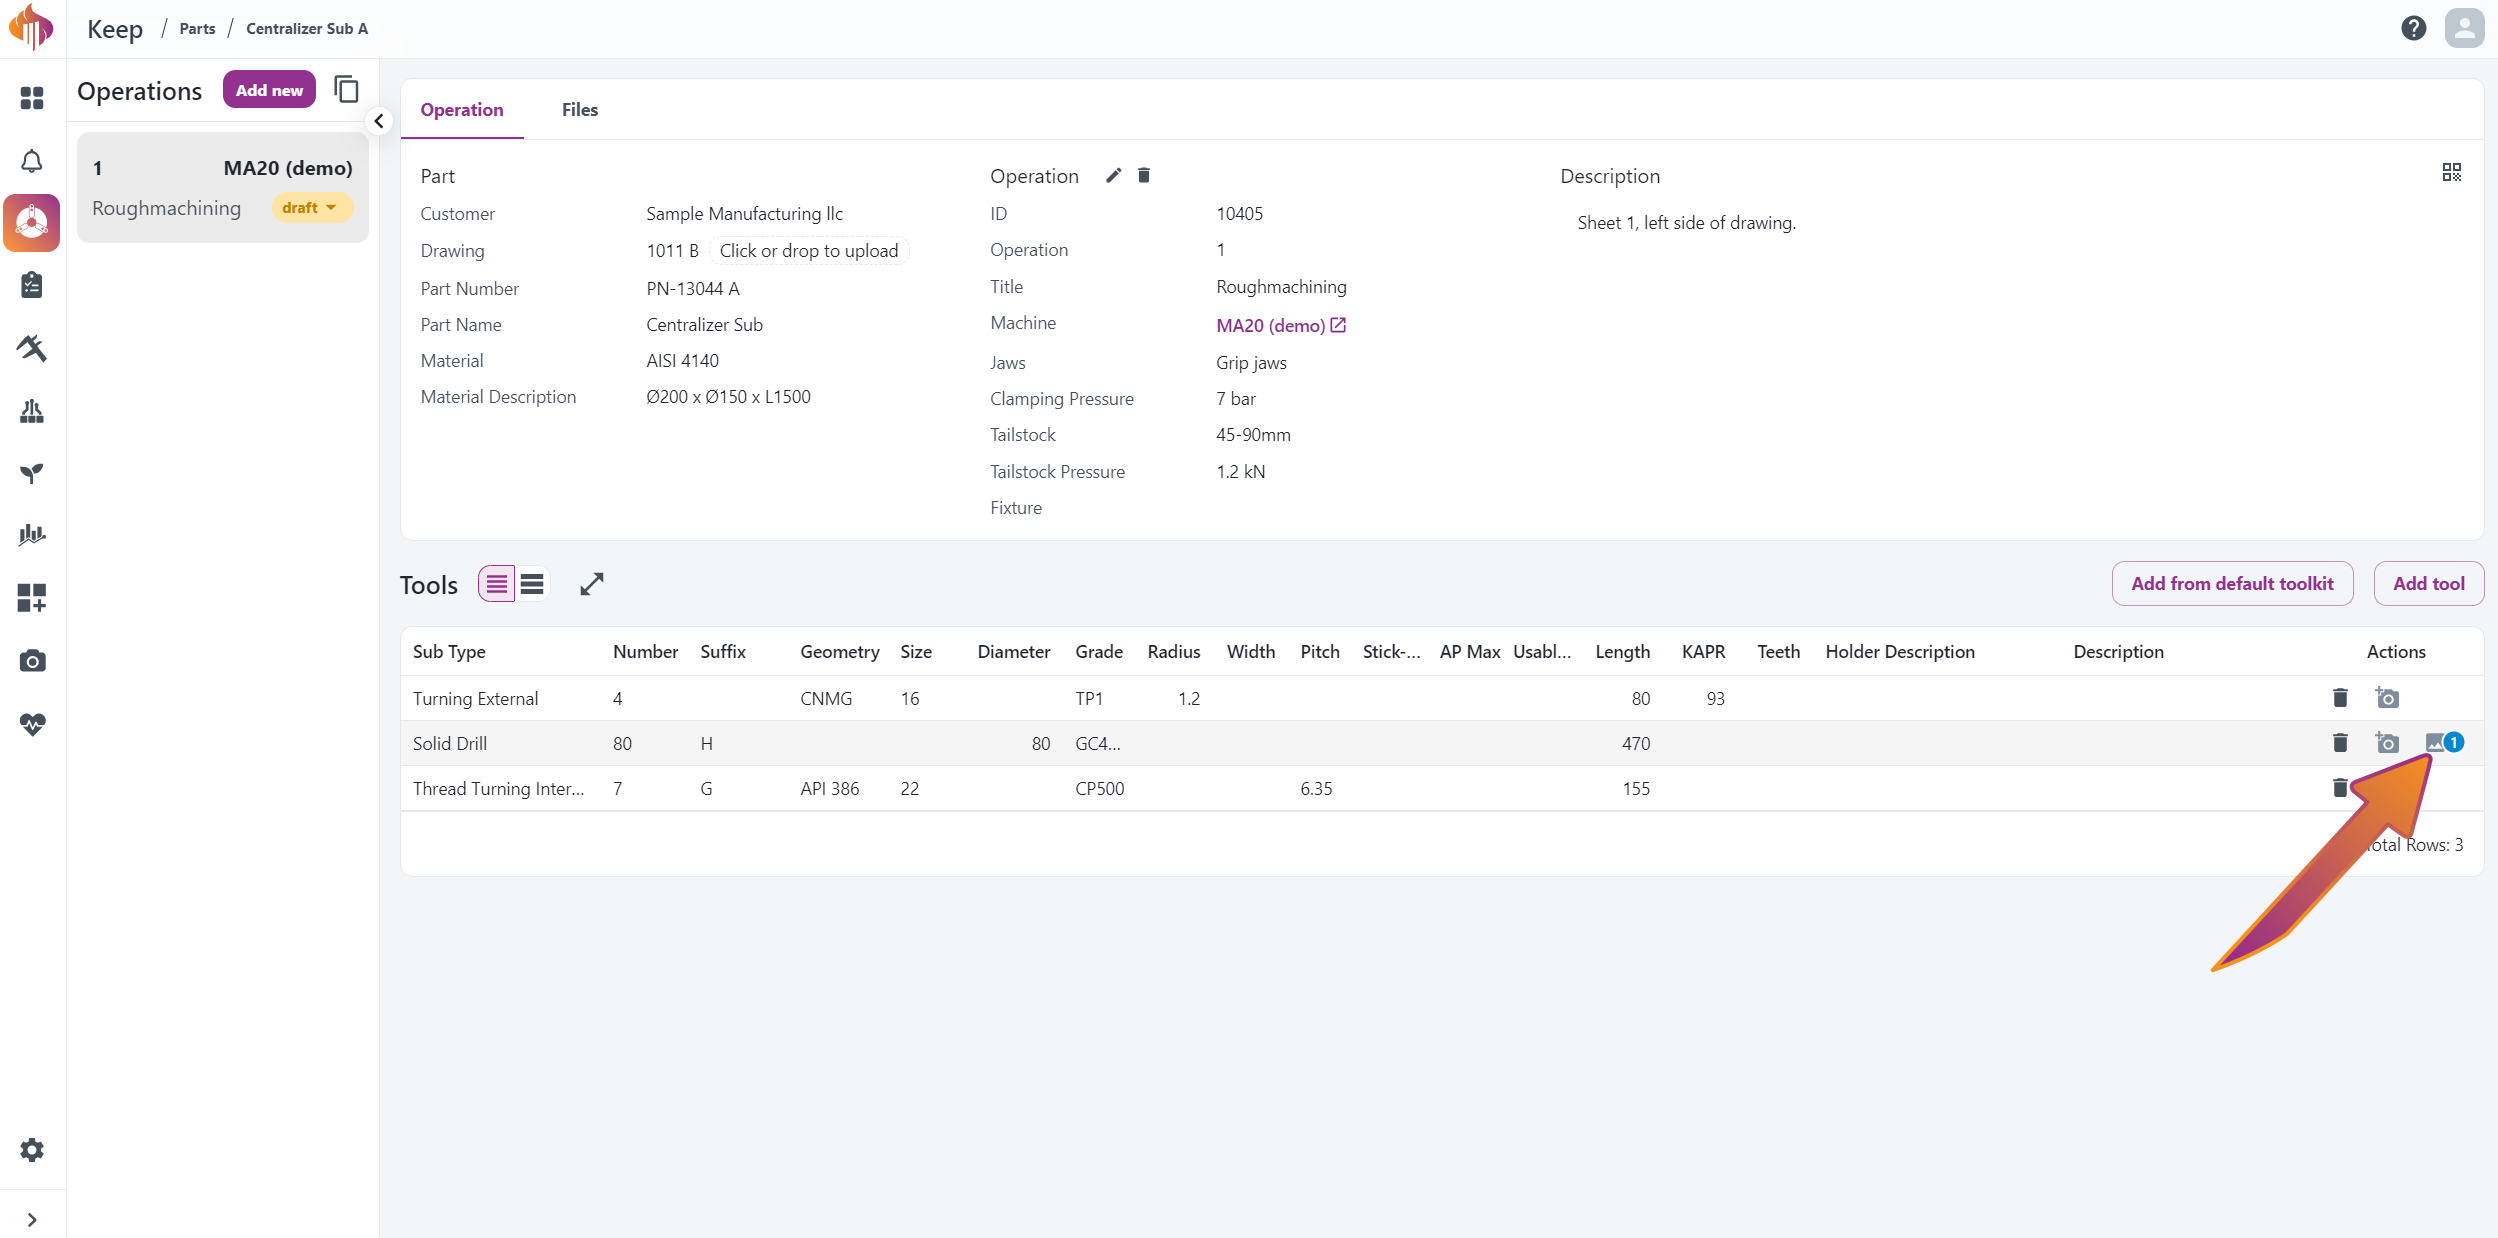
After logging in, you will be sent to the same operation you had open on your desktop:
After uploading:
After any picture has been uploaded, a small icon will signal that the tool has an attached image:
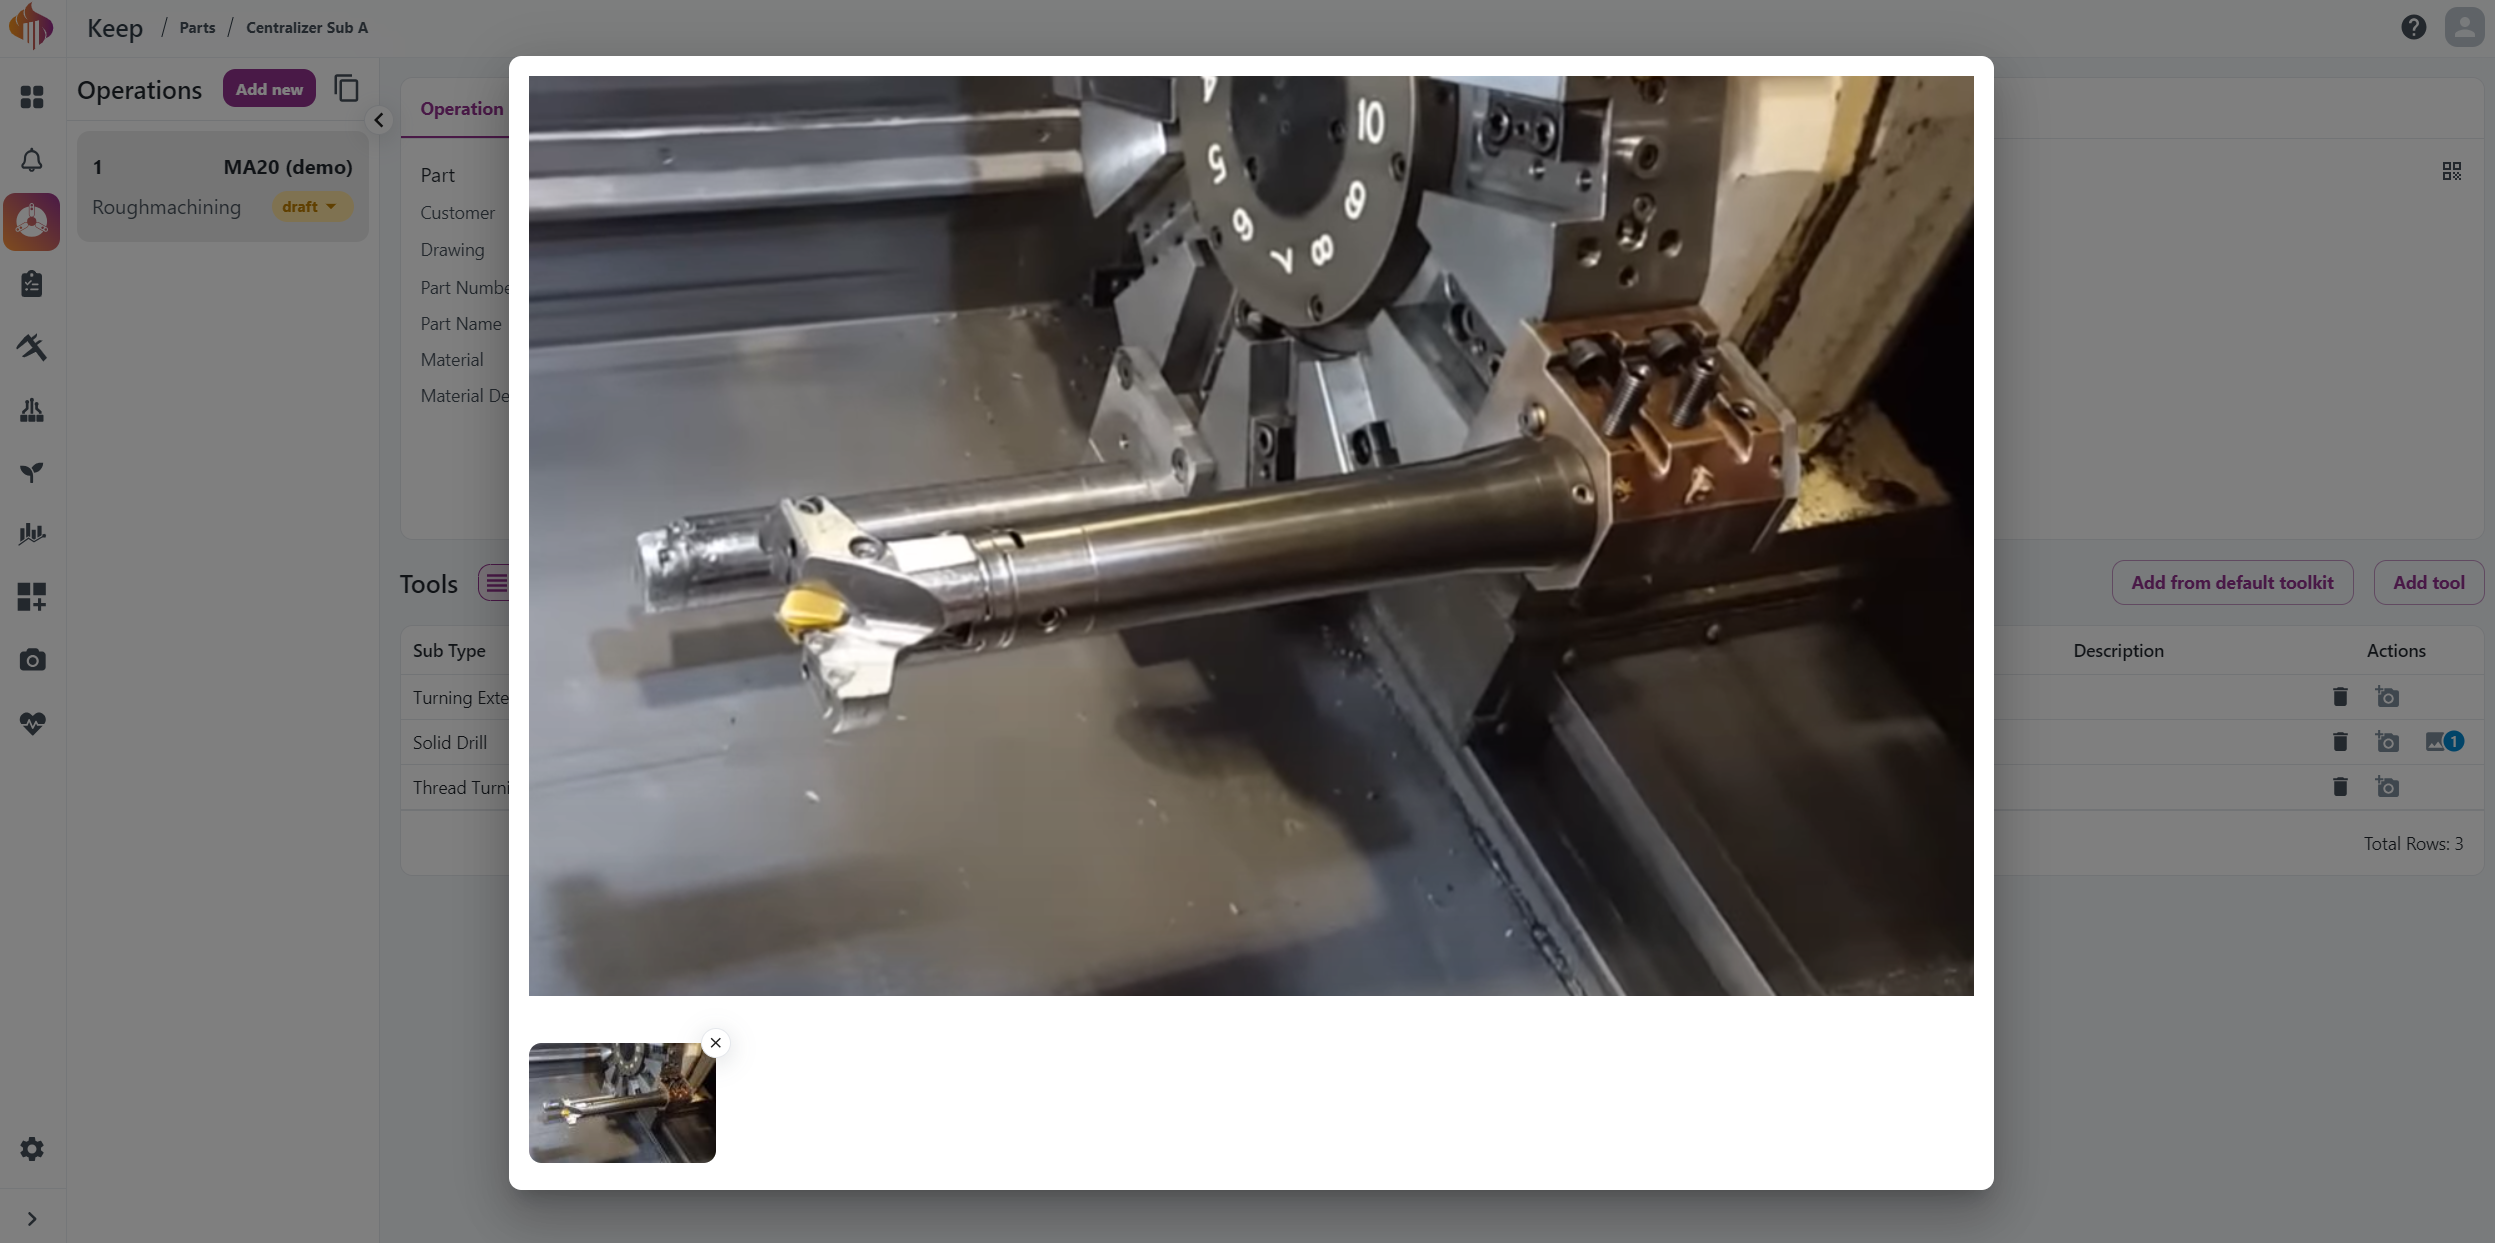
- Press the image to view it.
- The image viewer will open and you can browse the attached image(s):
Machines
You will find everything regarding the Machines menu in this chapter.
Default tool list
- You can add tools to the default tool list here:
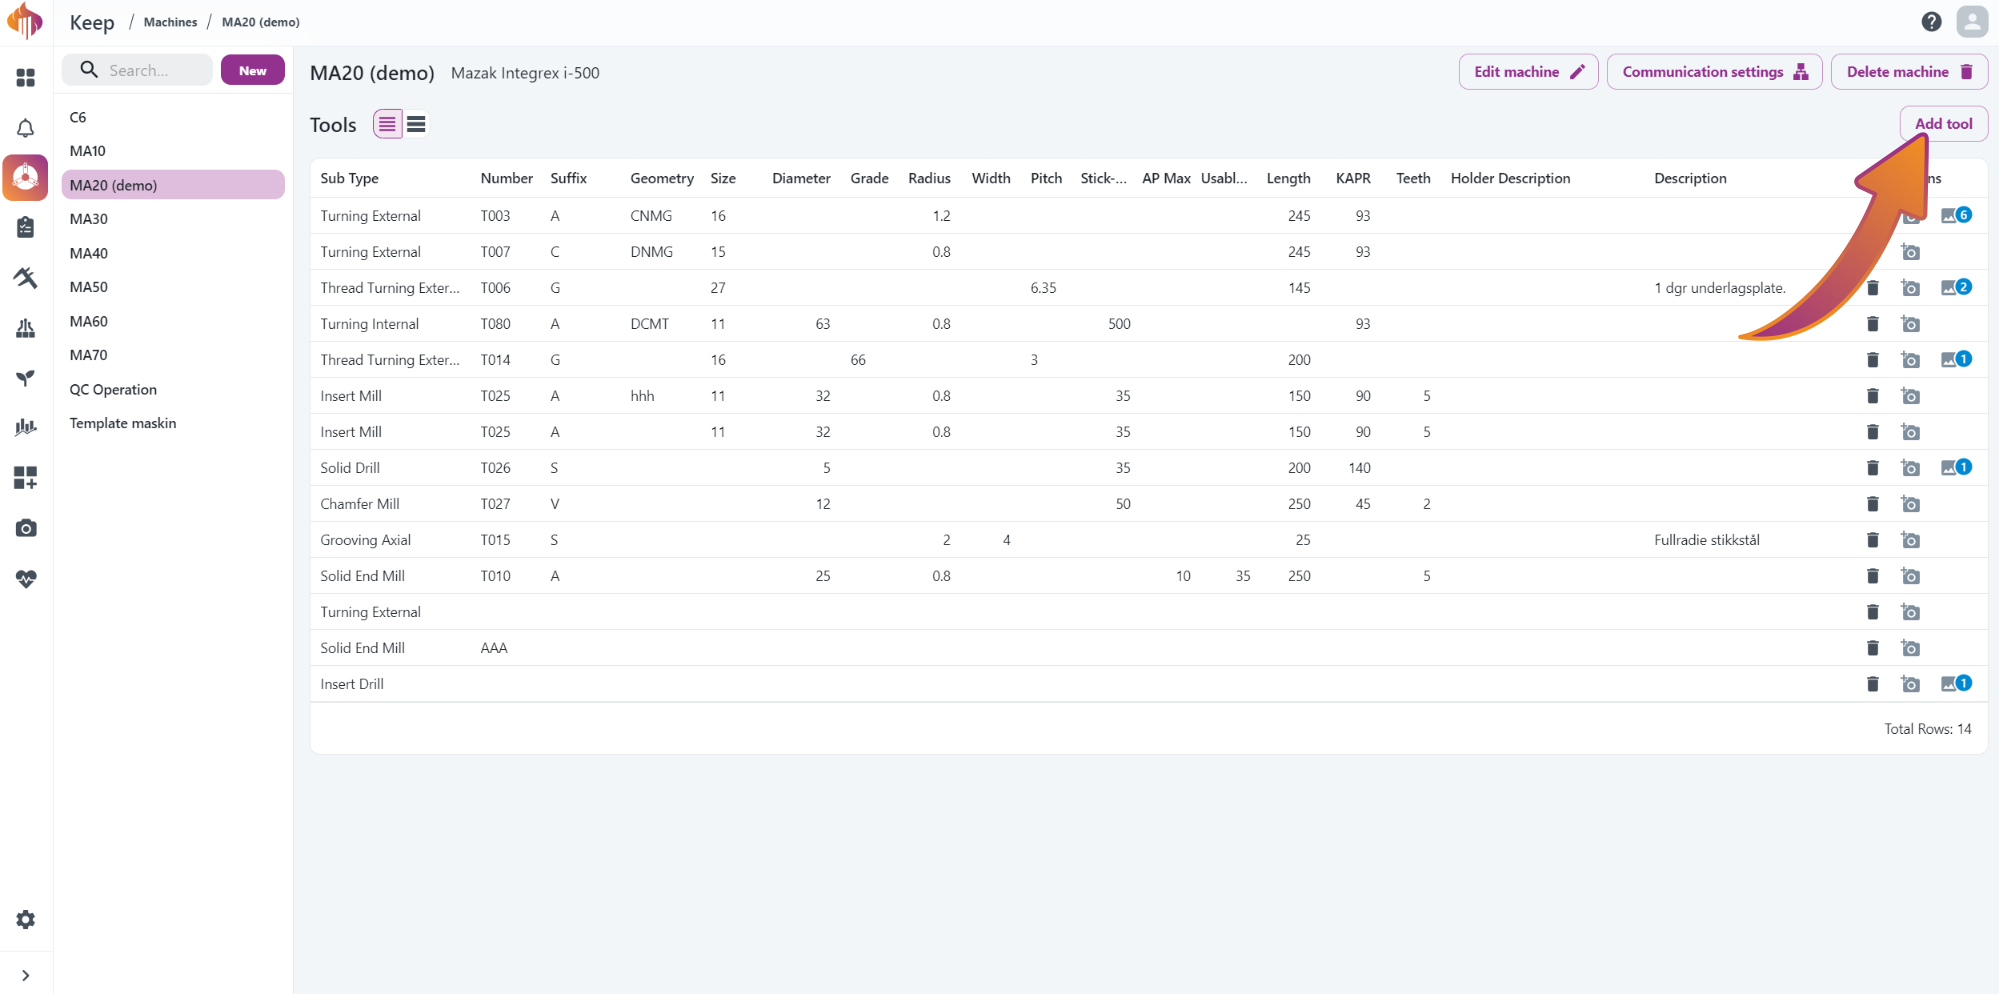
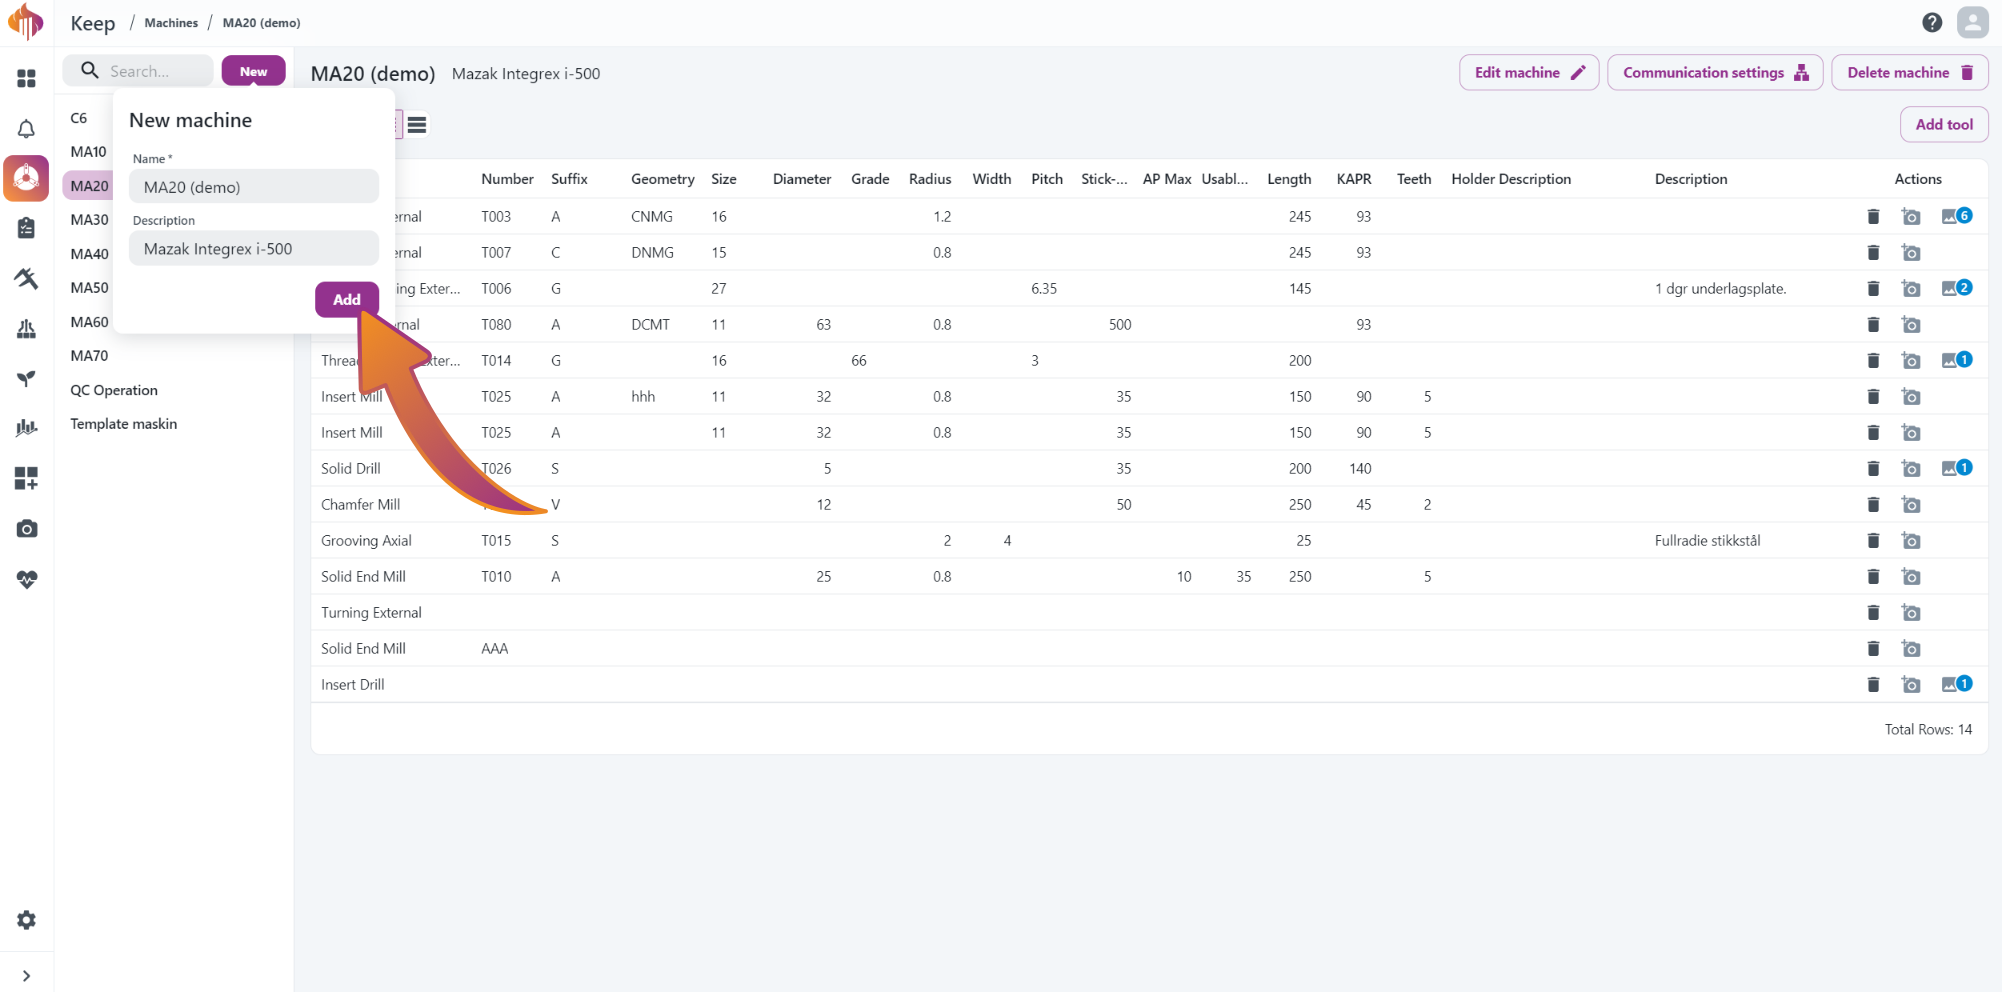
- You can also edit the default tool list from an operations card here:
The same features you have in the Machines menu will be available here except deleting default tools.
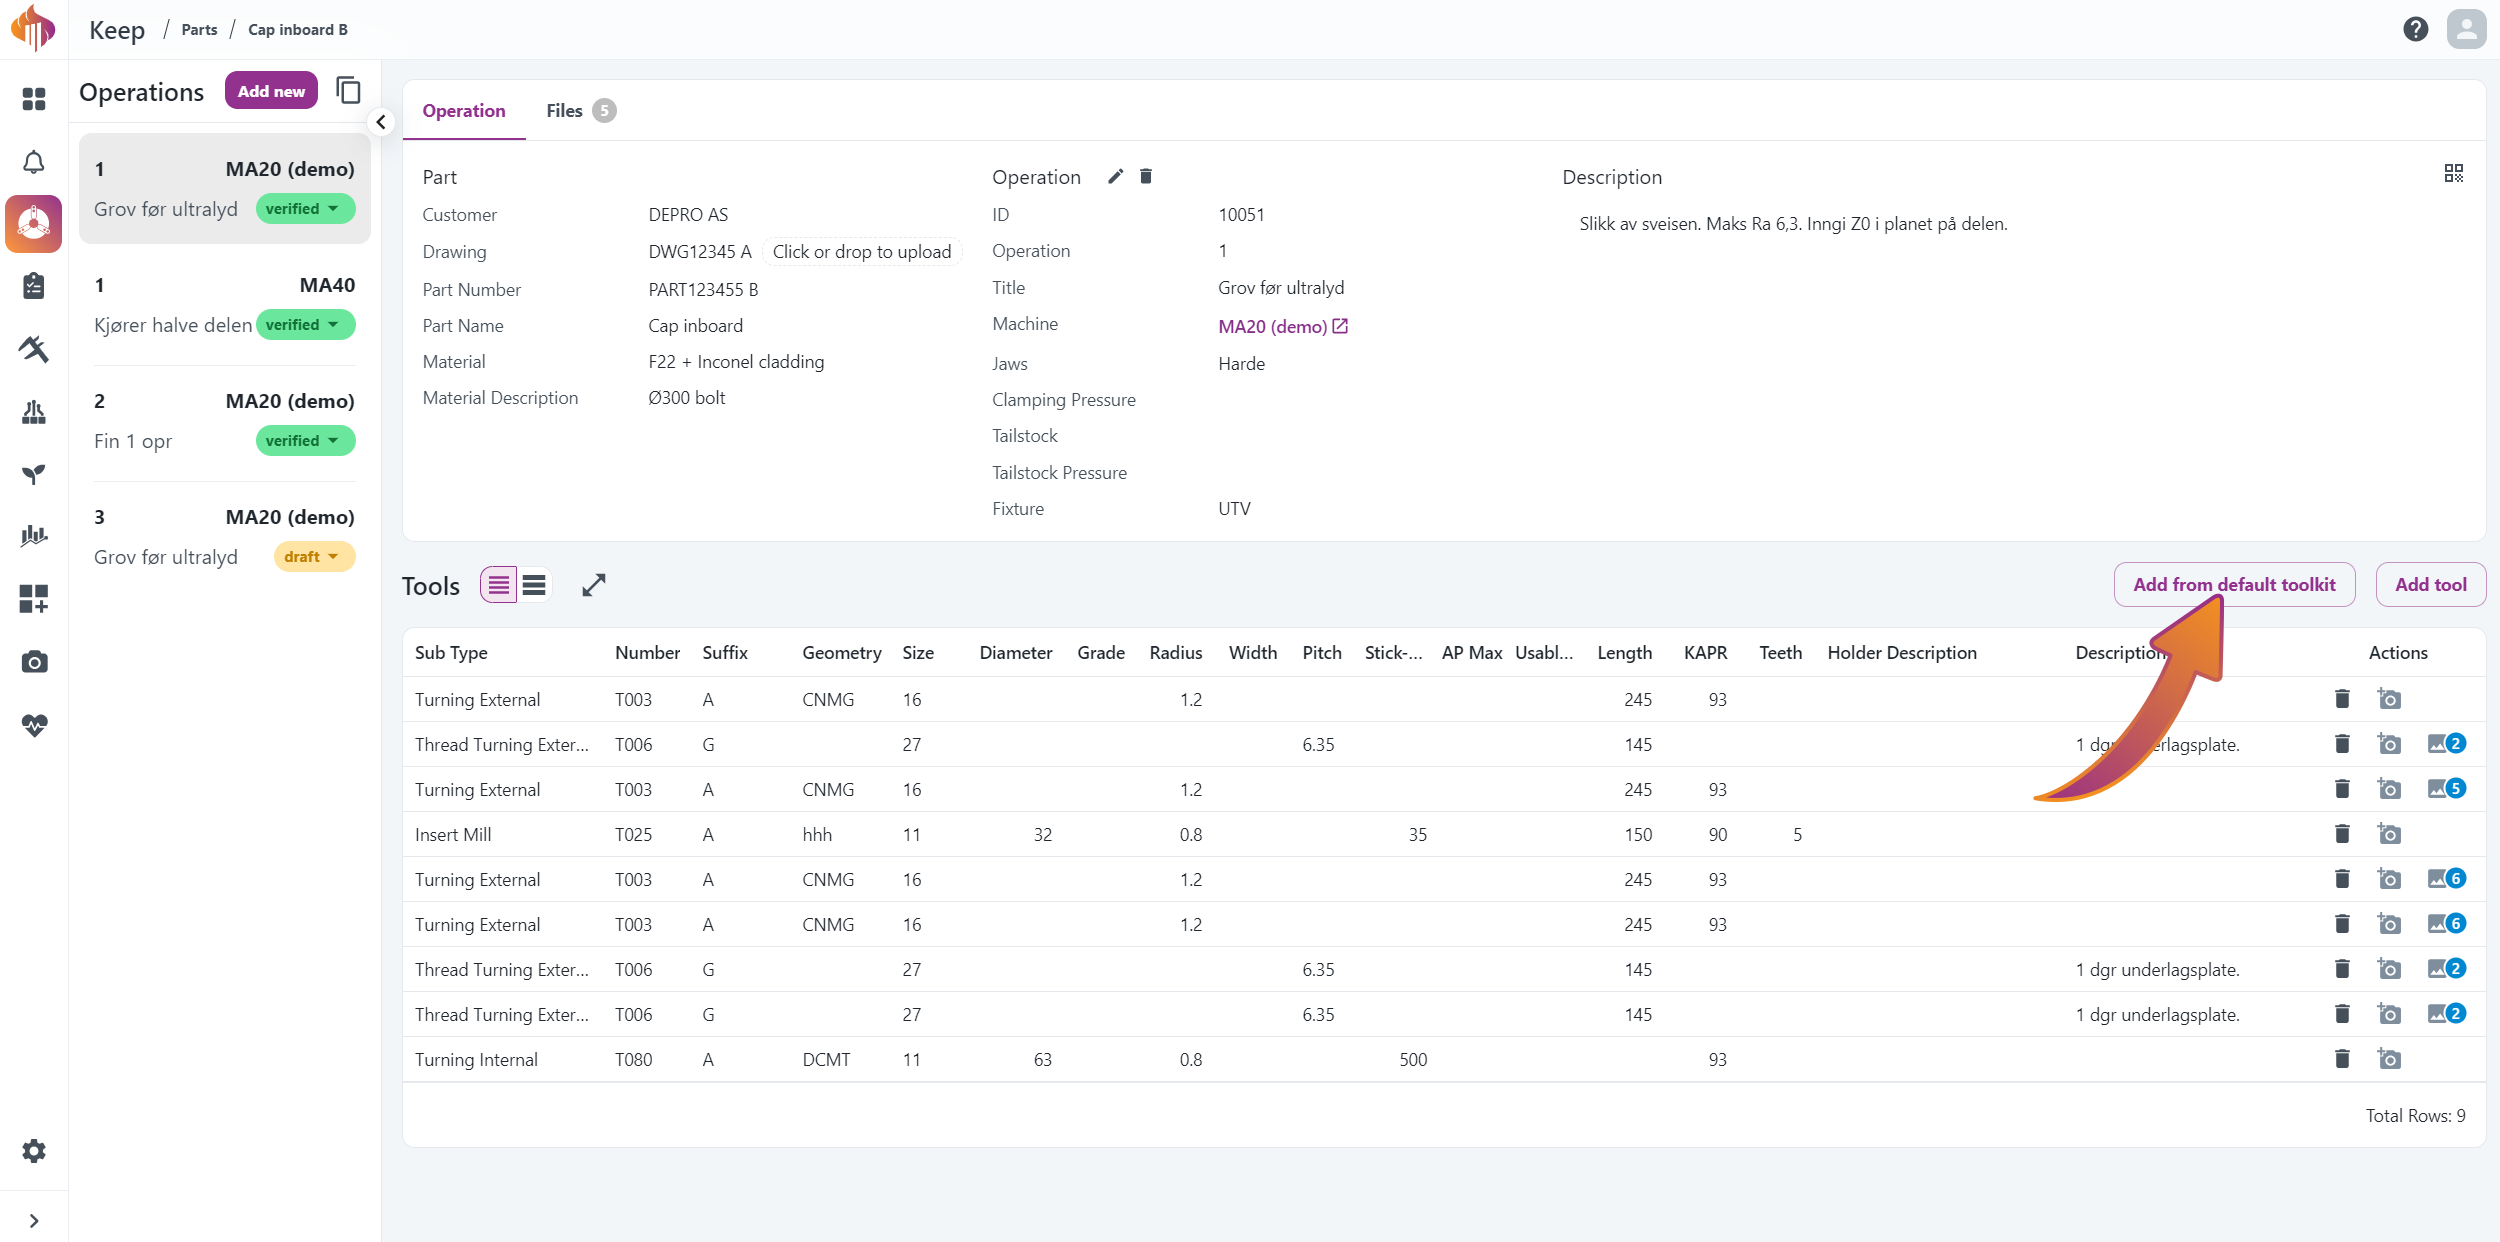
Add machines
- Add more machines by pressing "New" and fill out the fields:
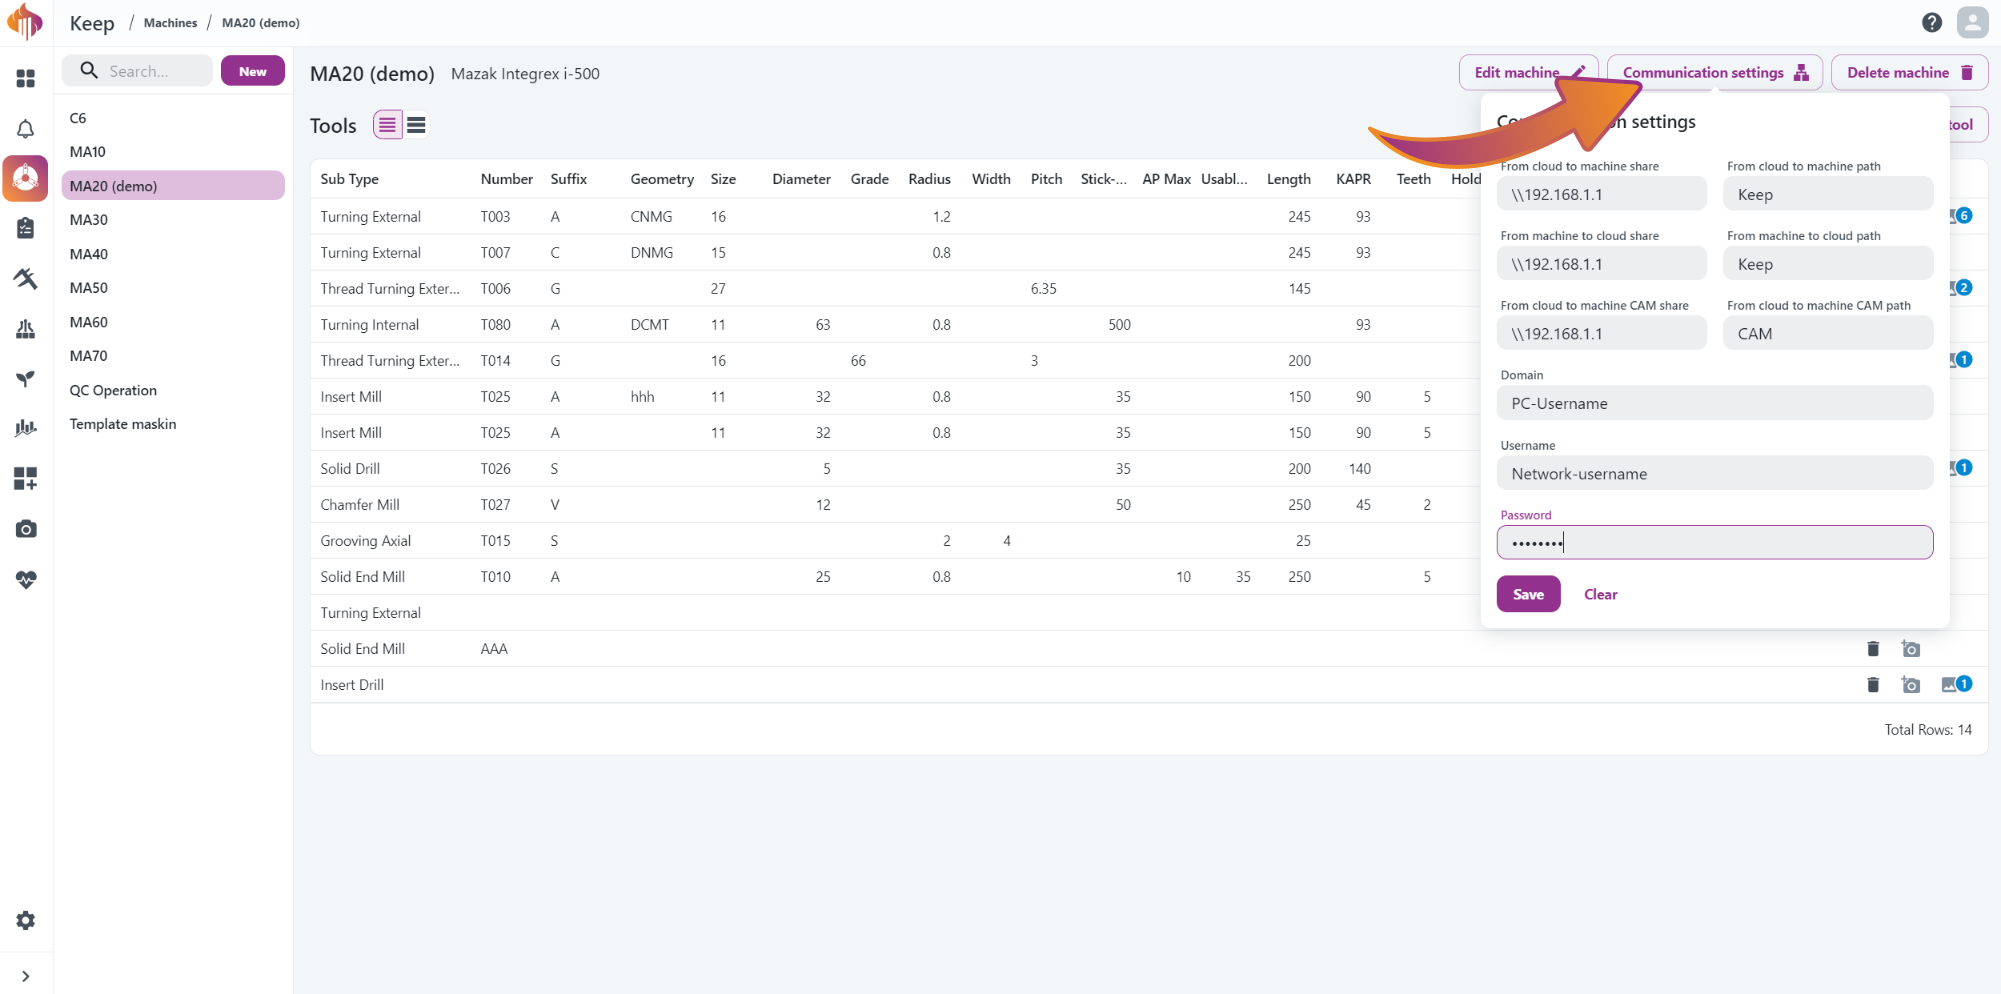
Configure program transferring
- Configuration for program transferring can be done here:
Miscellaneous
You will find various useful information in this chapter.
GibbsCAM NC File Transfer
We offer a way to send NC files directly to your CNC machine, no USB dongles needed!
Here's how to use it after it has been installed:
Overview
The Keep Transfer Macro icon in Gibbscam works kind of like a config.
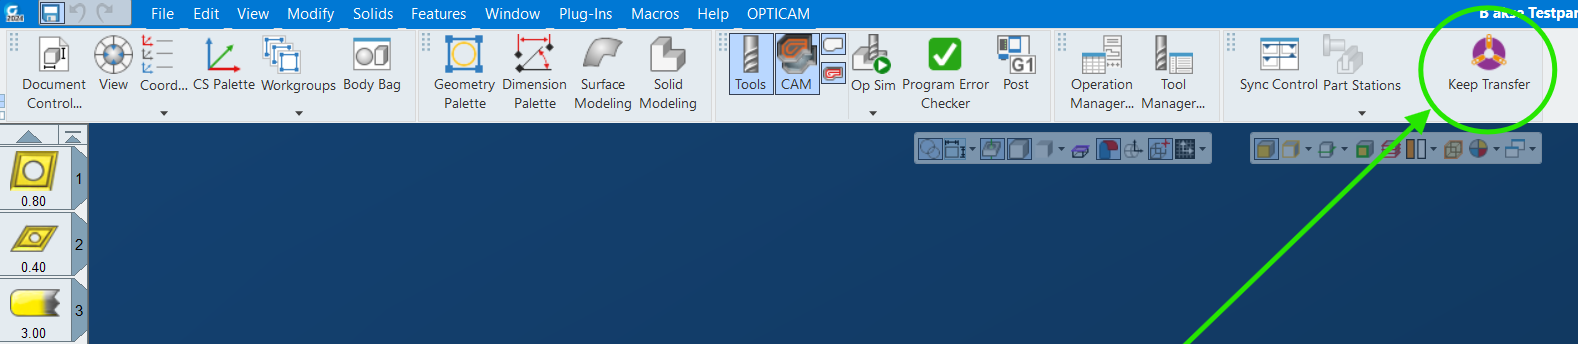
You choose the machine you want to send to in the drop-down menu, and press "Add Selected" to activate that machine's key.

This key is then used by NcTransfer.exe
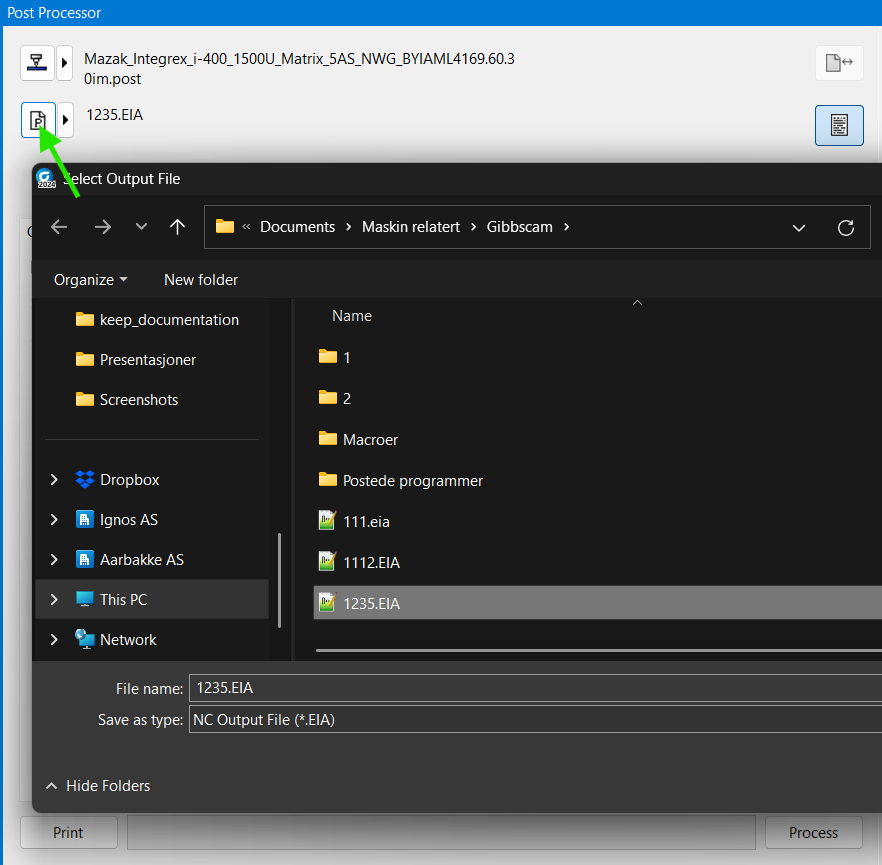
NcTransfer.exe executes right after you press "Process" in Gibbscam, and the program will be transferred directly to the configured machine folder.
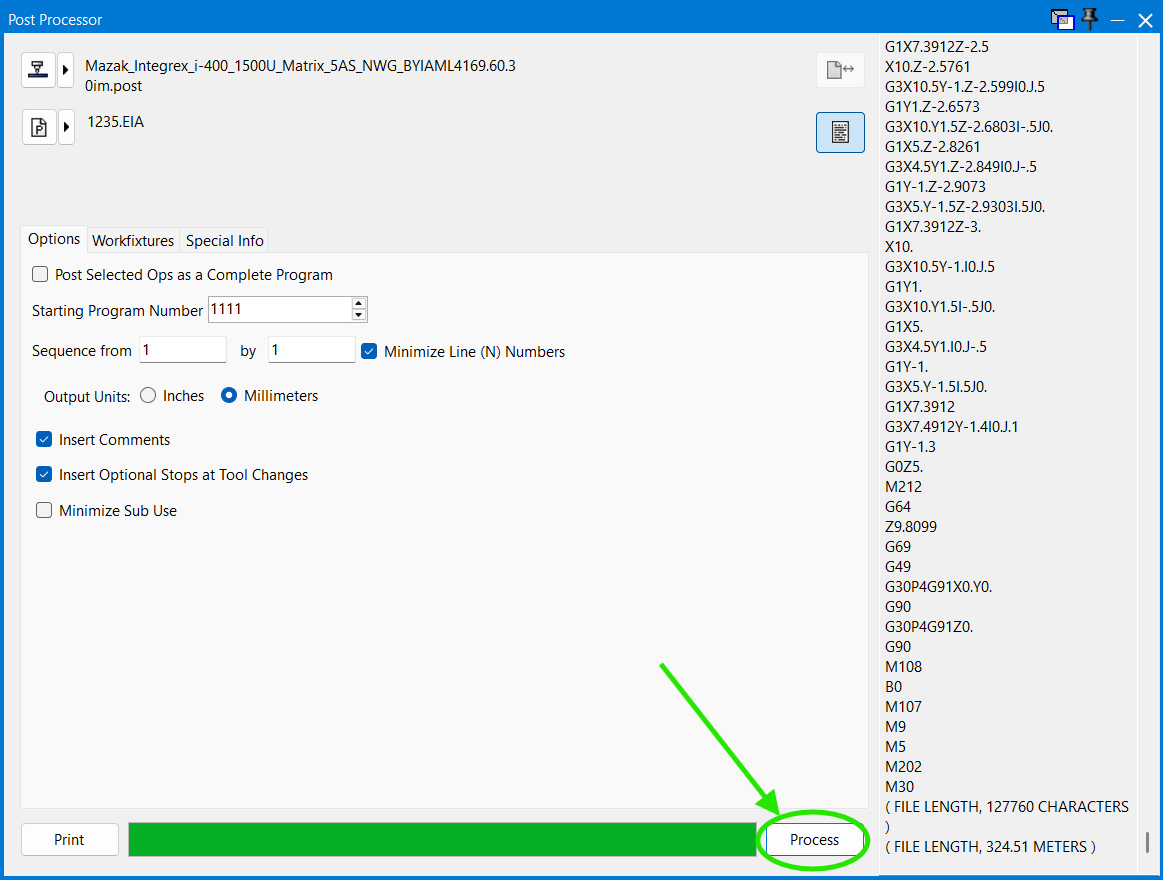
You will also have a copy of the program file in the directory you've chosen in Gibbscam
To deactivate Keep Transfer Macro, choose "No Selected" in the drop-down menu.
New machines can be added in the Excel sheet "keep_transfer_config.xlsx" which will be opened when pressing the "Open Config" button.
Key for the new machine can be provided from us at post@ignos.no
Usage
Upon pressing "Process" in Gibbscam, the ISO-program will be transferred to the folder specified in the Ignos Keep machine config. This folder is a shared directory on the CNC-machine.

The program can be retrieved from the configured location by following one of these two procedures outlined for Mazak machines. These options are based on which configuration you have in your shop.
Method number one: Transfer via HDD
See the attached gif below
- Press Data I/O
- Press HARDDISK
- Choose directory Keep
- Press NC<-HD LOAD
- Press Start
- Select and run your program.
Method number two: Transfer directly into the machine programs folder
See the attached gif below
- Select and run your program.
Videos
Keep demo video:
Screenshots
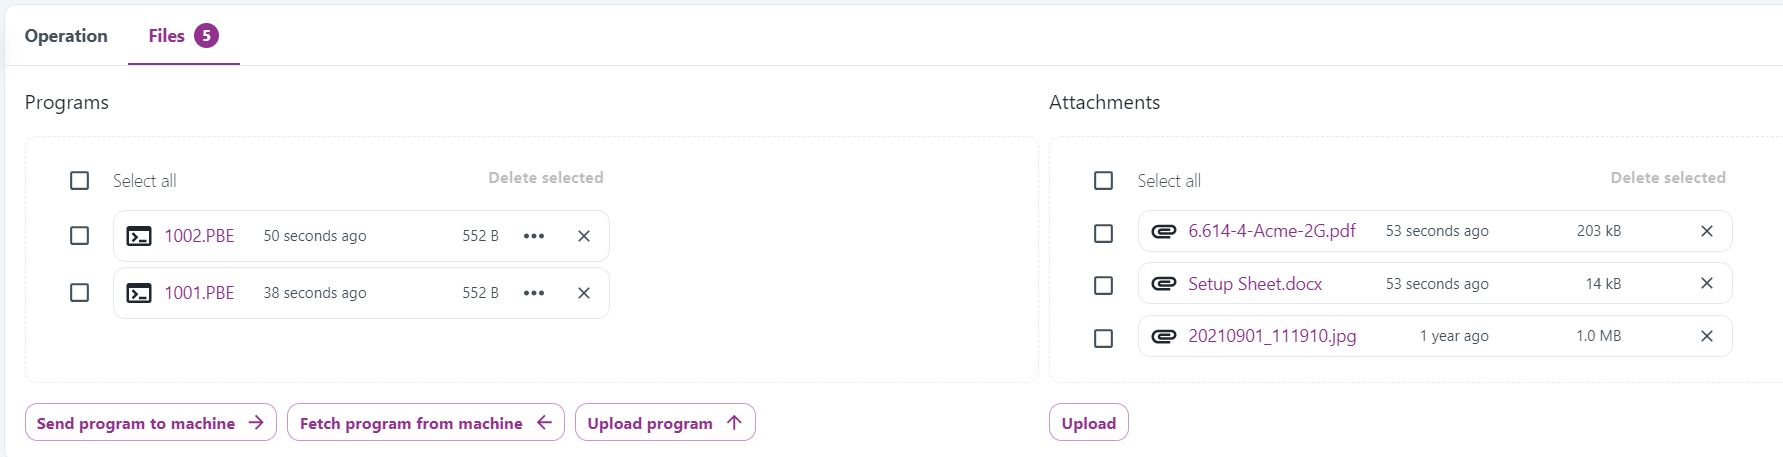
Programs on the left, attachments on the right. No file extension limits.
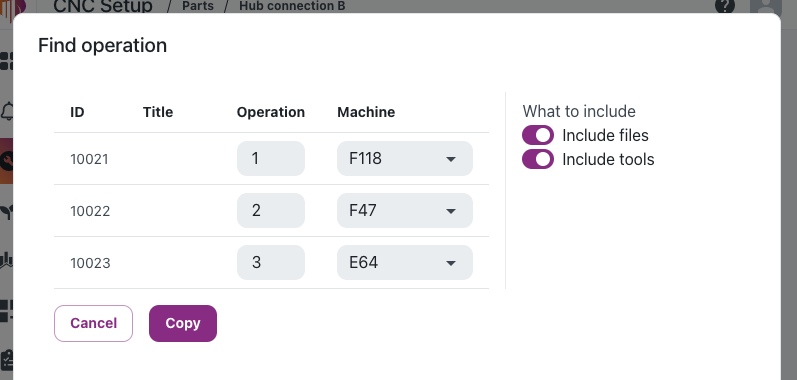
Possible to copy several operations into your Part's card.
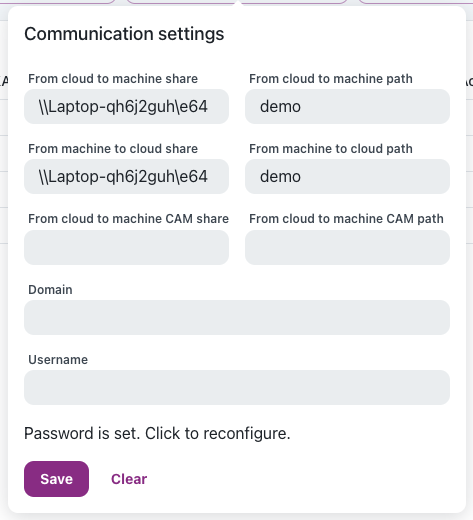
Communication settings in the Machines menu.
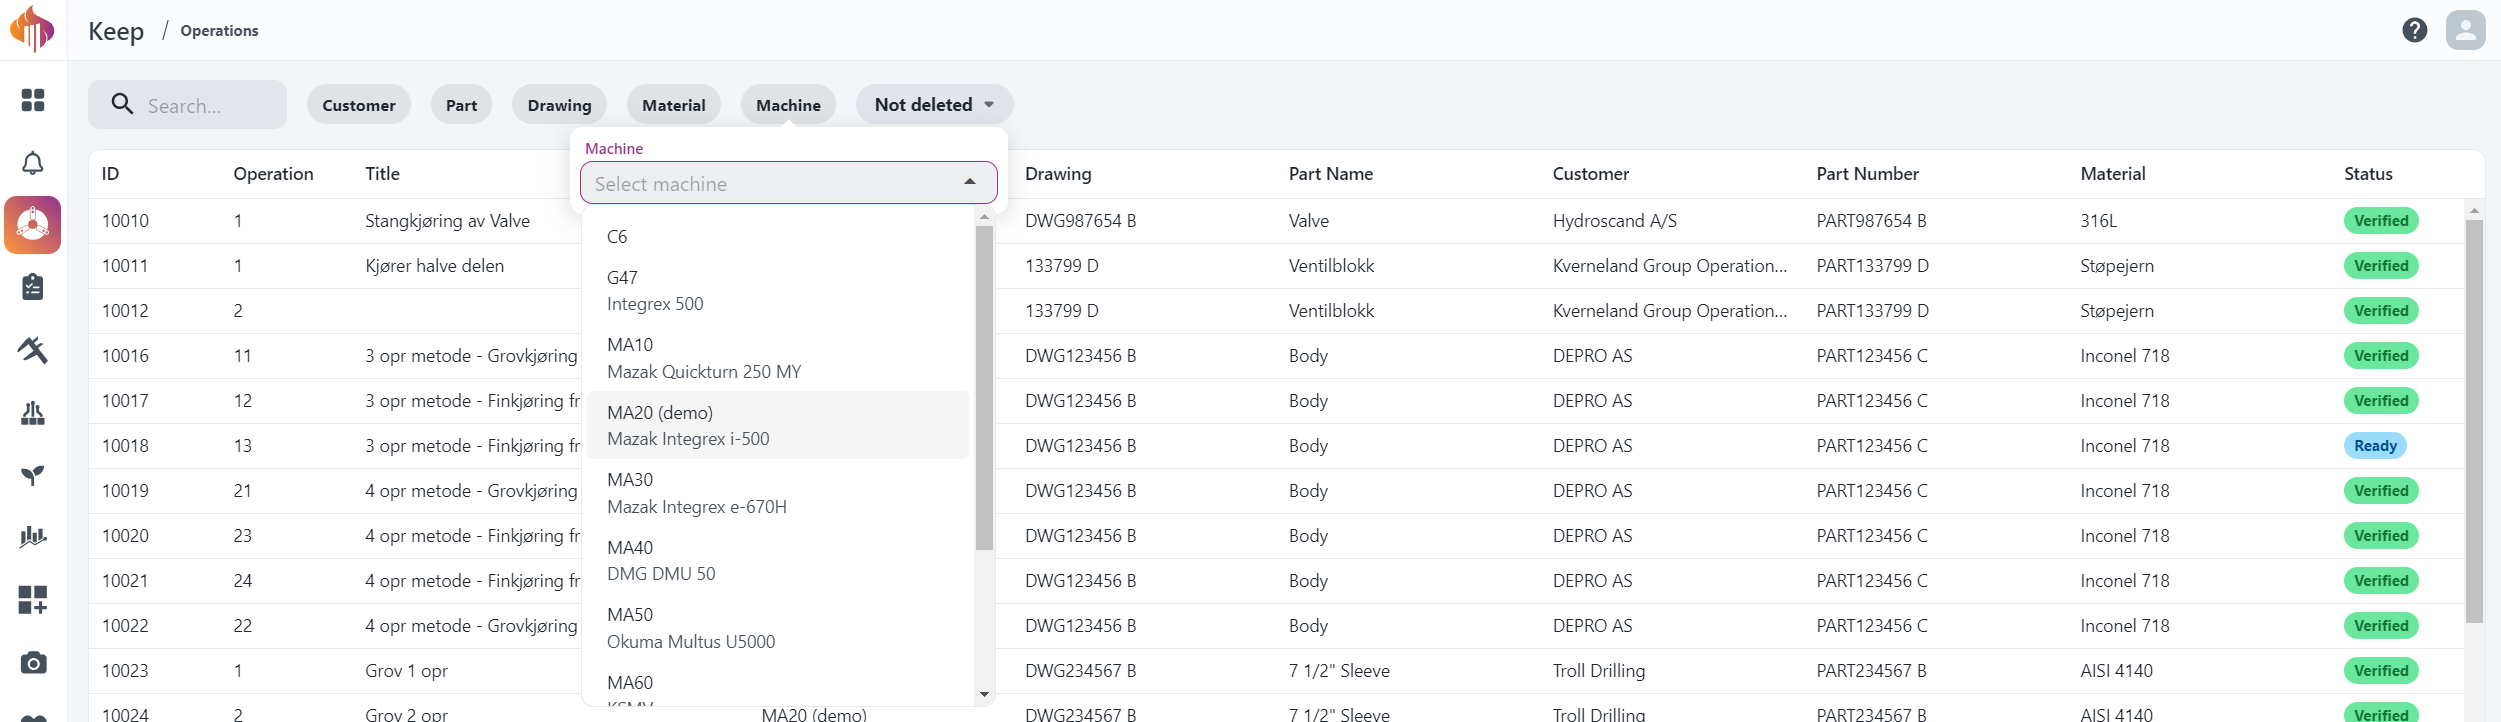
On the Operations screen, you can filter data using various criteria, including by machine.
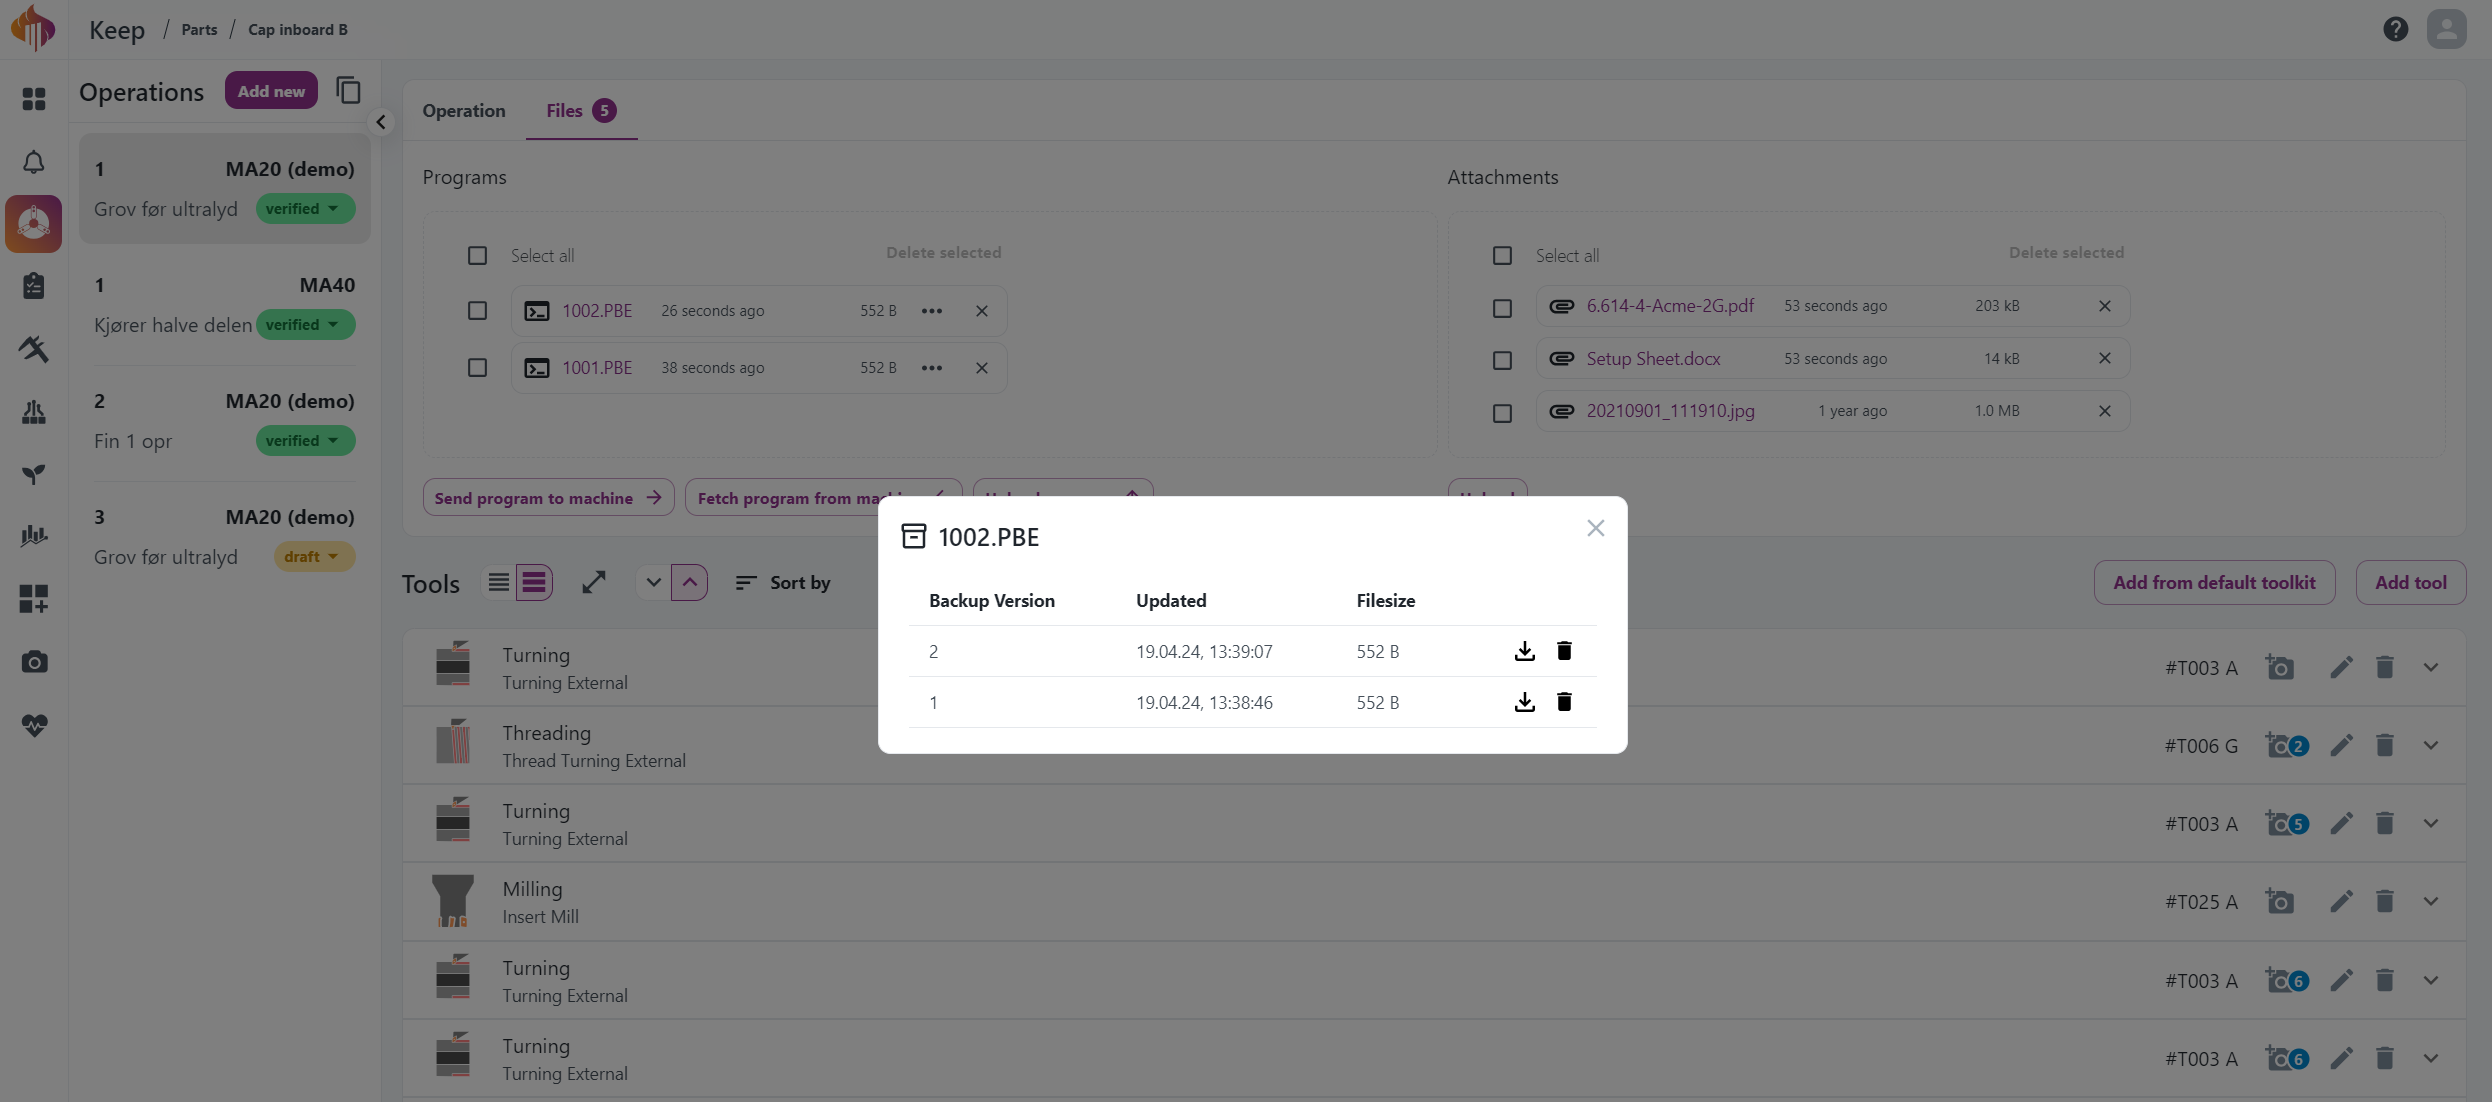
Version control for every uploaded program.

Default toolkit for each machine.
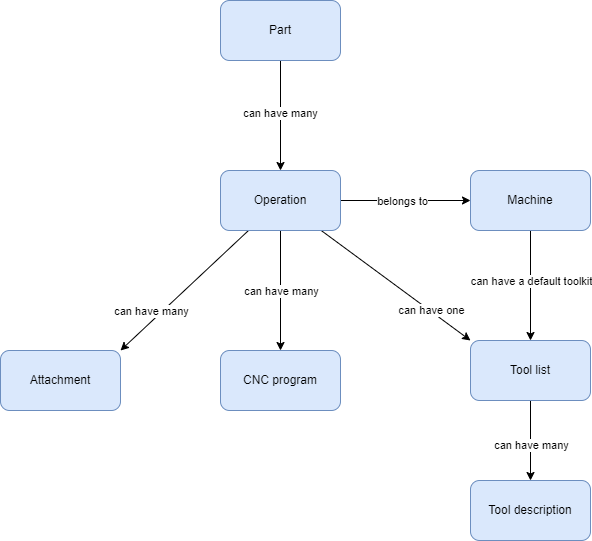
Entity Relationship Diagram
Features
This chapter provides a list of the features currently offered by Keep.
Questions? Please contact us or submit a ticket at our service desk.
General
-
Keep is compatible with pc, tablet and mobile phones
-
Easy setup
-
Cloud-based and available from anywhere in a browser
Part
-
Search parts with various useful filters
-
Create part
-
Upload drawing
-
Restore deleted parts
Operation
-
Search operations with various useful filters
-
Create operation
-
Update operation
-
Upload attachments
-
Upload programs
-
Transfer program to- and from machine
-
Version control on programs with restore of unlimited backups
-
Restore deleted operations
-
Build tool list
-
Copy similar operations from previous productions
-
Duplicate operation from current part
-
Write instructions in the "Description" field
Tool list
-
Add tool
-
Update tool
-
Remove tool
-
Add from machine default toolkit
-
Two different view options for tool lists
-
Add photos to a tool